Create Windows Executable (.exe) for Java Application
Launch4j is a cross-platform tool for wrapping Java applications distributed as jars in lightweight Windows native executable files. In this post, we will learn making such an executable file for a demo java application.
Step1 ) Create a java application
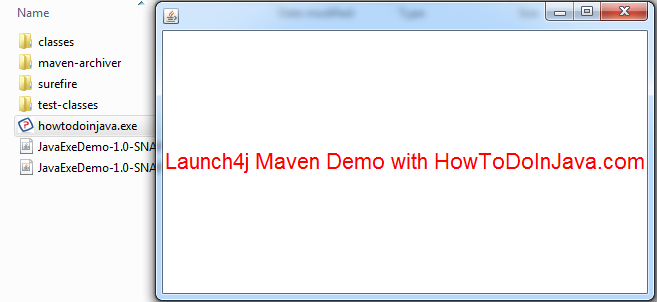
I am creating a very basic java class which simply displays a frame and some text on it. It also has the main() method which will start the application.
package com.howtodoinjava; import java.awt.Color; import java.awt.Font; import java.awt.Frame; import java.awt.Label; import java.awt.event.WindowAdapter; import java.awt.event.WindowEvent; import javax.swing.JDialog; public class ApplicationMain extends JDialog < private static final long serialVersionUID = 1L; public ApplicationMain() < //Create a frame Frame f = new Frame(); f.setSize(500, 300); //Prepare font Font font = new Font( "SansSerif", Font.PLAIN, 22 ); //Write something Label label = new Label("Launch4j Maven Demo with HowToDoInJava.com"); label.setForeground(Color.RED); label.setFont(font); f.add(label); //Make visible f.setVisible(true); f.addWindowListener(new WindowAdapter() < public void windowClosing(WindowEvent e) < System.exit(0); >>); > public static void main(final String[] args) < new ApplicationMain(); >>
Step 2) Create maven file with launch4j configured in it
I have created a pom file for packaging the application as .exe file. If you feel something unclear, drop a comment.
Java is the best programming language available today that works across different platforms. I love Java and JavaFX. Once you finish writing your application, you may want to release it. The problem is, the native Java program executable, the good old .jar files always have a cup icon and sometimes a simple double click wont open them. The solution to this problem is to convert JARs to native executable, for windows .exe files.
In this article, I will explain how to make windows executable (.exe) from your Java / JavaFX program. Having exe file for windows has many advantages. We can set icons, properties, version information etc.
Step 1 : Make JAR file for your application
The first step is making a JAR file from your java code. This is pretty simple if you are using an IDE like NetBeans.
NetBeans : NetBeans provide option for making JAR file very easily. Just right click on your project from Projects window and then select “clean and build”. This will create a folder called “dist” in your project directory. Inside dist, there will be the final JAR. All the libraries required for running the program will be inside “/dist/lib” directory.
Maven : Maven uses convention over configuration, this means that you only need to tell Maven the things that are different from the defaults. You can use “mvn package” command to create JAR files.
Step 2 : Download Launch4J
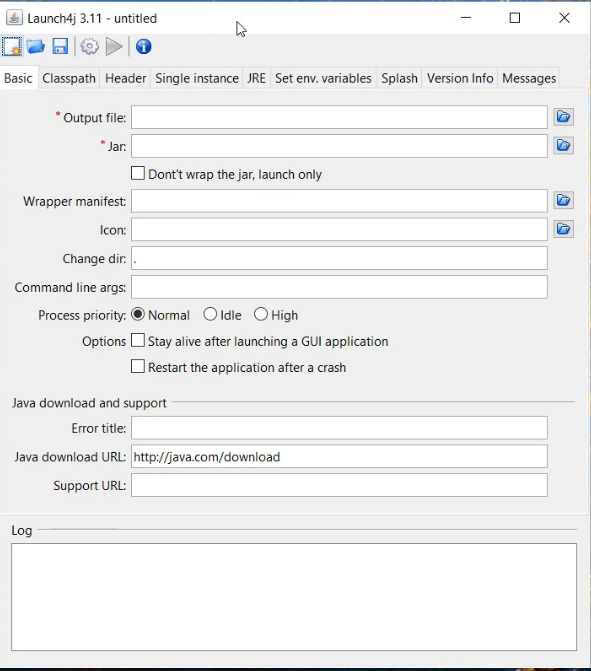
Launch4J is so far the best wrapper available for converting JAR files to windows executable. It is written in JAVA and is open source. Download latest version of Launch4J from http://launch4j.sourceforge.net/. Once You install and open it, you will get the following screen.
On the first look, the interface may look little confusing, but it is actually simple and every field will become too important once you get used to it.
Step 3 :Launch4J Basic Configurations
This tab contains the most basic configurations for the exe like jar file to be converted and the icon to be used.
Basic
Output File This is the location where the compiled EXE (executable) file will be created once the conversion is complete
Jar Location of the Jar file to be converted in to executable
Wrapper manifest You can specify manifest file here. This will be used for processing the application against User Account Control(UAC) in windows.
Icon Here you can specify the icon. It has to be in ico format.
Change dir Change current directory to an arbitrary path relative to the executable. If you omit this property or leave it blank it will have no effect. Setting it to . will change the current dir to the same directory as the executable. .. will change it to the parent directory, and so on.
Command line args Here you can specify the java arguments
In case if the system doesn’t have supported Java, the error message and URL to download can be specifed under the Java Download and Support Sections.
Classpath
Here you can specify classpath for your main class. Select the JAR file by selecting the directory icon from right and the default classpath corresponding to main class will be loaded. You can edut them from Edit Item text field. You can also add or remove classpath for given main class from this section.
Single Instance
Here you can specify whether you need only once instance of the application running at a time. Give a mutext name and window title if single instance option needed.
JRE
This section allows configuring JRE. If you are bundling JRE with your product (Which is not a good idea at all), you can specify the path here. You can check the ‘Fallback option’ so that the bundled JRE will only be used when the JRE isntalled on the system does not matches with min and max version requirement.
Min JRE Version is a mandatory field and it has to be specified.You can also specify Heap parameters or any JVM options in the corresponding fields.
Splash
If you need a custom splash screen, you can check the “Enable Splash Screen option”. Then specify the file (Either bitmap image or JAR file). In the TimeOut field, time out can be specified.
Version Info
This is a good way to properly specify version information for your executable. This entries will then be shown in the properties section of executable.
Messages
Messages section allows to create custom messages when errors occur. You can enable this option by checking “Add custom messages”.
Step 4 :Compile and Make Executable
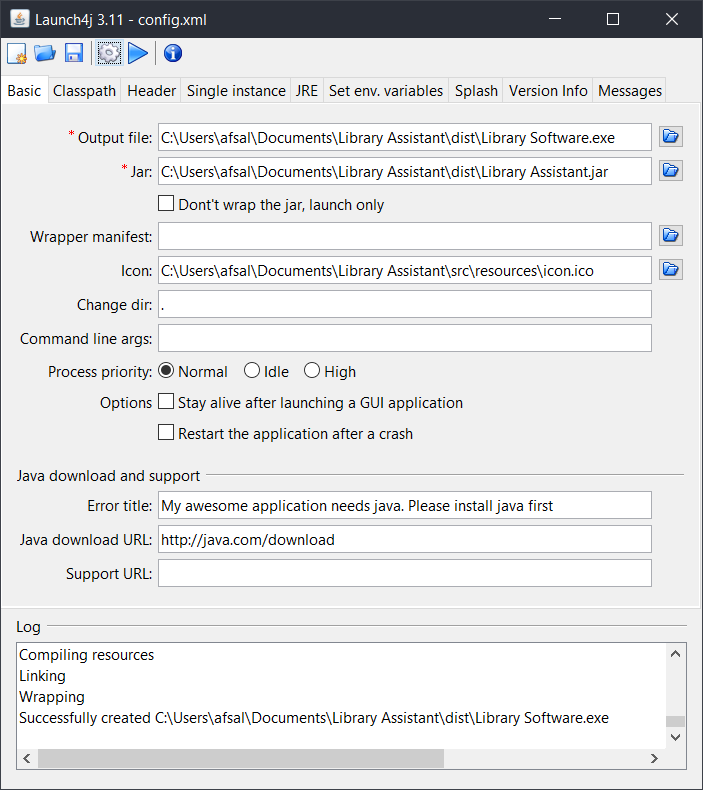
Once the entries are filled, you have to save the configuration. For saving, click on the Floppy DIsk icon from the menu. Your configuration entries will be saved as an xml file called config.xml. After saving click on the Setting like icon next to save button to start converting to executable file.
If it the wrapping was a success, you should see the following messages in Log
Compiling resources Linking Wrapping Successfully created D:\Library Assistant\dist\Library Software.exe
You can start your program from executable by clicking on the Play button from menu.
Watch video tutorial from Genuine Coder YouTube channel :-
Кратчайшая инструкция. Пишем простейшее тестовое приложение, допустим «Hi Amigo!» в файл HiAmigo.txt 100 раз.
public class Main < public static void main(String[] args) throws IOException < File file = new File("C:\\temp\\HiAmigo.txt"); FileWriter fileWriter = new FileWriter(file); for (int i = 0; i < 100 ; i++) < fileWriter.write("Hi Amigo! \n"); >fileWriter.close(); > >
Проверяем что все работает на этом этапе (это важно!) Идем File -> Project Structure -> Artifacts -> + JAR -> From Modules with dependencies.. Указываем путь к нашему Main.class: Жмем ОК Жмем Build Artifacts — > Action -> Build Появляется наш артефакт: Удаляем наш тестовый файл «C:\\temp\\HiAmigo.txt» и запускаем JAR. Файл должен появиться еще раз. Если появился — все ок. Едем дальше. Качаем тулзу с сайта https://launch4j.sourceforge.net/ (Рекомендую версию 3.14, потом объясню почему). Устанавниваем запускаем. Нам нужно два поля. Указываем наш JAR и куда класть готовый .exe Сейчас самое интересное. Представьте ситуацию что на машине где мы планируем использовать наше приложение не установлена JRE и нет возможности ее установить. Такое часто бывает по соображениям безопасности. К тому же хорошо бы обеспечить наше приложение более высоким уровнем автономности. Делаем следующее. Создаем отдельный каталог для нашего приложения, пусть OurApp. Внутри создаем папку JRE. Качаем JRE (в моем примере пусть будет jre-8u361-windows-i586) устанавливаем куда нибудь (если это готовый архив разархивируем) и выдергиваем из нее все файлы. Копируем все в \OurApp\JRE\ должно получиться примерно так: В Launch4j переходим во вкладку JRE и в поле Bundled JRE paths: указываем имя каталога JRE Жмем на шестеренку и выбираем любой файл для сохранения конфигурации типа file.xml После нажатия на save появится наш exe. Копируем exe и кладем рядом рядом с папкой JRE Удаляем тестовый C:\temp\HiAmigo.txt. Запускаем exe и смотрим как создается новый. Вот и все. Теперь каталог можно OurApp можно архивировать и передавать куда угодно, exe отработает. Важно: Версия JRE в папке должна быть не ниже той на которой билдился артефакт. Проверяйте поле: В моем случае возникли проблемы совместимости с x86 платформой и я использовал версию враппера 3.14, так как в ней можно явно указывать тип целевой архитектуры. В общем всем спасибо за внимание. Это была моя первая статья-инструкция, прошу не судить строго. Всем мир!

 Идем File -> Project Structure -> Artifacts -> + JAR -> From Modules with dependencies..
  Указываем путь к нашему Main.class:
  Жмем ОК Жмем Build Artifacts — > Action -> Build
  Появляется наш артефакт:
  Удаляем наш тестовый файл «C:\\temp\\HiAmigo.txt» и запускаем JAR. Файл должен появиться еще раз. Если появился — все ок. Едем дальше. Качаем тулзу с сайта https://launch4j.sourceforge.net/ (Рекомендую версию 3.14, потом объясню почему). Устанавниваем запускаем. Нам нужно два поля. Указываем наш JAR и куда класть готовый .exe
  Сейчас самое интересное. Представьте ситуацию что на машине где мы планируем использовать наше приложение не установлена JRE и нет возможности ее установить. Такое часто бывает по соображениям безопасности. К тому же хорошо бы обеспечить наше приложение более высоким уровнем автономности. Делаем следующее. Создаем отдельный каталог для нашего приложения, пусть OurApp. Внутри создаем папку JRE. Качаем JRE (в моем примере пусть будет jre-8u361-windows-i586) устанавливаем куда нибудь (если это готовый архив разархивируем) и выдергиваем из нее все файлы. Копируем все в \OurApp\JRE\ должно получиться примерно так:
  В Launch4j переходим во вкладку JRE и в поле Bundled JRE paths: указываем имя каталога JRE
  Жмем на шестеренку и выбираем любой файл для сохранения конфигурации типа file.xml
  После нажатия на save появится наш exe.
  Копируем exe и кладем рядом рядом с папкой JRE
  Удаляем тестовый C:\temp\HiAmigo.txt. Запускаем exe и смотрим как создается новый. Вот и все. Теперь каталог можно OurApp можно архивировать и передавать куда угодно, exe отработает. Важно: Версия JRE в папке должна быть не ниже той на которой билдился артефакт. Проверяйте поле:
  В моем случае возникли проблемы совместимости с x86 платформой и я использовал версию враппера 3.14, так как в ней можно явно указывать тип целевой архитектуры. В общем всем спасибо за внимание. Это была моя первая статья-инструкция, прошу не судить строго. Всем мир!