- Reading/Loading an Image
- Displaying image in Java
- Display image example
- Displaying image with command line tools
- Using Ant to build the project
- Using IntelliJ IDEA
- Author
- Lesson: Working with Images
- Reading/Loading an image
- Drawing an image
- Creating and drawing To an image
- Writing/saving an image
- Display an Image in Java
- Display an Image in Java Using JLabel.setIcon()
- Display an Image in Java Using ImageJ Library
- Related Article — Java JLabel
- Related Article — Java Swing
Reading/Loading an Image
When you think of digital images, you probably think of sampled image formats such as the JPEG image format used in digital photography, or GIF images commonly used on web pages. All programs that can use these images must first convert them from that external format into an internal format.
Java 2D supports loading these external image formats into its BufferedImage format using its Image I/O API which is in the javax.imageio package. Image I/O has built-in support for GIF, PNG, JPEG, BMP, and WBMP. Image I/O is also extensible so that developers or administrators can «plug-in» support for additional formats. For example, plug-ins for TIFF and JPEG 2000 are separately available.
To load an image from a specific file use the following code, which is from LoadImageApp.java :
BufferedImage img = null; try < img = ImageIO.read(new File("strawberry.jpg")); >catch (IOException e)
Image I/O recognises the contents of the file as a JPEG format image, and decodes it into a BufferedImage which can be directly used by Java 2D.
LoadImageApp.java shows how to display this image.
If the code is running in an applet, then its just as easy to obtain the image from the applet codebase. The following excerpt is from LoadImageApplet.java :
The getCodeBase method used in this example returns the URL of the directory containing this applet when the applet is deployed on a web server. If the applet is deployed locally, getCodeBase returns null and the applet will not run.
The following example shows how to use the getCodeBase method to load the strawberry.jpg file.
Note: If you don’t see the applet running, you need to install at least the Java SE Development Kit (JDK) 7 release.
LoadImageApplet.java contains the complete code for this example and this applet requires the strawberry.jpg image file.
In addition to reading from files or URLS, Image I/O can read from other sources, such as an InputStream. ImageIO.read() is the most straightforward convenience API for most applications, but the javax.imageio.ImageIO class provides many more static methods for more advanced usages of the Image I/O API. The collection of methods on this class represent just a subset of the rich set of APIs for discovering information about the images and for controlling the image decoding (reading) process.
We will explore some of the other capabilities of Image I/O later in the Writing/Saving an Image section.
Displaying image in Java
Displaying image in Java tutorial shows how to display an image in Java.
Beginner programmers often have problems with displaying an image in a project. The problem lies in correctly identifying the path to the image file. The key part is to realize that the relative path to the image file starts from the project directory. This tutorial was created to make things clear.
Display image example
Here we provide the source code for displaying an image in Java.
package com.zetcode; import java.awt.Container; import java.awt.EventQueue; import javax.swing.GroupLayout; import javax.swing.ImageIcon; import javax.swing.JComponent; import javax.swing.JFrame; import javax.swing.JLabel; public class DisplayImage extends JFrame < public DisplayImage() < initUI(); >private void initUI() < ImageIcon ii = loadImage(); JLabel label = new JLabel(ii); createLayout(label); setTitle("Image"); setLocationRelativeTo(null); setDefaultCloseOperation(EXIT_ON_CLOSE); >private ImageIcon loadImage() < var ii = new ImageIcon("src/main/resources/sid.png"); return ii; >private void createLayout(JComponent. arg) < Container pane = getContentPane(); var gl = new GroupLayout(pane); pane.setLayout(gl); gl.setAutoCreateContainerGaps(true); gl.setHorizontalGroup(gl.createSequentialGroup() .addComponent(arg[0]) ); gl.setVerticalGroup(gl.createParallelGroup() .addComponent(arg[0]) ); pack(); >public static void main(String[] args) < EventQueue.invokeLater(() ->< var ex = new DisplayImage(); ex.setVisible(true); >); > > The example creates a Java Swing application and uses an ImageIcon component to display the image.
private ImageIcon loadImage() < var ii = new ImageIcon("src/main/resources/sid.png"); return ii; > The important part is here. The ImageIcon takes the file path to the image. This file path depends on the build tool we use.
Displaying image with command line tools
The first example builds the Java application with command line tools.
src └── main ├── java │ └── com │ └── zetcode │ └── DisplayImage.java └── resources └── sid.png
This is the project structure.
$ javac src/main/java/com/zetcode/DisplayImage.java -d bin
The application is compiled with the javac tool.
bin │ └── com │ └── zetcode │ └── DisplayImage.class └── src └── main ├── java │ └── com │ └── zetcode │ └── DisplayImage.java └── resources └── sid.png
After compiling the source code, we have a Java class file created in the bin/com/zetcode subdirectory.
$ java -cp bin com.zetcode.DisplayImage
We run the application with the java command.
Using Ant to build the project
In this section, we use the Ant build tool to create the project.
build.xml src └── main ├── java │ └── com │ └── zetcode │ └── DisplayImage.java └── resources └── sid.png
This is the project structure.
This is the Ant build file. We have tasks for creating directories, compiling source code, and cleaning up.
$ ant Buildfile: /home/jano/Documents/prog/java/display-image/ant-ver/build.xml init: [mkdir] Created dir: /home/jano/Documents/prog/java/display-image/ant-ver/build/classes compile: [javac] Compiling 1 source file to /home/jano/Documents/prog/java/display-image/ant-ver/build/classes BUILD SUCCESSFUL Total time: 0 seconds
$ java -cp build/classes/ com.zetcode.DisplayImage
Using IntelliJ IDEA
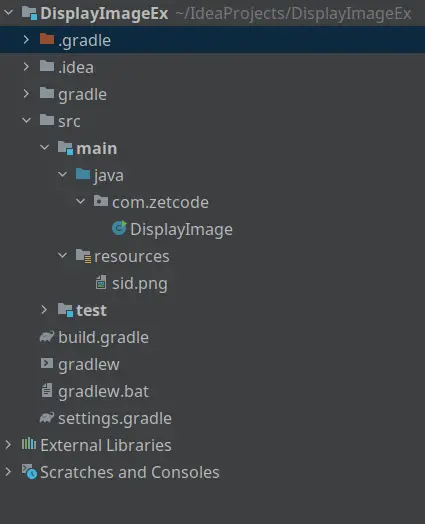
We create a Maven/Gradle application and copy the image into the resources folder. Figure: Using IntelliJ IDEA
After creating the source file and copying the image, we can run the program.
In this article we have showed how to display an image in Java.
Author
My name is Jan Bodnar and I am a passionate programmer with many years of programming experience. I have been writing programming articles since 2007. So far, I have written over 1400 articles and 8 e-books. I have over eight years of experience in teaching programming.
Lesson: Working with Images
As you have already learned from the Images lesson, Image s are described by a width and a height, measured in pixels, and have a coordinate system that is independent of the drawing surface.
There are a number of common tasks when working with images.
- Loading an external GIF, PNG JPEG image format file into the internal image representation used by Java 2D.
- Directly creating a Java 2D image and rendering to it.
- Drawing the contents of a Java 2D image on to a drawing surface.
- Saving the contents of a Java 2D image to an external GIF, PNG, or JPEG image file.
This lesson teaches you the basics of loading, displaying, and saving images.
The are two main classes that you must learn about to work with images:
- The java.awt.Image class is the superclass that represents graphical images as rectangular arrays of pixels.
- The java.awt.image.BufferedImage class, which extends the Image class to allow the application to operate directly with image data (for example, retrieving or setting up the pixel color). Applications can directly construct instances of this class.
The BufferedImage class is a cornerstone of the Java 2D immediate-mode imaging API. It manages the image in memory and provides methods for storing, interpreting, and obtaining pixel data. Since BufferedImage is a subclass of Image it can be rendered by the Graphics and Graphics2D methods that accept an Image parameter.
A BufferedImage is essentially an Image with an accessible data buffer. It is therefore more efficient to work directly with BufferedImage . A BufferedImage has a ColorModel and a Raster of image data. The ColorModel provides a color interpretation of the image’s pixel data.
The Raster performs the following functions:
- Represents the rectangular coordinates of the image
- Maintains image data in memory
- Provides a mechanism for creating multiple subimages from a single image data buffer
- Provides methods for accessing specific pixels within the image
The basic operations with images are represented in the following sections:
Reading/Loading an image
This section explains how to load an image from an external image format into a Java application using the Image I/O API
Drawing an image
This section teaches how to display images using the drawImage method of the Graphics and Graphics2D classes.
Creating and drawing To an image
This section describes how to create an image and how to use the image itself as a drawing surface.
Writing/saving an image
This section explains how to save created images in an appropriate format.
Display an Image in Java

- Display an Image in Java Using JLabel.setIcon()
- Display an Image in Java Using ImageJ Library
We can show an image using several ways in Java. Below we will see how to display an image in Java using two methods.
Display an Image in Java Using JLabel.setIcon()
In the first example, we use JLabel class of the Swing library. JLabel extends JComponent , and we can attach this component to a JFrame . To read the image file, we use the File class and pass the path of the image. Next we convert the image to a BufferedImage object using ImageIO.read() . Now we create an icon to be shown in the JLabel .
To show the label icon, we need a JFrame object with a FlowLayout and a size of 500 x 500. The size can be adjusted according to our needs. Now we create a JLabel object and set its icon using JLabel.setIcon() function. Then we add the jLabel component to jFrame and set the visibility of the frame as true.
import javax.imageio.ImageIO; import javax.swing.*; import java.awt.*; import java.awt.image.BufferedImage; import java.io.File; import java.io.IOException; public class DisplayImage public static void main(String[] args) throws IOException File file = new File("C:\\Users\\User1\\Pictures\\Camera Roll\\java.png"); BufferedImage bufferedImage = ImageIO.read(file); ImageIcon imageIcon = new ImageIcon(bufferedImage); JFrame jFrame = new JFrame(); jFrame.setLayout(new FlowLayout()); jFrame.setSize(500, 500); JLabel jLabel = new JLabel(); jLabel.setIcon(imageIcon); jFrame.add(jLabel); jFrame.setVisible(true); jFrame.setDefaultCloseOperation(JFrame.EXIT_ON_CLOSE); > > 
Display an Image in Java Using ImageJ Library
In this program, we use a powerful image processing library called ImageJ . To use it, we first import the maven repository and the dependency into pom.xml .
scijava.public https://maven.scijava.org/content/groups/public Our goal is to show an image, and ImageJ makes it simple for us. Following is the code where we first call a static function openImage() from the class IJ and pass the path of the image in it as an argument. Notice that we write only the image name with its extensions because our image is in the same directory.
IJ.openImage() returns an ImagePlus object imagePlus . Now we call the show() method using the imagePlus object. We can see that the output shows an image in a frame.
import ij.IJ; import ij.ImagePlus; public class DisplayImage public static void main(String[] args) ImagePlus imagePlus = IJ.openImage("mountains.jpeg"); imagePlus.show(); > >
Rupam Saini is an android developer, who also works sometimes as a web developer., He likes to read books and write about various things.
Related Article — Java JLabel
Related Article — Java Swing
Copyright © 2023. All right reserved