- Стилизация input file
- Стандартный вид
- Результат:
- Обычная кнопка
- Результат:
- В виде input text
- Результат:
- Input file со списком выбранных файлов
- Результат:
- Загрузка изображений с превью
- Custom styled input type file upload button with pure CSS
- Markup
- Styling
- Styling the upload file block
- Styling the upload file button
- Styling the the click/drop zone
- Handling drag and drop events
- Demo
- 20 Best CSS & Javascript File Upload Examples
- Drag & Drop
- File Upload & Image Preview
- Upload CSS Animation Ui
- File Upload Plugin
- File Upload With Style And Pure CSS
- Drag And Drop Upload Form Stylized (Html & CSS Only)
- Image Upload With Preview
- Nice Upload Form)
- Custom Animated Input File
- Bootstrapped Styled File Browse Button
- Pure CSS File Upload Field
- File Upload Dialog
- Image Uploader
- Dropzone Upload
- File Upload – Day 031
- A Simple Upload Form
- Box Content Uploader
- Bootstrap Multi Step Form With Progress Bar
- Attach Or Upload Files Modal
- Mock-up: Photos Using React, Fluxify And Bootstrap
- Related Posts :
- Стилизация Input File
- Пример 3: Брутальный Input File
- HTML разметка
- CSS стилизация
- JS скрипт
- Поделиться с друзьями
- Похожие статьи:
- Комментарии ( )
- Программирование
- Продвижение сайтов
- Полезные инструменты
Стилизация input file
Примеры изменения вида стандартного поля для загрузки файлов ( input[type=file] ) с помощью CSS и JS.
Стандартный вид
.input-file < position: relative; display: inline-block; >.input-file-btn < position: relative; display: inline-block; cursor: pointer; outline: none; text-decoration: none; font-size: 14px; vertical-align: middle; color: rgb(255 255 255); text-align: center; border-radius: 4px; background-color: #419152; line-height: 22px; height: 40px; padding: 10px 20px; box-sizing: border-box; border: none; margin: 0; transition: background-color 0.2s; >.input-file-text < padding: 0 10px; line-height: 40px; display: inline-block; >.input-file input[type=file] < position: absolute; z-index: -1; opacity: 0; display: block; width: 0; height: 0; >/* Focus */ .input-file input[type=file]:focus + .input-file-btn < box-shadow: 0 0 0 0.2rem rgba(0,123,255,.25); >/* Hover/active */ .input-file:hover .input-file-btn < background-color: #59be6e; >.input-file:active .input-file-btn < background-color: #2E703A; >/* Disabled */ .input-file input[type=file]:disabled + .input-file-btn
$('.input-file input[type=file]').on('change', function()< let file = this.files[0]; $(this).closest('.input-file').find('.input-file-text').html(file.name); >);Результат:
Обычная кнопка
.input-file < position: relative; display: inline-block; >.input-file span < position: relative; display: inline-block; cursor: pointer; outline: none; text-decoration: none; font-size: 14px; vertical-align: middle; color: rgb(255 255 255); text-align: center; border-radius: 4px; background-color: #419152; line-height: 22px; height: 40px; padding: 10px 20px; box-sizing: border-box; border: none; margin: 0; transition: background-color 0.2s; >.input-file input[type=file] < position: absolute; z-index: -1; opacity: 0; display: block; width: 0; height: 0; >/* Focus */ .input-file input[type=file]:focus + span < box-shadow: 0 0 0 0.2rem rgba(0,123,255,.25); >/* Hover/active */ .input-file:hover span < background-color: #59be6e; >.input-file:active span < background-color: #2E703A; >/* Disabled */ .input-file input[type=file]:disabled + span
$('.input-file input[type=file]').on('change', function()< let file = this.files[0]; $(this).next().html(file.name); >);Результат:
В виде input text
.input-file < position: relative; display: inline-block; >.input-file-text < padding: 0 10px; line-height: 40px; text-align: left; height: 40px; display: block; float: left; box-sizing: border-box; width: 200px; border-radius: 6px 0px 0 6px; border: 1px solid #ddd; >.input-file-btn < position: relative; display: inline-block; cursor: pointer; outline: none; text-decoration: none; font-size: 14px; vertical-align: middle; color: rgb(255 255 255); text-align: center; border-radius: 0 4px 4px 0; background-color: #419152; line-height: 22px; height: 40px; padding: 10px 20px; box-sizing: border-box; border: none; margin: 0; transition: background-color 0.2s; >.input-file input[type=file] < position: absolute; z-index: -1; opacity: 0; display: block; width: 0; height: 0; >/* Focus */ .input-file input[type=file]:focus + .input-file-btn < box-shadow: 0 0 0 0.2rem rgba(0,123,255,.25); >/* Hover/active */ .input-file:hover .input-file-btn < background-color: #59be6e; >.input-file:active .input-file-btn < background-color: #2E703A; >/* Disabled */ .input-file input[type=file]:disabled + .input-file-btn
$('.input-file input[type=file]').on('change', function()< let file = this.files[0]; $(this).closest('.input-file').find('.input-file-text').html(file.name); >);Результат:
Input file со списком выбранных файлов
.input-file-row < display: inline-block; >.input-file < position: relative; display: inline-block; >.input-file span < position: relative; display: inline-block; cursor: pointer; outline: none; text-decoration: none; font-size: 14px; vertical-align: middle; color: rgb(255 255 255); text-align: center; border-radius: 4px; background-color: #419152; line-height: 22px; height: 40px; padding: 10px 20px; box-sizing: border-box; border: none; margin: 0; transition: background-color 0.2s; >.input-file input[type=file] < position: absolute; z-index: -1; opacity: 0; display: block; width: 0; height: 0; >/* Focus */ .input-file input[type=file]:focus + span < box-shadow: 0 0 0 0.2rem rgba(0,123,255,.25); >/* Hover/Active */ .input-file:hover span < background-color: #59be6e; >.input-file:active span < background-color: #2E703A; >/* Disabled */ .input-file input[type=file]:disabled + span < background-color: #eee; >/* Список файлов */ .input-file-list < padding: 10px 0; >.input-file-list-item < margin-bottom: 10px; >.input-file-list-remove
var dt = new DataTransfer(); $('.input-file input[type=file]').on('change', function()< let $files_list = $(this).closest('.input-file').next(); $files_list.empty(); for(var i = 0; i < this.files.length; i++)< let new_file_input = '' + ''; $files_list.append(new_file_input); dt.items.add(this.files.item(i)); >; this.files = dt.files; >); function removeFilesItem(target) < let name = $(target).prev().text(); let input = $(target).closest('.input-file-row').find('input[type=file]'); $(target).closest('.input-file-list-item').remove(); for(let i = 0; i < dt.items.length; i++)< if(name === dt.items[i].getAsFile().name)< dt.items.remove(i); >> input[0].files = dt.files; > Результат:
Загрузка изображений с превью
.input-file-row < display: inline-block; >.input-file < position: relative; display: inline-block; >.input-file span < position: relative; display: inline-block; cursor: pointer; outline: none; text-decoration: none; font-size: 14px; vertical-align: middle; color: rgb(255 255 255); text-align: center; border-radius: 4px; background-color: #419152; line-height: 22px; height: 40px; padding: 10px 20px; box-sizing: border-box; border: none; margin: 0; transition: background-color 0.2s; >.input-file input[type=file] < position: absolute; z-index: -1; opacity: 0; display: block; width: 0; height: 0; >/* Focus */ .input-file input[type=file]:focus + span < box-shadow: 0 0 0 0.2rem rgba(0,123,255,.25); >/* Hover/active */ .input-file:hover span < background-color: #59be6e; >.input-file:active span < background-color: #2E703A; >/* Disabled */ .input-file input[type=file]:disabled + span < background-color: #eee; >/* Список c превью */ .input-file-list < padding: 10px 0; >.input-file-list-item < display: inline-block; margin: 0 15px 15px; width: 150px; vertical-align: top; position: relative; >.input-file-list-item img < width: 150px; >.input-file-list-name < text-align: center; display: block; font-size: 12px; text-overflow: ellipsis; overflow: hidden; >.input-file-list-remove
var dt = new DataTransfer(); $('.input-file input[type=file]').on('change', function()< let $files_list = $(this).closest('.input-file').next(); $files_list.empty(); for(var i = 0; i < this.files.length; i++)< let file = this.files.item(i); dt.items.add(file); let reader = new FileReader(); reader.readAsDataURL(file); reader.onloadend = function()< let new_file_input = ' ' + '' + ''; $files_list.append(new_file_input); > >; this.files = dt.files; >); function removeFilesItem(target) < let name = $(target).prev().text(); let input = $(target).closest('.input-file-row').find('input[type=file]'); $(target).closest('.input-file-list-item').remove(); for(let i = 0; i < dt.items.length; i++)< if(name === dt.items[i].getAsFile().name)< dt.items.remove(i); >> input[0].files = dt.files; >
 Custom styled input type file upload button with pure CSS
In this guide I’ll show you how to create a stylish and user friendly file upload button with pure CSS and HTML.
Markup
To upload files you’ll need to use the input tag with type=»file» attribute. Additionally you can specify which file types you’re allowing to upload via accept attribute.
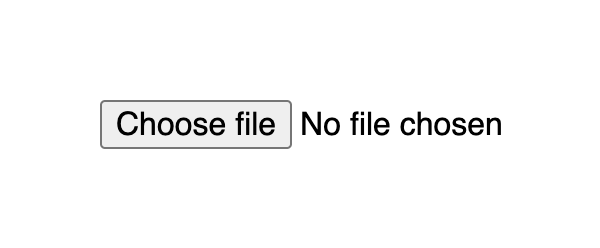
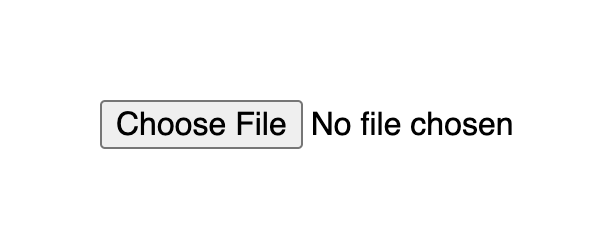
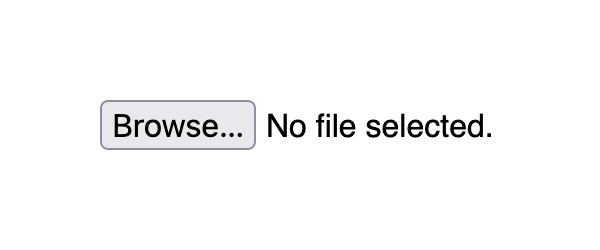
This markup produces a button with a Choose file title followed by a text which indicates the file name when selected. By default it is No file chosen.
Input with type file default look differs on different browsers:

Styling
The upload file widget structure consists of a block that displays a button and a file name. A user can click anywhere inside the block or drag a file from the desktop and it will open up the upload window.
Styling the upload file block
If you apply styles for the input[type=file] selector it will set them for the whole widget block, that is the button and text.
input[type=file] width: 350px; max-width: 100%; color: #444; padding: 5px; background: #fff; border-radius: 10px; border: 1px solid #555; >
The result already looks much better as it indicates the zone where user is able to click or drag the file.
Styling the upload file button
By default, the Choose file button has a plain user-agent style. To style the button with CSS you should use the ::file-selector-button pseudo-element to select it. It is supported in all modern browsers.
input[type=file]::file-selector-button margin-right: 20px; border: none; background: #084cdf; padding: 10px 20px; border-radius: 10px; color: #fff; cursor: pointer; transition: background .2s ease-in-out; > input[type=file]::file-selector-button:hover background: #0d45a5; >
Styling the the click/drop zone
If you wich to go a bit further, you can create a large zone where user can click and drag files. This large zone will make it easier for people to use the widget, as it don’t require to be that precise when dragging a file, especially on smaller screens.
To implement a large drop zone, you’ll need to wrap your file upload input into a label tag and specify a description text that will let users know how to use the widget.
for="images" class="drop-container" id="dropcontainer"> class="drop-title">Drop files here or type="file" id="images" accept="image/*" required>
For the layout, we need to set display to flex with flex related properties for positioning. The height and padding properties for proportion. And finally add some fancy styles like border and hover effects to highlight the file upload zone and you’re ready to go.
.drop-container position: relative; display: flex; gap: 10px; flex-direction: column; justify-content: center; align-items: center; height: 200px; padding: 20px; border-radius: 10px; border: 2px dashed #555; color: #444; cursor: pointer; transition: background .2s ease-in-out, border .2s ease-in-out; > .drop-container:hover background: #eee; border-color: #111; > .drop-container:hover .drop-title color: #222; > .drop-title color: #444; font-size: 20px; font-weight: bold; text-align: center; transition: color .2s ease-in-out; >
Handling drag and drop events
Additionally, you can handle cases when the user will try to drag the file over the drop area. CSS alone cannot handle such cases, so we can add a little bit of JavaScript.
There are two points to consider to improve UX for the drop field:
- Indicate the drop area when the user is dragging a file over it
- Make it possible to drop a file inside the drop area, and not just the input element
To indicate drop area when user is dragging a file over it, we’ll need to use the dragenter and dragleave events. Both on the label tag, since it represents the drop area. For each event we add or remove a CSS class accordingly.
Since user will be dropping to the label tag we also need to set the input value with the file. To do that we need to do 2 things:
- Set dragover event for the label tag, set e.preventDefault() and pass false as the third parameter for the addEventListener method
- On drop event, we need to set the input’s files property to the file via fileInput.files = e.dataTransfer.files
const dropContainer = document.getElementById("dropcontainer") const fileInput = document.getElementById("images") dropContainer.addEventListener("dragover", (e) => // prevent default to allow drop e.preventDefault() >, false) dropContainer.addEventListener("dragenter", () => dropContainer.classList.add("drag-active") >) dropContainer.addEventListener("dragleave", () => dropContainer.classList.remove("drag-active") >) dropContainer.addEventListener("drop", (e) => e.preventDefault() dropContainer.classList.remove("drag-active") fileInput.files = e.dataTransfer.files >)
As for styles, we can use similar styles to :hover state, but this time with a designated class:
.drop-container.drag-active background: #eee; border-color: #111; > .drop-container.drag-active .drop-title color: #222; >
Demo
See the full example on CodePen:
See the Pen Untitled by Nikita Hlopov (@nikitahl) on CodePen.
20 Best CSS & Javascript File Upload Examples
File upload is a common feature in mobile and web development that almost every app needs. File upload capability enables your users to place their files on your site. These files might be images, videos, PDFs, or files of any other type. Collecting files directly through a form on your site is great for acquiring documents such as resume, portfolios or images and videos such as screenshots and screen-captures through customer support forms. So in this post I’ve gathered 20 best CSS & Javascript File Upload Examples for inspiration to improve file upload UI and UX design.
Drag & Drop
File Upload & Image Preview
Upload CSS Animation Ui
File Upload Plugin
File Upload With Style And Pure CSS
Drag And Drop Upload Form Stylized (Html & CSS Only)
Image Upload With Preview
Nice Upload Form)
Custom Animated Input File
Bootstrapped Styled File Browse Button
Pure CSS File Upload Field
File Upload Dialog
Image Uploader
Dropzone Upload
File Upload – Day 031
A Simple Upload Form
Box Content Uploader
Bootstrap Multi Step Form With Progress Bar
Attach Or Upload Files Modal
Mock-up: Photos Using React, Fluxify And Bootstrap
Related Posts :
Стилизация Input File
Данный скрипт позволяет менять внешний вид Input File (появится зеленая галочка) после того, как файл будет загружен.
(function() { 'use strict'; $('.input-file').each(function() { var $input = $(this), $label = $input.next('.js-labelFile'), labelVal = $label.html(); $input.on('change', function(element) { var fileName = ''; if (element.target.value) fileName = element.target.value.split('\\').pop(); fileName ? $label.addClass('has-file').find('.js-fileName').html(fileName) : $label.removeClass('has-file').html(labelVal); }); }); })(); Пример 3: Брутальный Input File
HTML разметка
CSS стилизация
@import "https://fonts.googleapis.com/css?family=Varela+Round"; .example-3{box-sizing:border-box} .example-3{position:relative;font:1em/1.6 "Varela Round",Arial,sans-serif;color:#999;font-weight:400;max-width:25em;padding:1em;} .example-3 h2{font-weight:400} .example-3 .filupp > input[type="file"]{position:absolute;width:1px;height:1px;padding:0;margin:-1px;overflow:hidden;clip:rect(0,0,0,0);border:0} .example-3 .filupp{position:relative;background:#242424;display:block;padding:1em;font-size:1em;width:100%;height:3.5em;color:#fff;cursor:pointer;box-shadow:0 1px 3px #0b0b0b} .example-3 .filupp:before{content:"";position:absolute;top:1.5em;right:.75em;width:2em;height:1.25em;border:3px solid #dd4040;border-top:0;text-align:center} .example-3 .filupp:after{content:"\f178";font-family: FontAwesome;-webkit-transform:rotate(-90deg);-moz-transform:rotate(-90deg);-ms-transform:rotate(-90deg);-o-transform:rotate(-90deg);transform:rotate(-90deg);position:absolute;top:.65em;right:.45em;font-size:2em;color:#dd4040;line-height:0} .example-3 .filupp-file-name{width:75%;display:inline-block;max-width:100%;overflow:hidden;text-overflow:ellipsis;white-space:nowrap;word-wrap:normal} JS скрипт
$(document).ready(function() { $('input[type="file"]').change(function(){ var value = $("input[type='file']").val(); $('.js-value').text(value); }); }); Поделиться с друзьями
Похожие статьи:
Комментарии ( )
Отличная стилизация Input! Давно искал вариант со скрепкой.
Но при попытке передать файл на сервер, у меня появилась ошибка «Не удалось открыть поток: отказано в доступе». Что я сделал?
Я загуглил эту тему и вот что нашел. Может кому то пригодиться.
1. Узнайте код ошибки php. Поместите этот код в начало файла php.
ini_set(‘error_reporting’, E_ALL);ini_set(‘display_errors’, 1);ini_set(‘display_startup_errors’, 1);
2. К папке должен быть доступ 777. Проверь это.
3. Тег должен иметь атрибут enctype = «multipart/form-data» method = «post».
4. Полностью открой и посмотри массив $ _FILES на сервере.
print_r ($_FILES);
5. Открой и посмотри массив $ _FILES на клиенте.
file = document.getElementById(«get_avatar»).files[0];parts = file.name.split(‘.’);
var a = file.size;var b = parts.pop();var c = file.type;alert(a+b+c);
6. Проверь права пользователя и группы пользователей на каталог.
cd /var/www/your_site/user
ls -l
Подробнее: http://profi.spage.me/php/check-file-input-on-php-and-jquery-why-error
Вы должны авторизоваться, чтобы оставлять комментарии.
Программирование
Продвижение сайтов
Полезные инструменты