- Force flex item on a single line
- 1 Answer 1
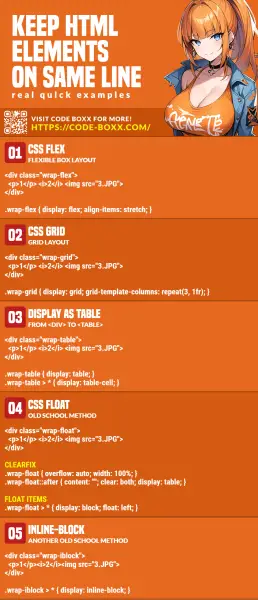
- 5 Ways To Keep Elements On The Same Line In HTML CSS
- TLDR – QUICK SLIDES
- TABLE OF CONTENTS
- DOWNLOAD & NOTES
- QUICK NOTES
- EXAMPLE CODE DOWNLOAD
- ELEMENTS ON THE SAME LINE
- METHOD 1) FLEXIBLE BOX
- METHOD 2) CSS GRID
- METHOD 3) DISPLAY AS A TABLE
- METHOD 4) FLOAT
- METHOD 5) INLINE-BLOCK
- EXTRA BITS & LINKS
- WHICH IS THE BEST METHOD?
- LINKS & REFERENCES
- INFOGRAPHIC CHEAT SHEET
- THE END
- How Can I Force Items To Stay In Line
- putting text and images on same line within a list item — html/css
- 3 Answers 3
Force flex item on a single line
I have the below example and I want to display the blue item text on a single line all the time no matter how much text I will have inside. (dynamic content) Basically I want the red item to get smaller in width when the blue item has more text. Is there any way to achieve this ? Thx PS. Don’t ask why I use flex here. I use it into a bigger example where I need it, this example is simplified.
red red red red red red red red red red red red red red red red red red red red red red blue blue blue blue blue 1 Answer 1
You can use flex-shrink:0 ref on the blue part:
red red red red red red red red red red red red red red red red red red red red red red blue blue blue blue blue blue blue blue blue blue blue red red red red red red red red red red red red red red red red red red red red red red blue blue blue blue blue blue blue blue blue blue blue blue blue blue blue blue blue Or the old white-space:nowrap :
red red red red red red red red red red red red red red red red red red red red red red blue blue blue blue blue blue blue blue blue blue blue red red red red red red red red red red red red red red red red red red red red red red blue blue blue blue blue blue blue blue blue blue blue blue blue blue blue blue blue Another idea is to set flex:1 to the red part. This will allow the content of the blue part to break into multiple lines when the red one can no more break:
red red red red red red red red red red red red red red red red red red red red red red blue blue blue blue blue blue blue blue blue blue blue red red red red red red red red red red red red red red red red red red red red red red blue blue blue blue blue blue blue blue blue blue blue blue blue blue blue blue blue 5 Ways To Keep Elements On The Same Line In HTML CSS
Welcome to a quick tutorial on how to keep HTML elements on the same line. So you are trying to create a “row of horizontal content”? Maybe a row of buttons, slides, pictures, or various different items.
One of the easiest ways to keep elements on the same line is to create a flexible container. For example:
But there are more ways to line things up. Let us walk through some examples – Read on to find out!
ⓘ I have included a zip file with all the example source code at the start of this tutorial, so you don’t have to copy-paste everything… Or if you just want to dive straight in.
TLDR – QUICK SLIDES

TABLE OF CONTENTS
DOWNLOAD & NOTES
Firstly, here is the download link to the example code as promised.
QUICK NOTES
If you spot a bug, feel free to comment below. I try to answer short questions too, but it is one person versus the entire world… If you need answers urgently, please check out my list of websites to get help with programming.
EXAMPLE CODE DOWNLOAD
Click here to download the source code, I have released it under the MIT license, so feel free to build on top of it or use it in your own project.
ELEMENTS ON THE SAME LINE
All right, let us now get into the ways and examples of how to line the elements up in a line.
METHOD 1) FLEXIBLE BOX
/* (A) FLEX CONTAINER */ .wrap-flex < display: flex; align-items: stretch; /* baseline | center | stretch */ >/* (B) NOT REALLY IMPORTANT - COSMETICS */ .wrap-flex > * Another craft hires a related tutor. An ice shares a deposit. 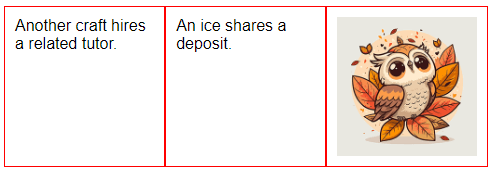
As in the above introduction, the CSS flexible box display: flex is one of the fastest and easiest ways to lay items out in a horizontal row. We can control it in many ways too:
- Add flex-wrap : wrap to allow the items to break into new rows.
- Set align-items: baseline | center | stretch to vertically align the items to your liking.
- To horizontally align the items, add justify-content: center .
Yes, there’s still a lot more to the flexible box. So I will just leave a link in the extras section below if you want to learn more.
METHOD 2) CSS GRID
/* (A) GRID LAYOUT - 3 EQUAL COLUMNS */ .wrap-grid < display: grid; grid-template-columns: repeat(3, 1fr); /* equal items */ >/* (B) NOT REALLY IMPORTANT - COSMETICS */ .wrap-grid > * < height: 100%; padding: 10px; margin: 0; border: 1px solid green; >.wrap-grid img Another craft hires a related tutor. An ice shares a deposit. 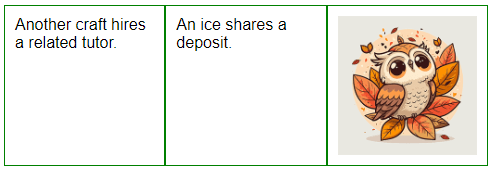
- Just set the container to display: grid .
- Define the columns with grid-template-columns and that’s it.
- In this example, repeat(3, 1fr) will set 3 equal columns. But you can define specific dimensions for each column. E.G. 100px, 200px, 150px .
METHOD 3) DISPLAY AS A TABLE
/* (A) LAYOUT CONTAINER AS A TABLE */ .wrap-table < display: table; >/* (B) "CONVERT" ITEMS TO TABLE CELLS */ .wrap-table > * < display: table-cell; vertical-align: middle; >/* (C) NOT REALLY IMPORTANT - COSMETICS */ .wrap-table > * < width: 33.3%; padding: 10px; margin: 0; border: 1px solid blue; >.wrap-table img Another craft hires a related tutor. An ice shares a deposit. 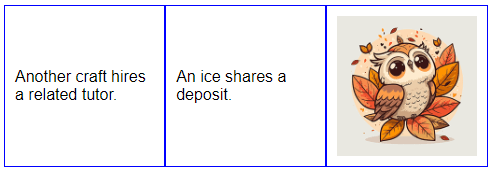
- Set the wrapper to display as a table – display: table
- Then, set all the items inside .wrap-table > * to show as table cells – display: table-cell .
METHOD 4) FLOAT
/* (A) CLEARFIX CONTAINER */ .wrap-float < overflow: auto; width: 100%; >.wrap-float::after < content: ""; clear: both; display: table; >/* (B) FLOAT ITEMS */ .wrap-float > * < display: block; float: left; >/* (C) NOT REALLY IMPORTANT - COSMETICS */ .wrap-float > * Another craft hires a related tutor. An ice shares a deposit. 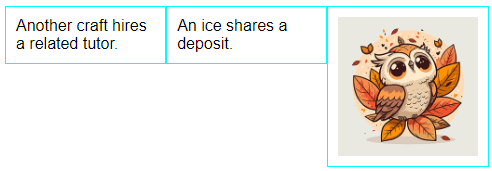
Next, we have an old-school method. The basic idea is actually pretty simple, but it is plagued with some underlying CSS issues.
- (B) The main mechanism here is to set all the items .wrap-float > * to float: left . That’s all, but when all the items are floating, the container itself will “collapse”. This will cause the layout below to be destroyed.
- (A) To fix this problem, we have to use an old CSS trick called a “clear fix” to help the container “retain its shape”.
There are no easy ways to vertically align floating items, unlike flex and grid… You will need to use some sort of “CSS hack”, and we will not open that can of worms.
METHOD 5) INLINE-BLOCK
/* (A) ALL ITEMS TO INLINE-BLOCK */ .wrap-iblock > * < display: inline-block; >/* (B) NOT REALLY IMPORTANT - COSMETICS */ .wrap-iblock > * Another craft hires a related tutor.An ice shares a deposit. 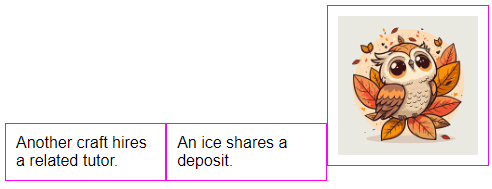
- Just set all the items to display: inline-block . But there is a “bug” with inline-block , the white space and line break in-between the items will show up.
- This is why we add that dummy comment between each item to prevent unnecessary spacing.
Once again, there are no easy ways to do vertical alignment of the items using inline-block.
EXTRA BITS & LINKS
That’s all for this tutorial, and here is a small section on some extras and links that may be useful to you.
WHICH IS THE BEST METHOD?
Personally, I will stick with the modern CSS flex or grid . At the time of writing, they are already well supported globally – Even on older devices… But if you have to support the ancient Internet Exploders, fallback to inline-block or float .
LINKS & REFERENCES
INFOGRAPHIC CHEAT SHEET
THE END
Thank you for reading, and we have come to the end of this guide. I hope that it has helped you with your project, and if you want to share anything with this guide, please feel free to comment below. Good luck and happy coding!
How Can I Force Items To Stay In Line

I am trying to style a section with a title and a button below and want the buttons to stay perfectly in line no matter the browser size (unless on mobile in which case they stack). Due to the fact that there is more text in one title than the other, when I change screen size some of the titles go from one line to needing to use two lines forcing the button to go lower on the page while the other button stays. I have the items in flex boxes but is there a way to maybe force them to stay inline with each other?
EDIT: What I tried most recently was removing the buttons and putting them within their own section below. I also tried this solution here by targeting the new section id, no success. This is my original code with the problem.
/* Section: Clients */ #clients .items < display: flex; >#clients .items img < display: block; position: center; margin: auto; width: 50%; >#clients .cr < position: relative; min-width: 29%; max-width: 30%; height: auto; text-align: center; padding-top: 0px; padding-left: 15px; padding-right: 15px; margin-left: 30px; >#clients .cr-last < position: relative; min-width: 29%; max-width: 30%; height: auto; text-align: center; padding-top: 0px; padding-left: 15px; padding-right: 15px; margin-left: 30px; >#clients .client-r < margin-right: 50px; >#clients .cr-btn
Client Resources
TD Ameritrade Access
American Equity Access
American Equity Access
putting text and images on same line within a list item — html/css
I was wondering if anyone could help me out with a small html/css issue I am having. Basically, I am trying to make a unordered list with a different image for the bullet of each list item, with a text to the right on the same line. More specifically, a header on the top line and some normal text below. At the moment, I can get the image and the text on the same line 🙁 Here is my code. Any help would be greatly appreciated. Html:

Header
text goes here
.

.service-list < list-style-type: none; margin-left:0px; padding-left:0px; float: left; display: inline-block; >.service-list p
display: inline-block; display: inline; should be assigned to the items you want to stay in one line.
3 Answers 3
.service-list < list-style-type: none; margin-left:0px; padding-left:0px; display: inline-block; >.service-list img < float:left; >.service-list p,.service-list h3
I discourage the «tabluar aproach». Tables are for tables. Use instead.
-
Header
text goes here
-
Header
text goes here
/*a little bit of reset*/ #services-list, #services-list p, #services-list h3 < list-style: none; margin:0; padding:0; >#services-list > li < float:left; margin-right: 20px; width: 130px; >#services-list > li > .image < display:block; float:left; margin-right:10px; >/* this instructions are to force the dimensions of image and its container */ #services-list > li > .image, #services-list > li > .image > img
- will not be proper calculated by the browser because contain floated elements. So you should add some clear:both or force the height of the
- element.
.items-list < box-shadow: -2px 1px 14px #e5e6e8; list-style-type: none; margin-left:0px; padding-left:0px; margin-bottom:15px; width:100%; >@media only screen and (max-width:400px) < .items-list < height:110px; >.items-list .kmtext < padding-bottom:6px; >.items-list img < float:left; width:40%; height:100%; margin-right:7px; >.items-list .righttxt < width:100%; padding: 5px; >> @media only screen and (min-width:401px) and (max-width:500px) < .items-list < height:200px; >.items-list .kmtext < padding-bottom:20px; >.items-list img < float:left; width:45%; height:100%; margin-right:7px; >.items-list .righttxt < width:100%; padding: 15px; >> @media only screen and (min-width:501px) and (max-width:700px) < .items-list < height:250px; >.items-list .kmtext < padding-bottom:20px; >.items-list img < float:left; width:45%; height:100%; margin-right:7px; >.items-list .righttxt < width:100%; padding: 40px; >> @media only screen and (min-width:701px) and (max-width:1399px) < .items-list < height:300px; >.items-list .kmtext < padding-bottom:20px; >.items-list img < float:left; width:45%; height:100%; margin-right:7px; >.items-list .righttxt < width:100%; padding: 50px; >> @media only screen and (min-width:1400px) < .items-list < height:330px; >.items-list .kmtext < padding-bottom:20px; >.items-list img < float:left; width:45%; height:100%; margin-right:7px; >.items-list .righttxt < width:100%; padding: 60px; >> .items-list img < object-fit: cover; border-right: 5px solid; border-image: linear-gradient(to bottom, #86DF7B 50%,#7BAADF 50%) 2; >.items-list .kmtext < color:#26b7a1; font-size:80%; overflow: hidden; text-overflow: ellipsis; display: -webkit-box; line-height: 21px; max-height: 48px; -webkit-line-clamp: 1; -webkit-box-orient: vertical; >.items-list .pricetext < color:#020202; font-weight:bold; padding-bottom:6px; font-size:120%; overflow: hidden; text-overflow: ellipsis; display: -webkit-box; line-height: 21px; max-height: 48px; -webkit-line-clamp: 1; -webkit-box-orient: vertical; >.items-list .titletext
62KM64NThis is title here 62KM64NThis is title here
This is okay using both media query, you can re-scale it to your likeness