- How to float one image over another
- HTML-CSS Source Code
- HTML-CSS Source Code
- z-index
- object-position
- Try it
- Syntax
- Values
- Formal definition
- Formal syntax
- Examples
- Positioning image content
- HTML
- CSS
- Result
- Specifications
- Browser compatibility
- See also
- Found a content problem with this page?
- MDN
- Support
- Our communities
- Developers
- How to Position an Image in CSS?
- Pre-requisite
- Syntax
- Methods
- Conclusion
- How to Position One Image on Top of Another in HTML/CSS
- Create HTML
- Add CSS
- Example of positioning an image on top of another using the position property:
- Result
- Example of positioning an image on top of another using the position and z-index properties:
- Html image css top
- Learn Latest Tutorials
- Preparation
- Trending Technologies
- B.Tech / MCA
- Javatpoint Services
- Training For College Campus
How to float one image over another
In many situations you may want to position one image on top of another image. There are many ways to achieve this using HTML and CSS. You can find here some easiest methods from this lesson.
The following HTML-CSS code placing one image on top of another by create a relative div that is placed in the flow of the page. Then place the background image first as relative so that the div knows how big it should be. Next is to place the overlay image as absolutes relative to the upper left of the first image.
HTML-CSS Source Code
position: relative — In relative position method , you can position the element relative to its normal position. In this case you should use left or right and top or bottom to move the element relative to its container.
position: absolute — When we position an element as Absolute , that element is is completely removed from the document`s normal flow. In Absolute position, the position is set through some combination of left, right, top and bottom properties.
Next approach is using z-index to put an image on top of another image.
HTML-CSS Source Code
z-index
While overlapping CSS elements, when using absolute and relative position, the default behavior is to have the first elements underneath later ones. In these cases we can control layering of positioned elements by using the z-index property . When using the z-index property you can specify which of the boxes appears on top the other one.
Related Contents
- Box model
- Div (division)
- CSS Span
- Rounded corners
- Box Shadow
- CSS position
- float, clear and z-index
- Image with Shadow
- Curved Shadows
- CSS hover effects
- Center Floated Divs
- CSS Overlay Techniques
- Full screen Overlay
- Image caption
- Div inside another Div
- CSS Transparency
- Center an Image in a Div
- Resizing images on hover
Related Topics
object-position
The object-position CSS property specifies the alignment of the selected replaced element’s contents within the element’s box. Areas of the box which aren’t covered by the replaced element’s object will show the element’s background.
You can adjust how the replaced element’s object’s intrinsic size (that is, its natural size) is adjusted to fit within the element’s box using the object-fit property.
Try it
Syntax
/* Keyword values */ object-position: top; object-position: bottom; object-position: left; object-position: right; object-position: center; /* values */ object-position: 25% 75%; /* values */ object-position: 0 0; object-position: 1cm 2cm; object-position: 10ch 8em; /* Edge offsets values */ object-position: bottom 10px right 20px; object-position: right 3em bottom 10px; object-position: top 0 right 10px; /* Global values */ object-position: inherit; object-position: initial; object-position: revert; object-position: revert-layer; object-position: unset;
Values
From one to four values that define the 2D position of the element. Relative or absolute offsets can be used.
Note: The position can be set so that the replaced element is drawn outside its box.
Formal definition
| Initial value | 50% 50% |
|---|---|
| Applies to | replaced elements |
| Inherited | yes |
| Percentages | refer to width and height of element itself |
| Computed value | as specified |
| Animation type | a repeatable list of |
Formal syntax
object-position =
=
[ left | center | right ] || [ top | center | bottom ] |
[ left | center | right | ] [ top | center | bottom | ]? |
[ [ left | right ] ] && [ [ top | bottom ] ]
=
|
Examples
Positioning image content
HTML
img id="object-position-1" src="mdn.svg" alt="MDN Logo" /> img id="object-position-2" src="mdn.svg" alt="MDN Logo" />
CSS
The CSS includes default styling for the element itself, as well as separate styles for each of the two images.
img width: 300px; height: 250px; border: 1px solid black; background-color: silver; margin-right: 1em; object-fit: none; > #object-position-1 object-position: 10px; > #object-position-2 object-position: 100% 10%; > The first image is positioned with its left edge inset 10 pixels from the left edge of the element’s box. The second image is positioned with its right edge flush against the right edge of the element’s box and is located 10% of the way down the height of the element’s box.
Result
Specifications
Browser compatibility
BCD tables only load in the browser
See also
Found a content problem with this page?
This page was last modified on Feb 21, 2023 by MDN contributors.
Your blueprint for a better internet.
MDN
Support
Our communities
Developers
Visit Mozilla Corporation’s not-for-profit parent, the Mozilla Foundation.
Portions of this content are ©1998– 2023 by individual mozilla.org contributors. Content available under a Creative Commons license.
How to Position an Image in CSS?

The image position in CSS can be changed by using CSS properties like object-position property and float property. Object-position property is used to align the position with respect to the x,y coordinates of the image within its container. The float property is used to float an element inside the container toward the left or right side.
Pre-requisite
You should know how to use CSS properties on elements. This article will explain the object-position property and float property with an example that will be easy to understand.
Syntax
1. object-position property: The Syntax of object position property :
position can be a numerical value that specifies the distance from the left of the content box( i.e x axis ) and the distance from the top of the content box (i.e., y-axis). It can also take values like left, right, top, bottom, and initial and inherit them as a string to specify the position.
2. Float property : The Syntax of the float property :
Methods
Method 1: Using object-position Property
object-position property: The object position property is used to position any element within a container to the required position within the container. The < img >element or < video >element are mostly positioned within a container using the object position property.
The Syntax for the object position property is
Position can take numerical , specific string values , percentage , length , and edge offsets values . Some values are shown in the examples below.
Example Let’s see a simple example of object position property and place the img to the top left of the container.
Method 2: Using float Property
float property: float property is used to change the image position in CSS to the extreme left or extreme right of the container. Float is used to position an element only horizontally. The Syntax of the float property is as follows:
left: place the element to the extreme left of the container right: place the element to the extreme right of the container inherit: inherits floating property from its parent (div, semantic element, etc.) none: element is displayed at its original position as it is.
Some examples of float properties values are as follows:
Let’s take an example in which float property is being used on an actual image :
The output of the above HTML code using the float right property is:

Conclusion
- object-property and float properties are used to position an element inside a container.
- object-position property can be used to change the image position in CSS both horizontally as well as vertically within the container of the image.
- float property can be used to change the image position in CSS horizontally within the container of the image.
- The position property in the object position can take both numerical values as well as some specified string values like left, right, top and bottom.
- Float property takes some specific values like left, right, inherit, and none.
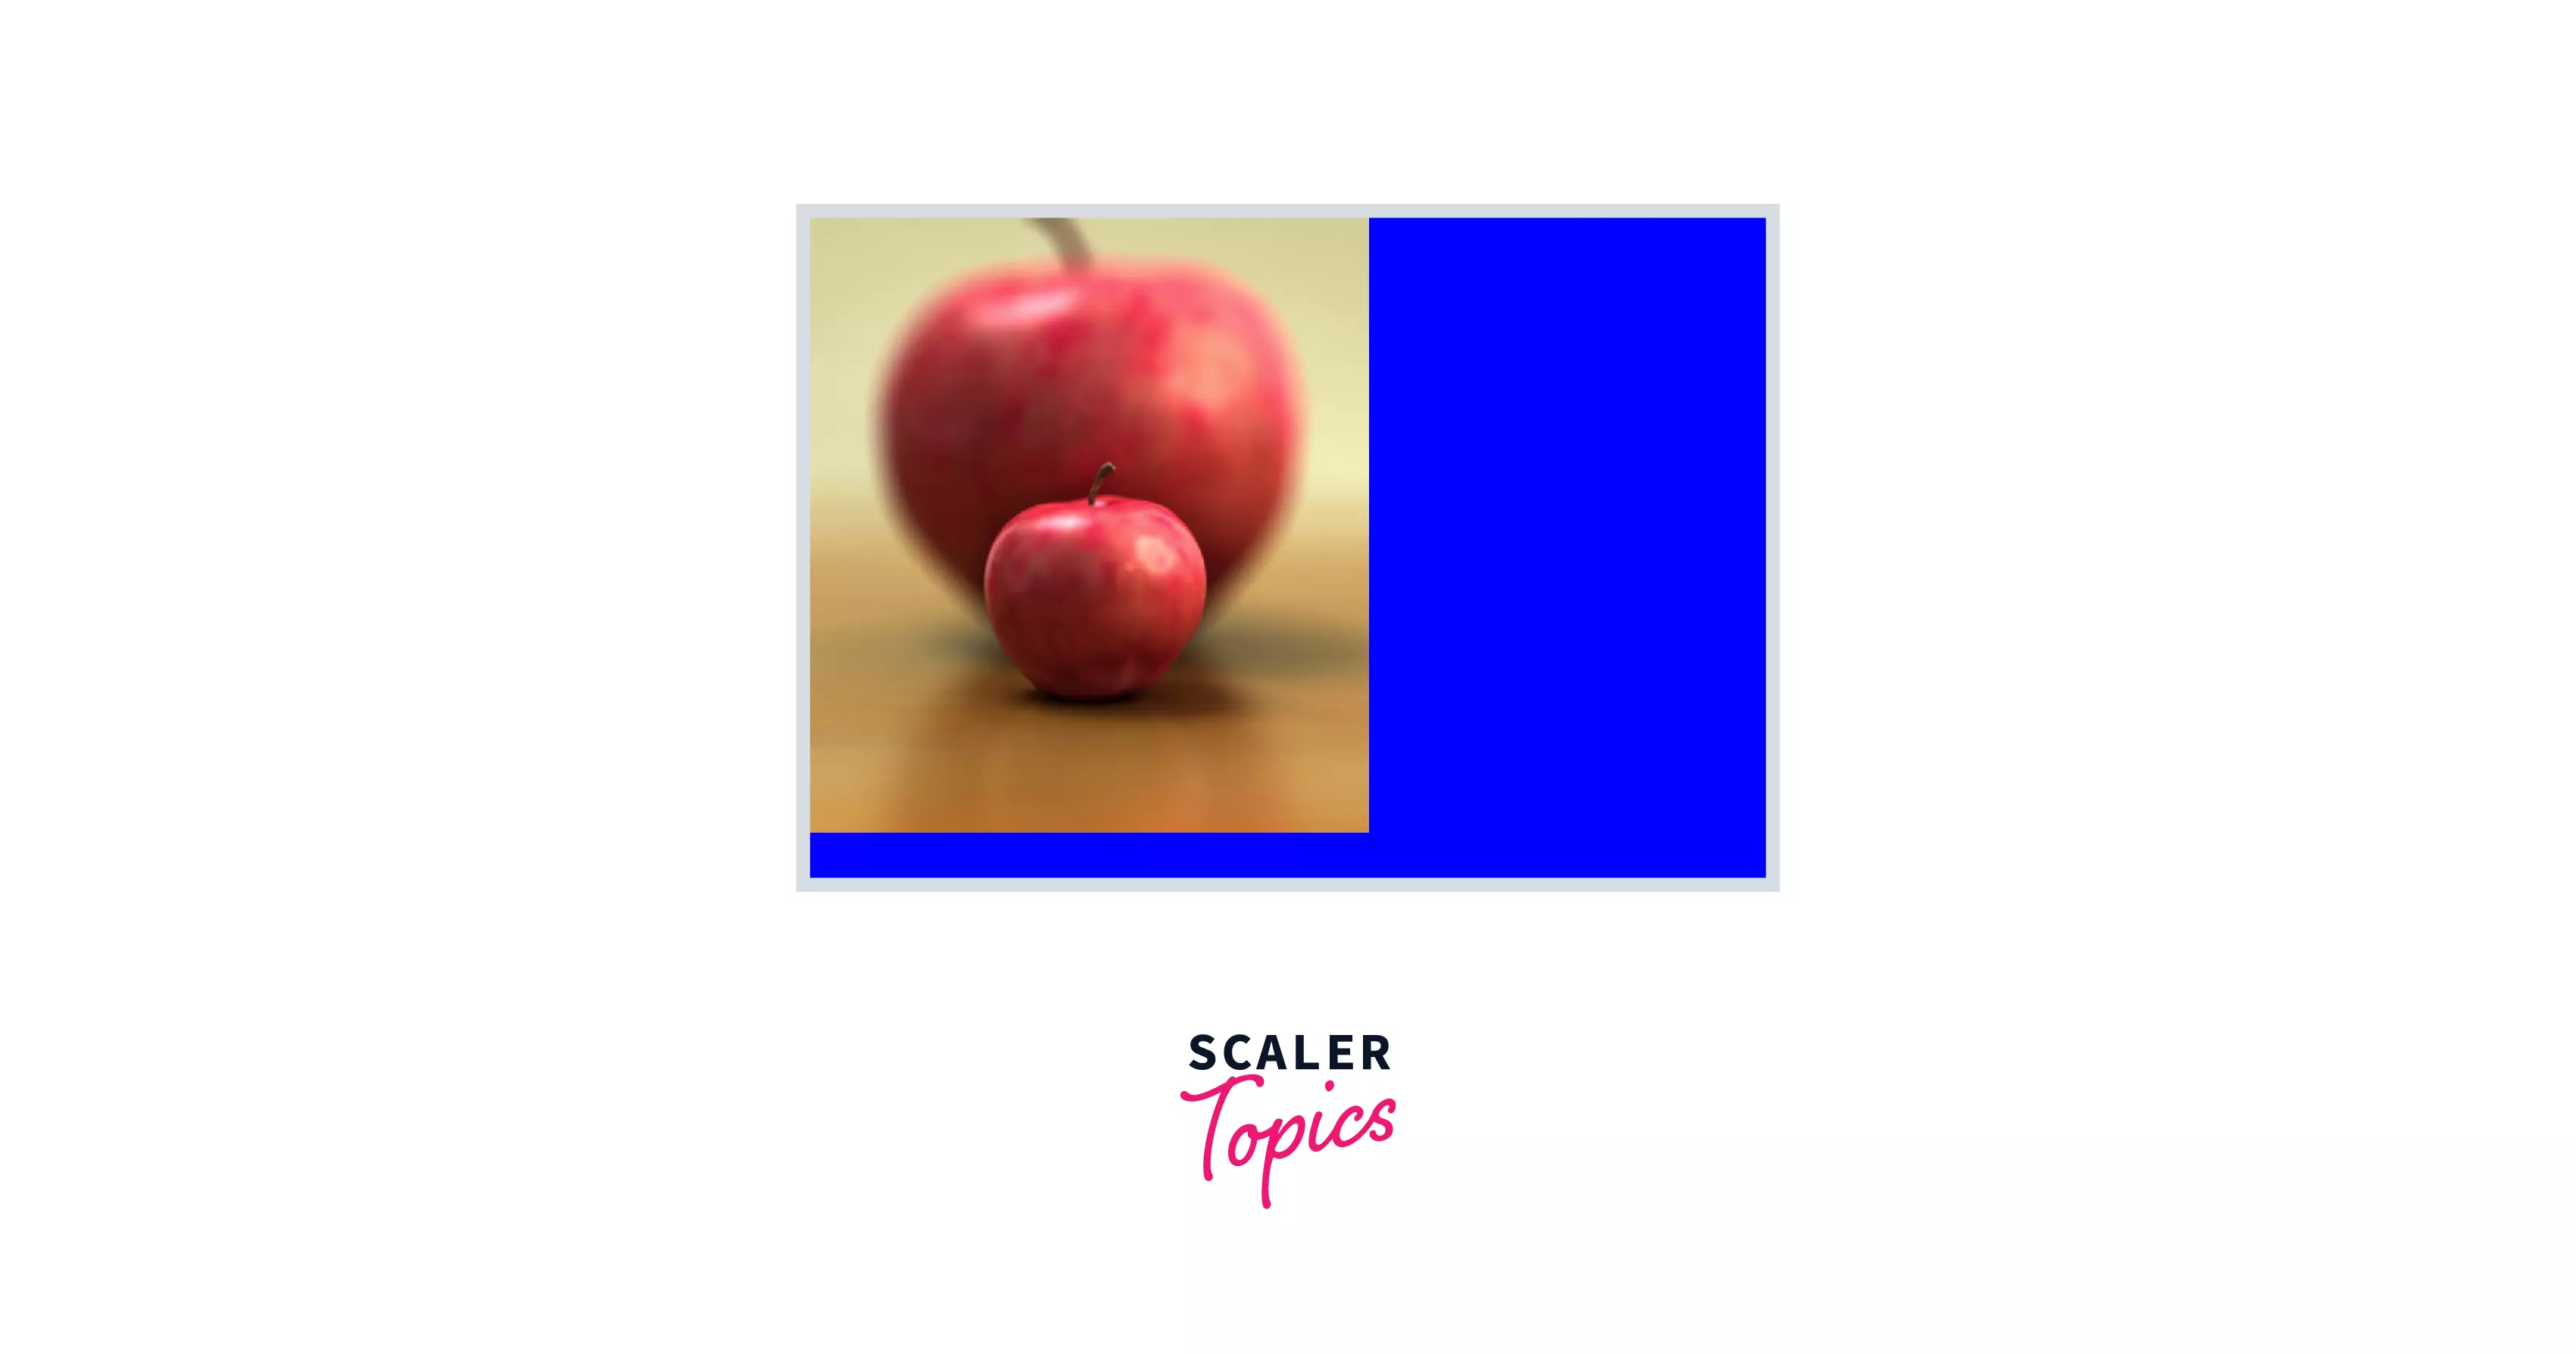
How to Position One Image on Top of Another in HTML/CSS
Sometimes, you may need to position one image on top of another. This can be easily done with HTML and CSS. For that, you can use the CSS position and z-index properties.
First, we are going to show an example where we use the position property.
Create HTML
The first image will be the background image and the second will overlay it.
div class="parent"> img class="image1" src="/uploads/media/default/0001/01/25acddb3da54207bc6beb5838f65f022feaa81d7.jpeg" /> img class="image2" src="/uploads/media/default/0001/01/25acddb3da54207bc6beb5838f65f022feaa81d7.jpeg" /> div>Add CSS
- Add a relative div placed in the flow of the page.
- Set the background image as relative so as the div knows how big it must be.
- Set the overlay as absolute, which will be relative to the upper-left edge of the container div.
We place the background image at the beginning of the container, and then we will set the overlay image to start from 30 pixels after the background.
.parent < position: relative; top: 0; left: 0; > .image1 < position: relative; top: 0; left: 0; border: 1px solid #000000; > .image2 < position: absolute; top: 30px; left: 30px; border: 1px solid #000000; >Let’s see the full example.
Example of positioning an image on top of another using the position property:
html> html> head> title>Title of the document title> style> .parent < position: relative; top: 0; left: 0; > .image1 < position: relative; top: 0; left: 0; border: 1px solid #000000; > .image2 < position: absolute; top: 30px; left: 30px; border: 1px solid #000000; > style> head> body> div class="parent"> img class="image1" src="/uploads/media/default/0001/01/25acddb3da54207bc6beb5838f65f022feaa81d7.jpeg" /> img class="image2" src="/uploads/media/default/0001/01/25acddb3da54207bc6beb5838f65f022feaa81d7.jpeg" /> div> body> html>Result
In this example, we used both the relative and absolute values of the position property. The relative value places an element relative to its normal position. The absolute value removes elements from the document flow, and elements are positioned relative to its parent element’s position.
Now, let’s see an example where we use both the position and z-index properties.
Example of positioning an image on top of another using the position and z-index properties:
The z-index is a CSS property to determine which element to overlay and which element to be in the background. The idea is to imagine a z-axis perpendicular to the screen. The higher the z-index of an element, the element will be shown nearer to the one viewing the page, thus overlaying the other elements with a lower z-index.
html> html> head> title>Title of the document title> style> .image1 < position: absolute; top: 10px; left: 10px; border: 1px solid #000000; z-index: 1; > .image2 < position: absolute; top: 25px; left: 25px; border: 1px solid #000000; z-index: 2; > style> head> body> img class="image1" src="/uploads/media/default/0001/01/25acddb3da54207bc6beb5838f65f022feaa81d7.jpeg" /> img class="image2" src="/uploads/media/default/0001/01/25acddb3da54207bc6beb5838f65f022feaa81d7.jpeg" /> body> html>In the example mentioned above, we set the position to absolute for both elements. You can try the snippet yourself, and see that you can swap the overlaying and the background image easily by changing the z-index. By z-index you can set any element on top of another one, and not just images.
Html image css top
Learn Latest Tutorials


Preparation


Trending Technologies


B.Tech / MCA


Javatpoint Services
JavaTpoint offers too many high quality services. Mail us on h[email protected], to get more information about given services.
- Website Designing
- Website Development
- Java Development
- PHP Development
- WordPress
- Graphic Designing
- Logo
- Digital Marketing
- On Page and Off Page SEO
- PPC
- Content Development
- Corporate Training
- Classroom and Online Training
- Data Entry
Training For College Campus
JavaTpoint offers college campus training on Core Java, Advance Java, .Net, Android, Hadoop, PHP, Web Technology and Python. Please mail your requirement at [email protected].
Duration: 1 week to 2 week
Like/Subscribe us for latest updates or newsletter 


