- CSS Borders
- CSS Border Style
- Example
- Как создать рамку вокруг элемента. CSS-свойство border
- Значения свойства border
- Border-width
- Border-style
- Border-color
- Наследование
- Для чего использовать свойство border
- Нюансы
- Чем заменить свойство
- Материалы по теме
- Все о свойстве border
- Основы
- Border-Radius
- Несколько границ
- Изменение углов
- CSS фигуры
- Создание Speech Bubble
- Итог
- How to Draw Horizontal and Vertical Lines in CSS
- How to Draw a Line with CSS?
- Conclusion
- About the author
- Sharqa Hameed
CSS Borders
The CSS border properties allow you to specify the style, width, and color of an element’s border.
I have borders on all sides.
I have a red bottom border.
I have a blue left border.
CSS Border Style
The border-style property specifies what kind of border to display.
The following values are allowed:
- dotted — Defines a dotted border
- dashed — Defines a dashed border
- solid — Defines a solid border
- double — Defines a double border
- groove — Defines a 3D grooved border. The effect depends on the border-color value
- ridge — Defines a 3D ridged border. The effect depends on the border-color value
- inset — Defines a 3D inset border. The effect depends on the border-color value
- outset — Defines a 3D outset border. The effect depends on the border-color value
- none — Defines no border
- hidden — Defines a hidden border
The border-style property can have from one to four values (for the top border, right border, bottom border, and the left border).
Example
Demonstration of the different border styles:
A groove border. The effect depends on the border-color value.
A ridge border. The effect depends on the border-color value.
An inset border. The effect depends on the border-color value.
An outset border. The effect depends on the border-color value.
Note: None of the OTHER CSS border properties (which you will learn more about in the next chapters) will have ANY effect unless the border-style property is set!
Как создать рамку вокруг элемента. CSS-свойство border
CSS-свойство border используется для задания стиля, толщины и цвета границы элемента. Граница — это линия, которая окружает элемент и отделяет его контент от соседних элементов. С помощью свойства border можно создавать различные рамки — от простых одноцветных линий до сложных узоров и теней.
В общем виде свойство записывается так:
border-width — задаёт толщину границы.
border-style — устанавливает стиль рамки.
border-color — определяет цвет рамки.

Значения свойства border
Border-width
Свойство border-width определяет толщину рамки и может быть задано в пикселях ( px ), процентах ( % ) или описано ключевым словом — thin , medium , thick .
- thin — тонкая граница, обычно около одного пикселя.
- medium — средняя граница, около трёх пикселей.
- thick — толстая граница, примерно пять пикселей.
Border-style
border-style — задаёт стиль границы и может принимать одно из значений — none , hidden , dotted , dashed , solid , double , groove , ridge , inset , outset .
hidden — граница скрыта, но она занимает место.
solid — сплошная линия границы.
groove — объёмная рифлёная вдавленная рамка.
ridge — объёмная рифлёная выпуклая рамка.
inset — объёмная вдавленная рамка.
outset — объёмная выпуклая рамка.
Border-color
border-color — определяет цвет рамки и может быть задан в виде ключевого слова, соответствующего названию цвета, hex-кода, rgb или hls значений. Значение currentColor использует текущий цвет текста в качестве цвета границы.
Наследование
Свойство border не наследуется от родительских элементов. Граница, заданная для одного элемента, не будет применяться к его дочерним элементам.
⭐ Свойство border поддерживается современными браузерами. Актуальная информация — на caniuse.com.
Для чего использовать свойство border
Создание стилизованной границы. Свойство border используется для создания стилизованных кнопок или ссылок с границей, которая меняет свой стиль при наведении курсора или нажатии.
Созданиетенейили выделений. Свойство border можно комбинировать с другими свойствами, такими как box-shadow или outline , для создания различных эффектов теней или выделений.
Разделение разных частей элемента. С помощью свойства border можно разделять различные части элемента, например, заголовок и содержимое блока.
Нюансы
Если нужно задать отдельные значения для каждой стороны границы, рекомендуется использовать отдельные свойства border-top , border-right , border-bottom и border-left .

Для создания рамок с закруглёнными углами используют свойство border-radius .

Чем заменить свойство
Для создания более сложных границ или декоративных элементов можно использовать свойства box-shadow , outline или border-image .
Материалы по теме
«Доктайп» — журнал о фронтенде. Читайте, слушайте и учитесь с нами.
Все о свойстве border
Все знакомы с css параметром border, но есть ли вещи, которые мы не знаем о нем?
Основы
border-width: thick; border-style: solid; border-color: black;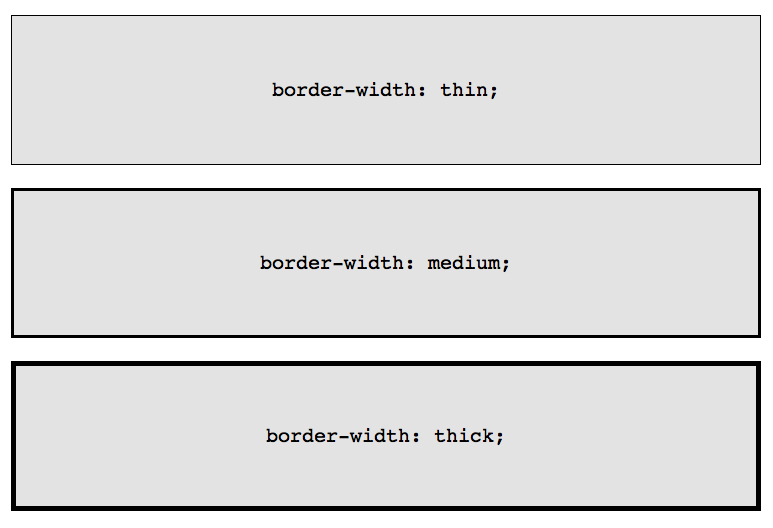
Например у параметра border-width есть три параметра: thin, medium, thick:
Если необходимо менять цвет границы при наведении на объект:
Border-Radius
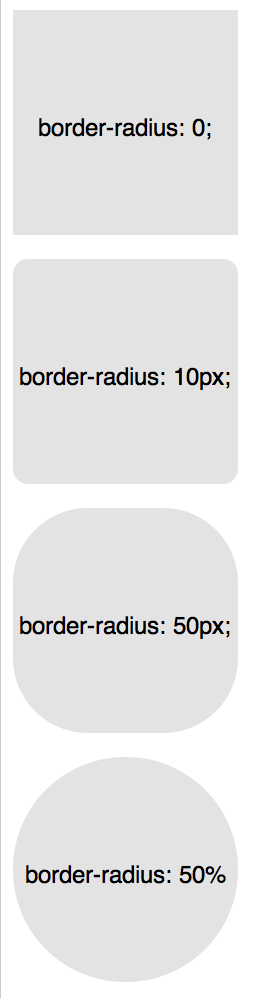
border-radius — это новый параметр CSS3 для отображения закругленных углов, который корректно работает во всех современных браузерах, за исключением Internet Explorer 8 (и более старых версий).
Для каждого угла можно назначить свое закругление:
border-top-left-radius: 20px; border-top-right-radius: 0; border-bottom-right-radius: 30px; border-bottom-left-radius: 0;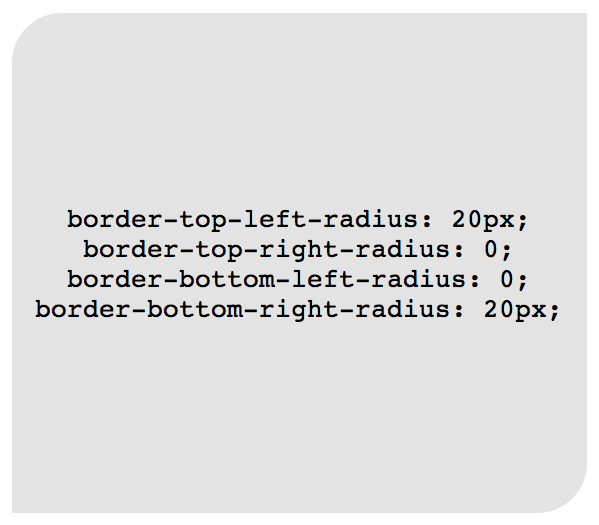
В приведенном примере необязательно назначать «0» border-top-right-radius и border-bottom-left-radius, если они не наследуют значения, которые должны быть изменены.
Всю конструкцию можно сжать в одну строку:
/* top left, top right, bottom right, bottom left */ border-radius: 20px 0 30px 0;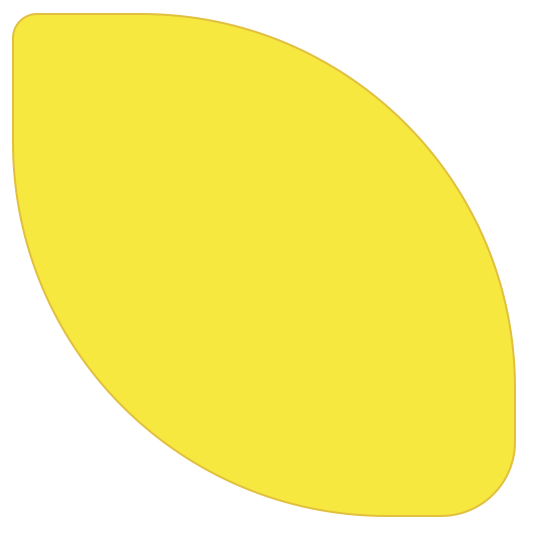
Здесь описаны самые простые и популярные примеры применения параметра border. Перейдем к более сложным.
Несколько границ
Border-Style
solid, dashed, and dotted — самые популярные значения параметра border-style, но давайте рассмотрим другие, например, groove and ridge.
border: 20px groove #e3e3e3;border-color: #e3e3e3; border-width: 20px; border-style: groove;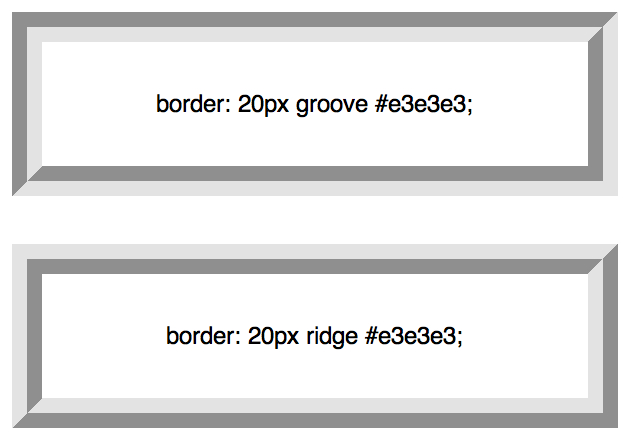
Outline

Этот способ отлично работает, но ограничен созданием двойной рамки. Если вам необходимо отобразить несколько границ элемента, то необходимо использовать другую технику.
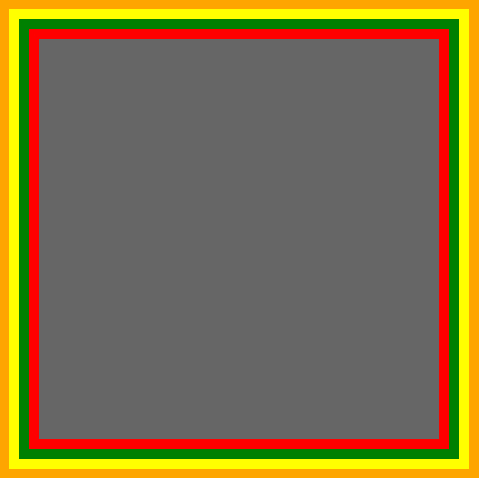
Псевдоэлементы
.box < width: 200px; height: 200px; background: #e3e3e3; position: relative; border: 10px solid green; >/* Create two boxes with the same width of the container */ .box:after, .box:before < content: ''; position: absolute; top: 0; left: 0; bottom: 0; right: 0; >.box:after < border: 5px solid red; outline: 5px solid yellow; >.box:before

Возможно это не самое элегантное решение, однако оно работает
Box-Shadow
Изменение углов
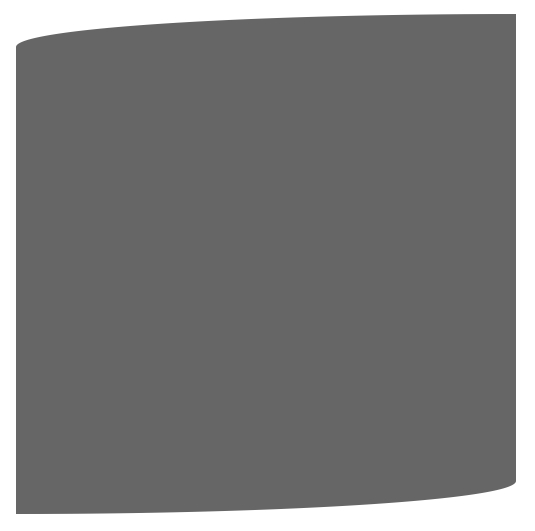
border-radius: 50px / 100px; /* horizontal radius, vertical radius */border-top-left-radius: 50px 100px; border-top-right-radius: 50px 100px; border-bottom-right-radius: 50px 100px; border-bottom-left-radius: 50px 100px;Эта техничка бывает полезна, если необходимо имитировать искривление, а не закругление. Например, так можно получить эффект скрученной бумаги:
CSS фигуры
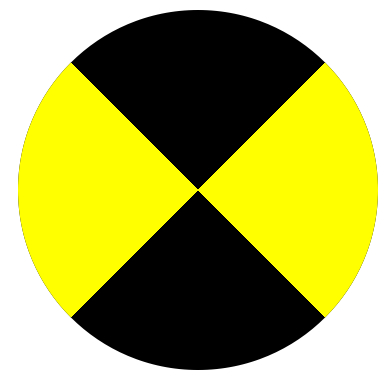
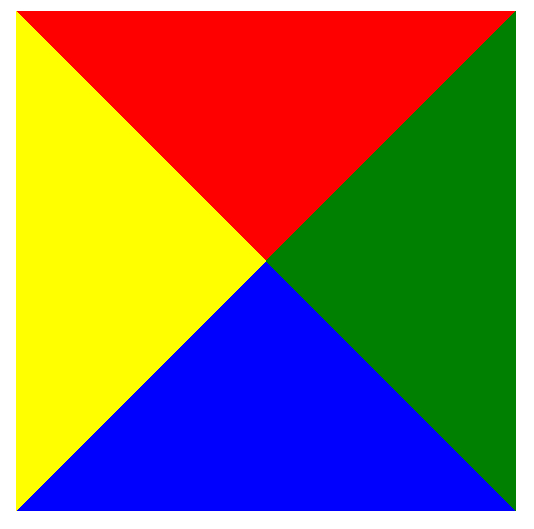
Наиболее частым примером использования CSS фигур является отображение стрелок. Чтобы понять, как это работает, необходимо разобраться с использованием отдельного border-color для каждой стороны и установкой значения «0» для width и height:
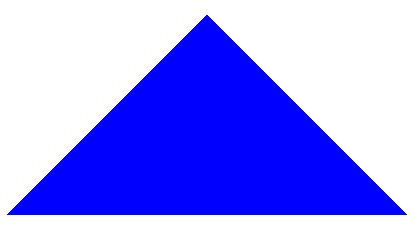
А теперь оставляем только синий треугольник:
Создание Speech Bubble
Теперь нужно расположить стрелку-треугольник в нужном месте. Вот наш цветной квадратик:
Оставляем только четверть квадратика:
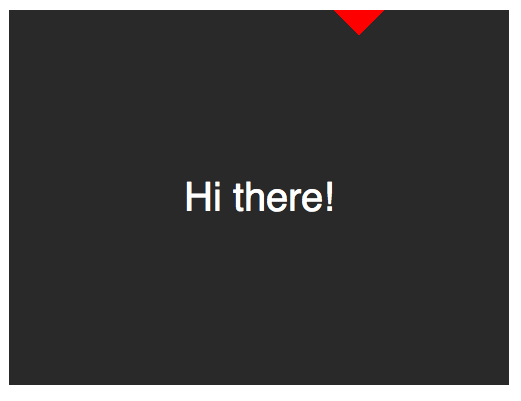
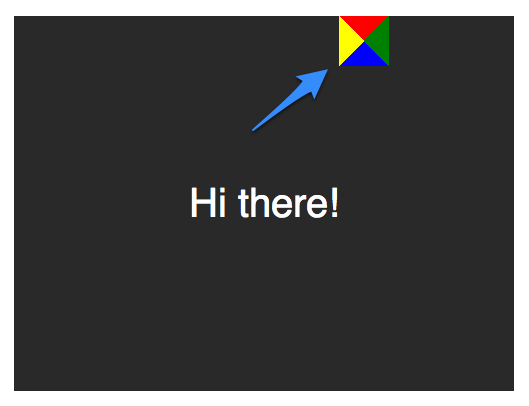
Теперь перемещаем ниже и закрашиваем:
.speech-bubble < /* … other styles */ border-radius: 10px; >.speech-bubble:after < content: ''; position: absolute; width: 0; height: 0; border: 15px solid; border-top-color: #292929; top: 100%; left: 50%; margin-left: -15px; /* adjust for border width */ >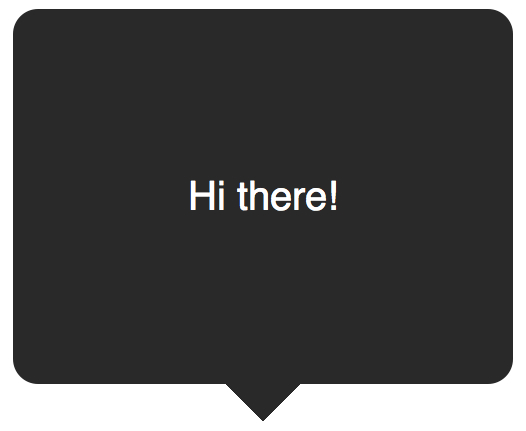
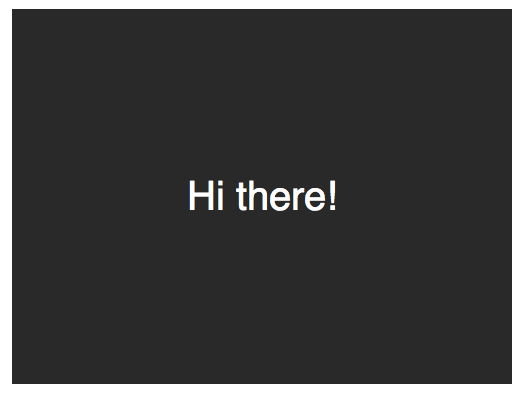
Примеры применения:
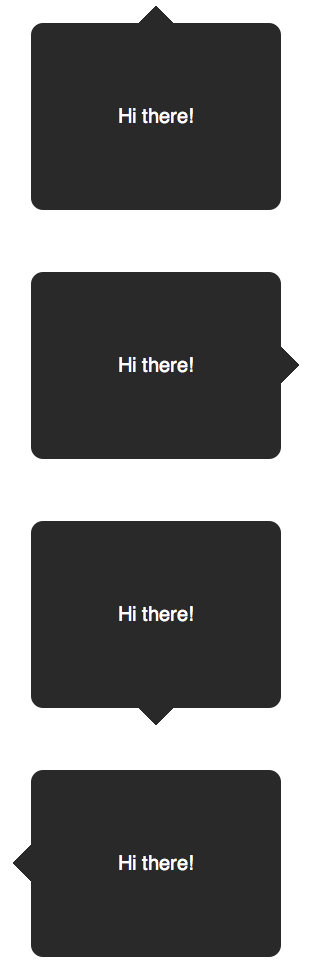
/* Speech Bubbles Usage: Apply a class of .speech-bubble and .speech-bubble-DIRECTIONHi there*/ .speech-bubble < position: relative; background-color: #292929; width: 200px; height: 150px; line-height: 150px; /* vertically center */ color: white; text-align: center; border-radius: 10px; font-family: sans-serif; >.speech-bubble:after < content: ''; position: absolute; width: 0; height: 0; border: 15px solid; >/* Position the Arrow */ .speech-bubble-top:after < border-bottom-color: #292929; left: 50%; bottom: 100%; margin-left: -15px; >.speech-bubble-right:after < border-left-color: #292929; left: 100%; top: 50%; margin-top: -15px; >.speech-bubble-bottom:after < border-top-color: #292929; top: 100%; left: 50%; margin-left: -15px; >.speech-bubble-left:after
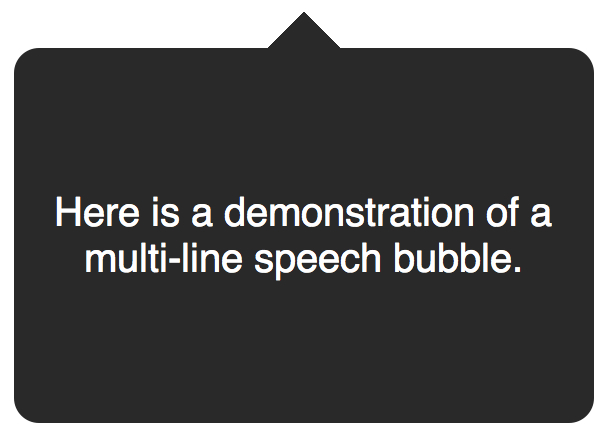
Вертикальное центрирование текста
минус использования line-height при вертикальном центрировании в ограничении текста одной строкой. Для решения этой проблемы, можно применить display: table к нашему Speech Bubble и display: table-cell к тексту:
.speech-bubble < /* other styles */ display: table; >.speech-bubble p
Еще один пример нестандартного использования границ:
Итог
Использование параметра border не ограничивается одним лишь «1px solid black», с помощью границ можно создавать различные фигуры, причем достаточно один раз написать CSS-класс и применять его к множеству элементов на странице.
How to Draw Horizontal and Vertical Lines in CSS
![]()
As we know, HTML provides the structure of web pages, and CSS can be utilized to apply styles. CSS also has different styling properties that are used to draw different shapes, such as squares, circles, rectangles, ovals, lines, and more. More specifically, a line is one of design’s most versatile and commonly used elements that can be added horizontally and vertically.
This article will teach the procedure to draw horizontal and vertical lines using CSS. Let’s get started!
How to Draw a Line with CSS?
To draw horizontal and vertical lines using CSS, different properties can be utilized, such as:
Let’s move ahead to understand the working of the above-provided properties one by one!
HTML
To draw lines, firstly, we will specify the “ ” element inside the body of our HTML file:
Now, to style a div, utilize the suitable properties. In our case, we will assign the “background-color” property value as “#e4a2a4”, and the “border” property value as “2px solid #0fafc4”, which indicates its width, type, and color, respectively, and the “height” property is set as “200px”.
Example 1: Draw Horizontal Line with CSS
Usually, the
element is utilized to draw horizontal lines in HTML. However, to draw a horizontal line with CSS, add element for the heading and then place a named “h_line” inside the above-described div of the HTML file.
Horizontal Line < / h1 >
< / div >Now, use CSS properties to draw a horizontal line:
- We will use the “border-bottom” property, which is associated with one to three values for line width, line type, and color. The below-provided example sets its value as “6px solid rgb(80,80,78)”.
- To adjust the size of the line, we have set the “width” property value as “300px”.
- The “margin” property value is set as “auto”, representing that the margin is equal from all sides. The “bottom-top” property can also be utilized for this purpose.
Now, save the HTML file and open it in your browser:
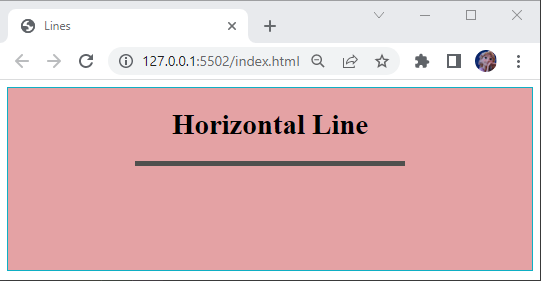
As you can see, we have drawn a horizontal line successfully with the CSS border property.
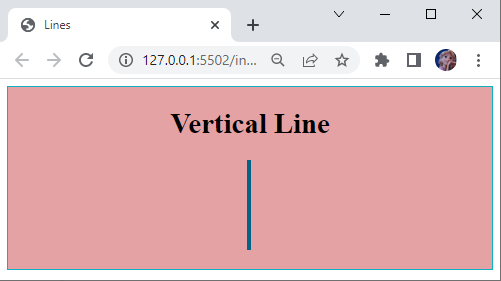
Example 2: Draw Vertical Line With CSS
To draw a vertical line, we will add tag for the heading and then place a named “v_line” inside the above-described div of the HTML file.
Vertical Line < / h1 >
< / div >Let’s provide the “v_line” div with some CSS properties. To draw a vertical line, we will utilize:
- The “border-left” property is assigned with values “5px solid rgb(2, 99, 135)”, where the first value represents the line width, the second value represents the line type, and the third value indicates the color.
- The “bottom-right” property can also be utilized for the same purpose.
- Next, we have defined the “height” of the line by setting its value as “100px”.
- Set “margin” as “0 auto”, where 0 indicates the top and bottom and auto represents the equal margin to the left and right.
- To show the width of the line, we have assigned the “width” property value as “2px”.
.v_line {
border-left : 5px solid rgb ( 2 , 99 , 135 ) ;
height : 100px ;
margin : 0 auto ;
width : 2px ;
}
Applying these values will draw a vertical line like this:
That’s it! We have used different CSS properties to draw horizontal and vertical lines.
Conclusion
You can use the “border-top” or “border-bottom” properties to draw a horizontal line and the “border-left” or “border-right” properties to draw a vertical line in CSS. This property has values one to three, where the first value defines the width, the second value defines its type, whether solid, dotted, dashed, or groove and the third value indicates the color of the line. This guide has explained how to draw horizontal and vertical lines with CSS.
About the author
Sharqa Hameed
I am a Linux enthusiast, I love to read Every Linux blog on the internet. I hold masters degree in computer science and am passionate about learning and teaching.