- Create a Chatbot using HTML, CSS, and JavaScript Code
- How to Make Chatbot in Html?
- Live Preview Of HTML Chatbot:-
- Chatbot CSS Code:-
- Chatbot JavaScript Code:-
- Final Output Of Chatbot Using Html Code:-
- Which code editor do you use for this Chatbot project coding?
- is this project responsive or not?
- Do you use any external links to create this project?
- Similar Posts
- How to Add Search Icon in Input field Using HTML and CSS
- Create Image Slider Using HTML,CSS and JavaScript
- Feedback Reaction Design Using HTML and CSS
- Progress Bar With Steps using HTML, CSS, and JavaScript
- Create Calculator Using JavaScript
- 17 CSS Slideshows (Example + Free Code )
- How TO — Chat
- How To Create Chat Messages
- Example
- Example
- Create Chat App Using HTML and CSS (Source Code)
- Html Code For Chat App UI:
- JotForm
- #general
- Jeshua Scott
- Jeshua Scott
- Aada Laine
- Nala Hester
- Ramon Bateman
- Amilia Luna
- HTML Output:
- CSS Code For Chat App UI:
Create a Chatbot using HTML, CSS, and JavaScript Code
Hello Coder! Welcome to the Codewithrandom blog. In this blog, We learn how to create Chatbot using HTML, CSS, and JavaScript Code. So if users type a specific word they get a specific answer in Chatbot that we write in JavaScript code.
How to Make Chatbot in Html?
we need Css and Javascript code in an Html file for creating Chatbot in Html. we Create a div, some heading and paragraph, and input where the user can ask a question to the chatbot, and the chatbot show the answer in the heading or paragraph where we want through javascript code.
you can hear what is a chatbot, and how its works.
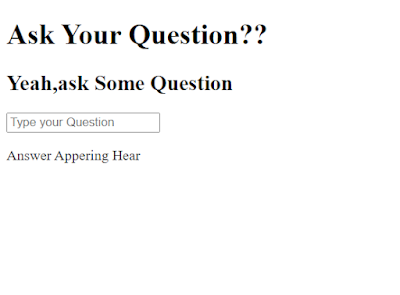
Live Preview Of HTML Chatbot:-
We use html code for baisc tags like we create a heading and paragraph for user instructions. And create an input field using Html. And in css code, we completely styled the main page of the chatbot. Styling input field where the user types a question and gets an answer.
And our final javascript code file in javascript code we create a function for question answer. So if users type a specific word they get a specific answer that we write in javascript code. So this way we create our chatbot using Html, Css, and JavaScript.
I hope you enjoy our blog so let’s start with a basic HTML structure for the Chatbot Javascript.
Do you want to learn HTML to JavaScript? 🔥
If yes, then here is our Master Frontend: Zero to Hero eBook! 📚 In this eBook, you’ll learn complete HTML, CSS, Bootstrap, and JavaScript from beginner to advance level. 💪 It includes 450 Projects with source code.
For the links for our external CSS file, we will add the external file link inside the head section, and the javascript file is added inside the body section.
Adding the structure for Chatbot Html Code
- Using the div tag, we will create a container for our chatbot.
- Inside the div tag, using the h1> tag, we will add the heading of our chatbot, and then using the input tag with type text, we will create an input column for the user so that they can ask questions to the chatbot.
- Then we will create a section using the div tag in which the answer will be displayed.
- There is all the HTML code for the Chatbot. Now, you can see output without CSS and JavaScript. then we write Css and JavaScript for the Chatbot.
Let’s have a look at our chatbot webpage now that we’ve added structure.
Chatbot CSS Code:-
* < margin: 0; padding: 0; box-sizing: border-box; >body < width: 100vw; height: 100vh; font-family: sans-serif; padding: 10em 10em; background: url(./bg.jpg); opacity: 0.5; background-position: center; background-repeat: no-repeat; background-position: 100% 20%; background-size: cover; display: flex; align-items: center; justify-content: space-between; >.glass < width: 500px; height: 400px; background-color: rgba(255, 255, 255, 0.1); padding: 50px; color: #000; border-radius: 9px; backdrop-filter: blur(50px); border: 2px solid transparent; background-clip: padding-box; box-shadow: 10px 10px 10px rgba(45, 55, 68, 0.3); line-height: 1.5; transform: translatey(-5%); transition: transform 0.5s; >.glass-1 < width: 500px; height: 400px; background-color: rgba(255, 255, 255, 0.1); padding: 50px; color: rgb(122, 82, 82); border-radius: 9px; backdrop-filter: blur(50px); border: 2px solid transparent; background-clip: padding-box; box-shadow: 10px 10px 10px rgba(45, 55, 68, 0.3); line-height: 1.5; transform: translatey(-5%); transition: transform 0.5s; font-size: 1.7rem; >.glass h1 < font-size: 1.5rem; text-align: center; >.glass h2 < font-size: 1rem; margin-top: 20px; >.input < width: 100%; height: 70px; overflow: hidden; margin-top: 40px; >.input input < width: 100%; height: 70px; border: none; padding-left: 30px; padding-top: 0; outline: none; font-size: 1.5rem; border-radius: 20px; >.glass p
Step1:The margin and padding will be set to “zero” using the universal tag selector (*), and the box-sizing attribute will be used to set the box-sizing to “border-box.”
We’ll set the width and height to 100vw and 100vh, respectively, using the body tag selector. The body’s typeface is specified to be “sans-serif.” We have added an image to our chatbot using the URL and the background parameter. The display was set to “flex.”
Step2:We will now adjust the width and height to 500 pixels and 400 pixels, respectively, using the class selector (.glass). We will specify a border-radius of 9 pixels using the border-radius attribute. Using the backdrop filter, we will add a filter to the background and give our glass container a blurred backdrop.
We’ll now style the components inside of our glass container. Our h1 heading will have a font size of 1.5 rem, and the content will be centred by utilising the text-align attribute. The remaining elements will also get style in a similar manner.
.glass < width: 500px; height: 400px; background-color: rgba(255, 255, 255, 0.1); padding: 50px; color: #000; border-radius: 9px; backdrop-filter: blur(50px); border: 2px solid transparent; background-clip: padding-box; box-shadow: 10px 10px 10px rgba(45, 55, 68, 0.3); line-height: 1.5; transform: translatey(-5%); transition: transform 0.5s; >.glass-1 < width: 500px; height: 400px; background-color: rgba(255, 255, 255, 0.1); padding: 50px; color: rgb(122, 82, 82); border-radius: 9px; backdrop-filter: blur(50px); border: 2px solid transparent; background-clip: padding-box; box-shadow: 10px 10px 10px rgba(45, 55, 68, 0.3); line-height: 1.5; transform: translatey(-5%); transition: transform 0.5s; font-size: 1.7rem; >.glass h1 < font-size: 1.5rem; text-align: center; >.glass h2 < font-size: 1rem; margin-top: 20px; >.input < width: 100%; height: 70px; overflow: hidden; margin-top: 40px; >.input input < width: 100%; height: 70px; border: none; padding-left: 30px; padding-top: 0; outline: none; font-size: 1.5rem; border-radius: 20px; >.glass p
Chat Bot Html Css Output Update:-
Chatbot JavaScript Code:-
function talk()< var know = < "Who are you" : "Hello, Codewith_random here ", "How are you" : "Good :)", "What can i do for you" : "Please Give us A Follow & Like.", "Your followers" : "I have my family of 5000 members, i don't have follower ,have supportive Famiy ", "ok" : "Thank You So Much ", "Bye" : "Okay! Will meet soon.." >; var user = document.getElementById('userBox').value; document.getElementById('chatLog').innerHTML = user + "
"; if (user in know) < document.getElementById('chatLog').innerHTML = know[user] + "
"; >else< document.getElementById('chatLog').innerHTML = "Sorry,I didn't understand
"; > >
We’ll build a function called talk() in our javascript, and inside of it, we’ll establish an object variable in which we’ll store the number of strings before using the document.
We will choose the HTML element using the getelementbyId () method, and we will use the if statement to determine whether or not the asked question is stored in the function. If so, the solution will be displayed. Otherwise, “Sorry, I didn’t understand” will appear.
Final Output Of Chatbot Using Html Code:-

Chatbot using HTML , CSS & JavaScript

Here is our updated output with javascript. Hope you like the Chatbot. you can see the output video and project screenshots. See our other blogs and gain knowledge in front-end development. Thank you!
Written by – Code With Random/Anki
Which code editor do you use for this Chatbot project coding?
I personally recommend using VS Code Studio, it’s straightforward and easy to use.
is this project responsive or not?
Yes! this project is a responsive project.
Do you use any external links to create this project?
Similar Posts
How to Add Search Icon in Input field Using HTML and CSS
How to Add Search Icon in Input field Using HTML and CSS Hello Coder! A very warm welcome to the Codewithrandom blog. Today we are Going to…
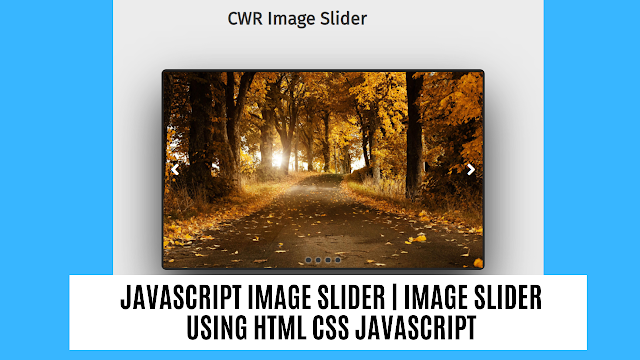
Create Image Slider Using HTML,CSS and JavaScript
Create Image Slider Using HTML,CSS and JavaScript Welcome to the Codewithrandom blog. In this blog, we learn how to create an Image Slider. We use HTML, CSS,…
Feedback Reaction Design Using HTML and CSS
Feedback Reaction Design Using HTML and CSS Welcome to the Codewithrandom blog. In this blog, We learn how to create a Feedback Reaction Design. We use HTML and CSS for…
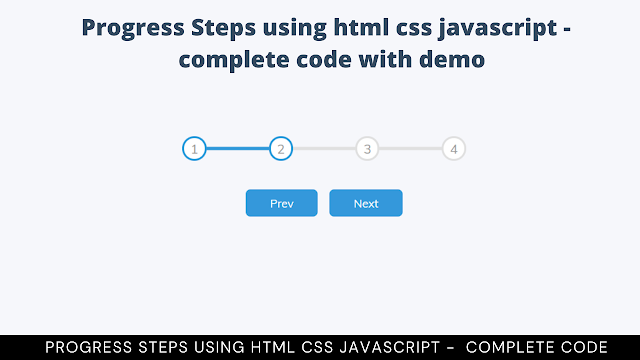
Progress Bar With Steps using HTML, CSS, and JavaScript
Progress Bar With Steps using HTML, CSS, and JavaScript Hello coders! Welcome to the Codewithrandom blog. In this tutorial, We learn How to create a Progress Bar With Steps using…
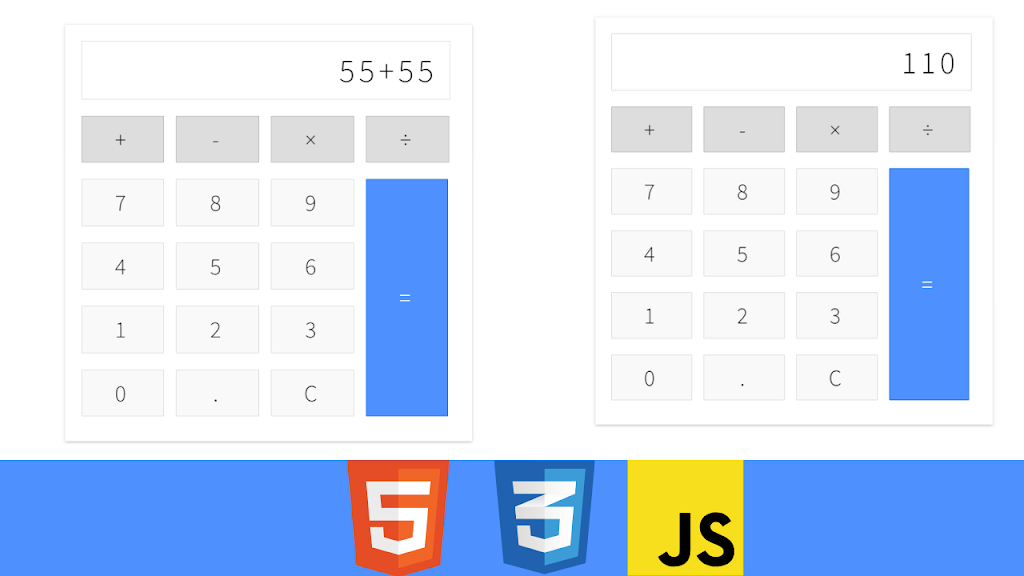
Create Calculator Using JavaScript
Calculator Using HTML, CSS, and JavaScript Hello Coder! Welcome to the Codewithrandom blog. This blog teaches us how to create a Calculator Using Html, Css, and JavaScript Code. We…
17 CSS Slideshows (Example + Free Code )
CSS Slideshow Welcome to Codewithrandom with a new blog today we’ll see how to make a CSS Slideshow. Here is the Latest Collection of free CSS Slideshow Examples and Source…
How TO — Chat

Nah, I dunno. Play soccer.. or learn more coding perhaps?
How To Create Chat Messages
Step 1) Add HTML:
Example
Hello. How are you today?
![]()
Hey! I’m fine. Thanks for asking!
Sweet! So, what do you wanna do today?
![]()
Nah, I dunno. Play soccer.. or learn more coding perhaps?
Step 2) Add CSS:
Example
/* Chat containers */
.container border: 2px solid #dedede;
background-color: #f1f1f1;
border-radius: 5px;
padding: 10px;
margin: 10px 0;
>
/* Darker chat container */
.darker border-color: #ccc;
background-color: #ddd;
>
/* Clear floats */
.container::after content: «»;
clear: both;
display: table;
>
/* Style images */
.container img float: left;
max-width: 60px;
width: 100%;
margin-right: 20px;
border-radius: 50%;
>
/* Style the right image */
.container img.right float: right;
margin-left: 20px;
margin-right:0;
>
/* Style time text */
.time-right float: right;
color: #aaa;
>
/* Style time text */
.time-left float: left;
color: #999;
>
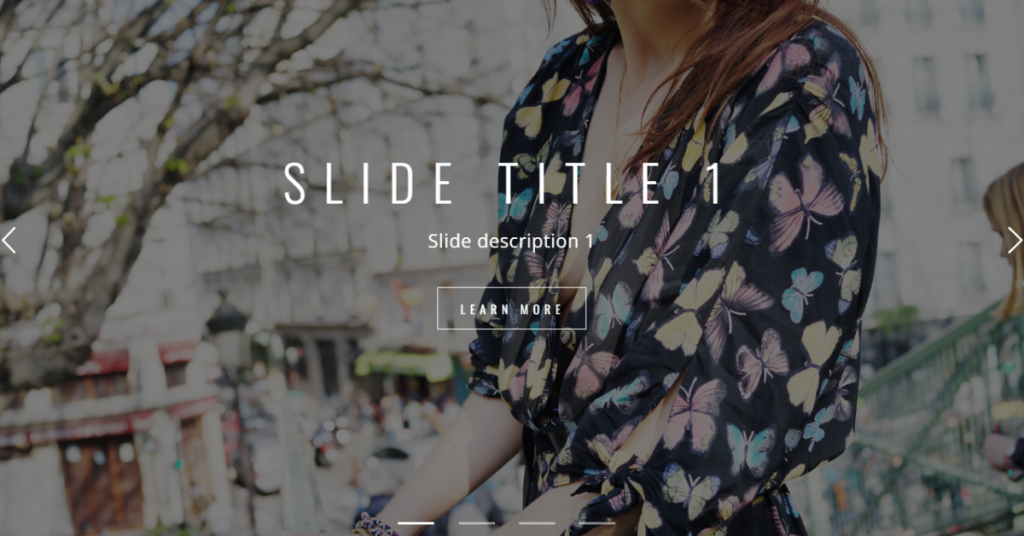
Create Chat App Using HTML and CSS (Source Code)
Hello guys, and welcome to the blog, In this blog, we are going to see how to create a chat app UI with help of HTML and CSS. Now lets we see a project intro.
In this chat app UI project, the user can first create their account and then they can search for other users over the internet, then start making they’re communicating with them.
You can view the other user’s profile cards and share your thoughts with them by chatting, sending pictures/videos, and even we can send voice messages to them. The insight we could also share our personnel documents and links to whom we want to share.
Also, that stuff was included in this project as a UI so as a first step now let’s get started with adding our HTML code.
Do you want to learn HTML to JavaScript? 🔥
If yes, then here is our Master Frontend: Zero to Hero eBook! 📚 In this eBook, you’ll learn complete HTML, CSS, Bootstrap, and JavaScript from beginner to advance level. 💪 It includes 450 Projects with source code.
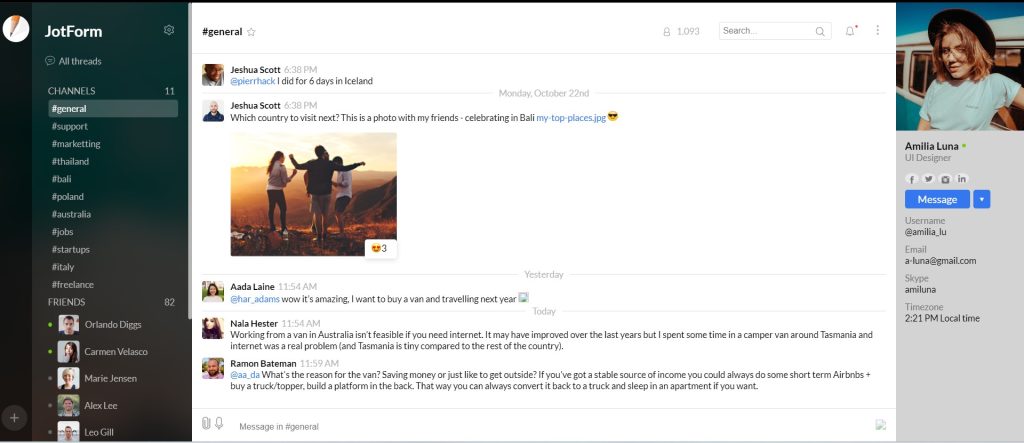
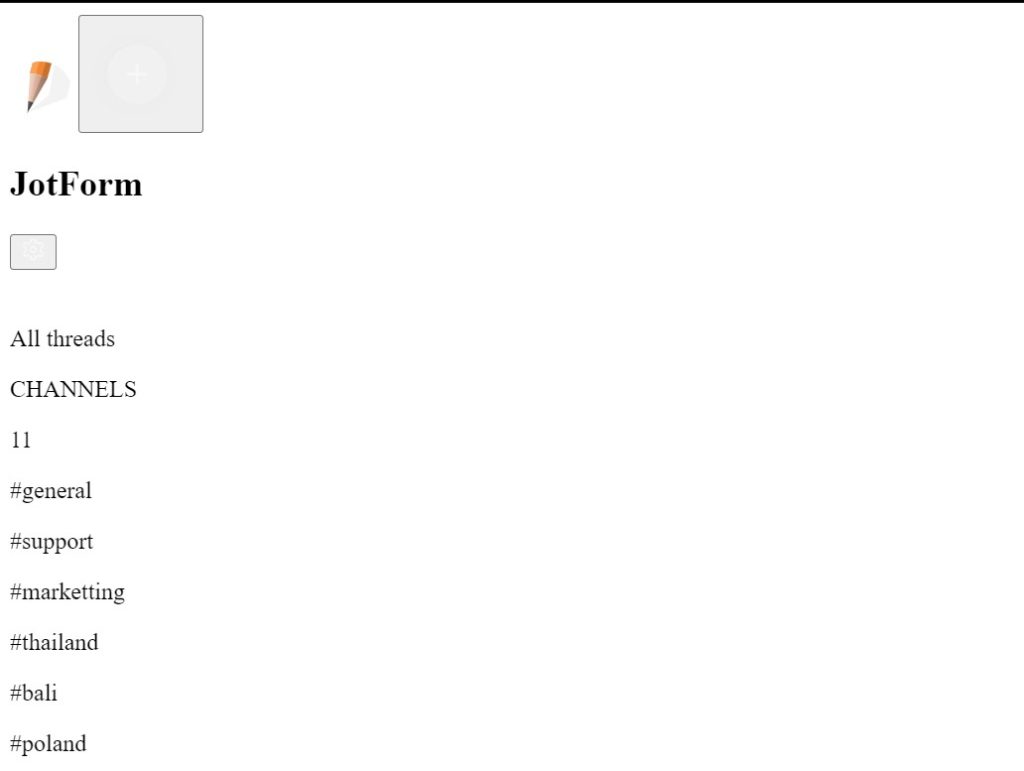
Html Code For Chat App UI:
JotForm
All threads
CHANNELS
11
#general
#support
#marketting
#thailand
#bali
#poland
#australia
#jobs
#startups
#italy
#freelance
FRIENDS
82
Orlando Diggs

Carmen Velasco
Marie Jensen
Alex Lee
Leo Gill
Britney Cooper
Aada Laine
Harold Adams
Jeshua Stout
Nala Hester
Ramon Bateman
#general
1.093
Jeshua Scott
6:38 PM
@pierrhack I did for 6 days in Iceland
Monday, October 22nd
Jeshua Scott
6:38 PM
Which country to visit next? This is a photo with my friends - celebrating in Bali my-top-places.jpg
3
Yesterday
Aada Laine
11:54 AM
@har_adams wow it’s amazing, I want to buy a van and travelling next year
Today
Nala Hester
11:54 AM
Working from a van in Australia isn’t feasible if you need internet. It may have improved over the last years but I spent some time in a camper van around Tasmania and internet was a real problem (and Tasmania is tiny compared to the rest of the country).
Ramon Bateman
11:59 AM
@aa_da What's the reason for the van? Saving money or just like to get outside? If you've got a stable source of income you could always do some short term Airbnbs + buy a truck/topper, build a platform in the back. That way you can always convert it back to a truck and sleep in an apartment if you want.
Amilia Luna
UI Designer
MessageUsername
@amilia_lu
[email protected]
Skype
amiluna
Timezone
2:21 PM Local time


Now we have added our HTML code successfully. In this code, we first added the header section with div elements and then we added our links inside every div element and also created several buttons with button html tags.
And then we are adding icons for sending messages/voice messages and documents sharing a purpose with an image tag also input field is declared for typing messages by the user to share with a send icon.
100+ front-end projects for web developers (source code)
We mostly included the latest version of html which is html 5 for adding some additional features. With h1 tags we are done adding our headings and then with paragraph and anchor tags, we finished adding paragraphs and links. Likewise, we are adding every element with specific html tags.
So now we are done with html, now we start styling our project with CSS.
HTML Output:
CSS Code For Chat App UI:
* < box-sizing:border-box; outline:none; >body,html < margin:0 auto; height:100%; color:#FFFFFF; font-family: 'Lato', sans-serif; >h2,p < margin:0; >p < font-size:14px; color:#B5B5B5; >.jotform-page < height:100%; display:flex; >.left-area < display:flex; background-image:url("https://i.ibb.co/S7ZrZnG/image.png"); background-repeat: no-repeat; background-attachment: fixed; height:100%; width:300px; >.icon-area < display:flex; flex-direction:column; justify-content:space-between; background-color: rgba(0,0,0,.88); width:50px; height:100%; padding:20px 5px 0 5px; align-items:center; >.contacts-area < background-color:rgba(0,0,0,.76); width:250px; height:100%; padding:30px 16px 0 20px ; overflow:auto; >.header < display:flex; justify-content:space-between; align-items:center; margin-bottom:24px; >.threads < display:flex; margin-bottom:24px; font-size:14px; >.icon < /* margin-right:5px;*/ >.channel , .friends < display:flex; justify-content:space-between; font-size:14px; padding:5px; >.channel-list < padding-left:6px; >.channel-name < display:flex; padding:5px; font-size:14px; >.selected < background:rgb(255,255,255,0.2); border-radius:4px; >.selected > p < color:rgb(255,255,255); >::-webkit-scrollbar < width: 6px; border-radius:10px; >::-webkit-scrollbar-track < background:none; >::-webkit-scrollbar-thumb < background: #B5B5B5; border-radius: 10px; >.friend-list < padding:5px; >.friend-info < display:flex; align-items:center; >.friend-info * < margin-right:8px; margin-bottom:8px; >.photo < border-radius:4px; width:34px; height:34px; >.message-area < height:100%; width:calc(100% - 500px); >.message-header < height:80px; border-bottom:1px solid #ddd; padding:30px 5px 5px 16px; >.message-wrapper < display:flex; justify-content:space-between; >.left > h2 < color:black; font-size:16px; >.left , .right < display:flex; align-items:center; >.right * < margin-right:5px; >input < padding:6px; border-radius:4px; border:1px solid #ddd; margin:0 20px; >button < background:none; border:none; >.notification < display:flex; backround:rgb(255,255,255); >.red-dot < margin-top:-10px; margin-left:-4px; >.search-icon < margin-left:-30px; >.wrapper < display:flex; align-items:center; margin-left:20px; >.info > h2 < color:black; font-size:14px; margin-right:5px; >.info < display:flex; >.container < display:flex; >.message < color:rgb(0,0,0); >.chat-break < position:relative; display:flex; align-items:center; justify-content:center; margin-bottom:10px; >.line < width:100%; border-bottom:1px solid #ddd; border-top:none; border-right:none; border-left:none; >.date-info < position:absolute; background:white; >.chat-area < padding:16px; >.container > .photo < margin-right:10px; >.container < padding:0 0 10px 0; >span.extension < color:rgb(53,119,239); >.content-image < max-width:100%; >.content < >.attachment < position:relative; max-width:260px; margin:14px 0; >.content-image < border-radius:4px; >.reaction < display:flex; position:absolute; border-radius:4px; padding: 5px 10px; width:50px; height:30px; background:#FFFFFF; box-shadow: 0px 2px 8px rgba(0, 0, 0, 0.14); bottom:0; right:0; >.icon < width:16px; height:16px; bottom:0; >.reaction > p < color:black; >.message-area < height:100%; display:flex; flex-direction:column; >.chat-area < flex:1; overflow:auto; border-bottom:1px solid #ddd; >.type-area < display:flex; align-items:center; justify-content:space-between; vertical-align:middle; padding:10px ; >.type-icon < width:20px; opacity:.5; >.type-icon:hover < opacity:.7; >.date-info < padding:0 10px; >.type-input < border:none; >.info-area < flex-shrink:0; width:200px; height:100%; background-color:#D3D3D3; overflow:auto; >.profile-photo < background-image:url("https://images.unsplash.com/photo-1513772051905-d2acb1dc5bb1?ixlib=rb-1.2.1&auto=format&fit=crop&w=1534&q=80"); background-repeat: no-repeat; background-position:center; background-size:cover; height:200px; >.info-content < padding:14px; >.info-wrapper > h2 < color:black; font-size:16px; margin-right:5px; >.info-header >p < color:#767676; >.info-header < margin-bottom:16px; >.info-wrapper < display:flex; align-items:center; >.button-wrapper > .button-message < font-size:16px; background:#3577EF; color:#FFFFFF; border-radius:4px; padding:5px 20px ; margin-right:5px; >.button-message:hover < background:#0462BB; >.button-wrapper < display:flex; align-items:center; >.faded < color:#737373; >.dark < color:black; >.personal-info < margin-top:10px; >.social-icon < width:22px; heigt:20px; border-radius:50%; background-color:#E8E8EB; padding:2px; >.social < display:flex; justify-content:space-between; width:100px; margin-bottom:10px; >.facebook , .instagram < padding-top:4px; >.icon:hover < opacity:.7; >.arrow < width:7px; >.option < background:#3577EF; padding:7px 10px; border-radius:4px; >.option:hover < background:#0462BB; >.threads .icon < margin-right:6px; >.star < margin-left:6px; >/* @media screen and (max-width:600px) < .contact-area< display:none; >.info-area < display:none; >.message-area < width:calc(100% - 300px); >>*/ @media screen and (max-width:1050px) < .info-area< display:none; >.message-area < width:calc(100% - 300px); >> @media screen and (max-width:850px) < .contacts-area< display:none; >.message-area < width:calc(100% - 50px); >.left-area < width:50px; >> @media screen and (max-width:575px) < .right< display:none; >> Now the CSS code has been successfully added. In this code we firstly styled and fixed values for elements in the body section, then we just started adding several CSS properties like width, height, and background to each and every element of the html code.
Then we added the latest version of CSS which is css3 to support additional features. And moreover, other common properties like margins, padding, color, overflow, z-index were repeated in every element. So the code won’t be more complex as you think.
And that’s off, we are done with our CSS code. Now the coding part is completed but there is one more left which is the project preview and that will be available in the output section.