- How to Install PHP Extensions from Source
- Booting the VM
- Prepping the Environment
- Ubuntu
- Fedora
- RHEL
- Suse
- Installing Extensions
- Installing a bundled extension
- Installing a third party extension
- Enabling and Testing
- Removing Extensions
- Conclusion
- Share This Article
- Установка PHP-расширения в Windows
- Где найти расширение?
- Какое расширение нужно загрузить?
How to Install PHP Extensions from Source
Sometimes it’s hard to know which PHP extensions you’ll need before you install PHP. In cases where you need to add extensions later on, you might get lucky and the extension could be in the repository of the OS you’re using. It might just be a simple sudo apt-get install php5-intl away. In other cases, however, you might need to install it from source – Phalcon is one such case, but it makes the procedure extremely simple by introducing vendor support, shortcuts and pre-written instructions for your OS to carry out. What if there’s no such thing for other extensions, though?
In this tutorial, we’ll go through installing some custom extensions on Linux systems (and OS X – the process is nearly identical). The procedure is very similar to what we already did on Nitrous.io, but adapted for local environments – more specifically, Laravel Homestead. You can easily derive installation instructions from this tutorial and apply them to other distros.
Booting the VM
If you haven’t already, read the Homestead post linked above and get it up and running. Immediately after running a new Homestead box, you should be able to do this:
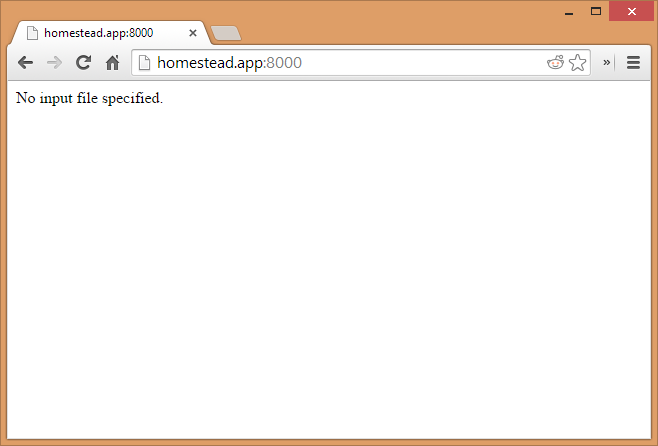
That’s perfectly fine, this happens because the folder that’s mounted by default actually doesn’t contain any files yet. Now vagrant ssh into the VM, and execute the following commands:
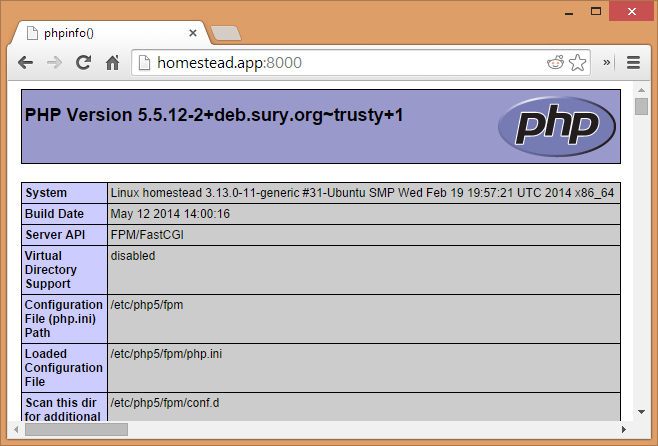
cd Code git clone https://github.com/Swader/publicinfoThis creates a valid PHP Info file in the path that Homestead is set to by default. Refreshing the URL will now produce a PHPInfo screen:
Prepping the Environment
To build extensions from source, we need the PHP dev tools installed on our machine, as well as a compiler that can produce the extension file. Here’s how you install these prerequisites on various operating systems:
Ubuntu
sudo apt-get install php5-dev php5-mysql gcc libpcre3-devFedora
sudo yum install php-devel php-mysqlnd gcc libtoolRHEL
sudo yum install php-devel php-mysql gcc libtoolSuse
yast2 -i php5-pear php5-devel php5-mysql gccIf you’re using the most recent Homestead, all these tools will already be installed for you. With everything prepared, let’s start installing extensions.
Installing Extensions
There are two types of extensions you can install: bundled with PHP but not installed by default, and third party extensions. Third party extensions like Phalcon usually make the installation process much easier by providing shortcuts, as they don’t have to comply to certain traditions bundled PHP extensions are bound by.
First, let’s move into the home folder on the vm: cd ~ . In there, make a downloads folder, and cd into it. When installing a bundled extension, you’ll need the source code of PHP on your machine, preferably one matching your current version. The version Homestead uses is 5.5.12, so I’ll be downloading that one:
wget http://be2.php.net/distributions/php-5.5.12.tar.bz2 tar xvjf php-5.5.12.tar.bz2 cd php-5.5.12I’m using the Belgian mirror above, feel free to use that one or any other from the download archives.
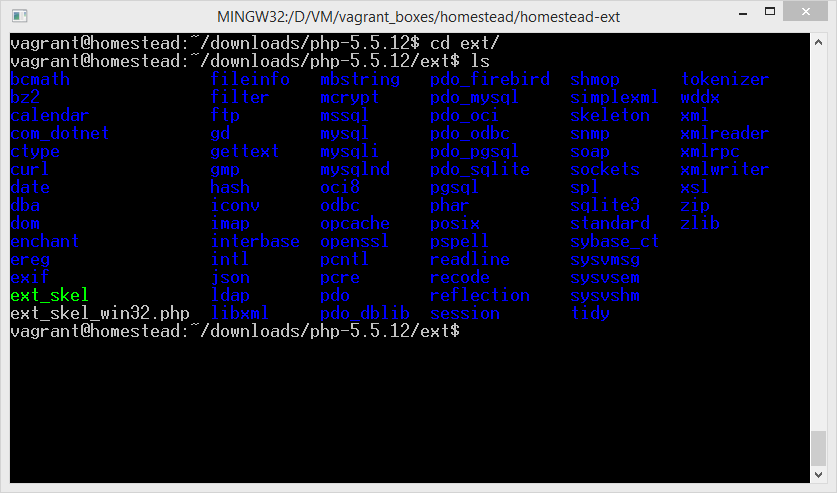
To see the sources of all bundled extensions, go into the ext folder inside the unarchived PHP source code folder and do a list with ls .
Installing a bundled extension
First, we’ll install the PHP-intl extension if you don’t have it installed already. If you do, that’s fine – the installation procedure you’ll see below is identical for every bundled PHP extension. The intl extension is for internationalization – read more here if you’re interested.
Seeing as the intl extension needs the ICU library as a prerequisite (as stated in the requirements), let’s install that first.
sudo apt-get install icu-devtools icu-doc libicu-dev libicu52 libicu52-dbgUnder other distributions, the installation instructions may vary. It’s best if you refer to the ICU site or your individual distribution’s docs for this step.
Once ICU is installed, do the following while still in the ext folder:
cd intl phpize ./configure --enable-intl make sudo make installLet’s explain what’s going on.
- phpize prepares the extension’s folder for compliation. It allows you to do the subsequent commands by creating a configure file, and basically making the extension’s folder “think” it’s PHP itself. The procedure after phpize is, in fact, identical to what you would do when installing PHP from source – only in this case, just a fragment of PHP is compiled and prepared for use with the already compiled and installed PHP.
- ./configure —enable-intl configures the environment for compilation. It prepares everything the compiler will need to craft the intl.so file which we’ll be using. The enable-intl flag is necessary even though we’re in the intl folder because the folder, effectively, thinks it is PHP, and we need to help it live that illusion. This command tells it: “Ok, you’re PHP’s source code. Now compile and install with the intl extension.”, when in fact, it’s the only part that can be installed from this folder.
- make will compile the sources into intl.so , placing the file into the very folder you’re currently in, under the modules subfolder.
- sudo make install will move this file into the current PHP installation’s extensions folder.
All we need to do now is enable the extension by having php.ini consume it. We’ll do that later, let’s compile a third party extension first.
Installing a third party extension
We’ll be installing Mongo as a third party extension. There are binary distributions available for Mongo which make installation simpler, but let’s do it manually for the sake of education. We’ll assume you already have the actual Mongo installed, and are thus focusing only on the PHP extension. If you don’t have Mongo installed, refer to their installation docs.
git clone https://github.com/mongodb/mongo-php-driver cd mongo-php-driver phpize ./configure make sudo make installThis has built our mongo.so file, and placed it into the extensions folder of our PHP installation. We’ll enable it in the next section.
Enabling and Testing
To see if the compiled .so files are indeed in our PHP extensions folder, list out its contents:
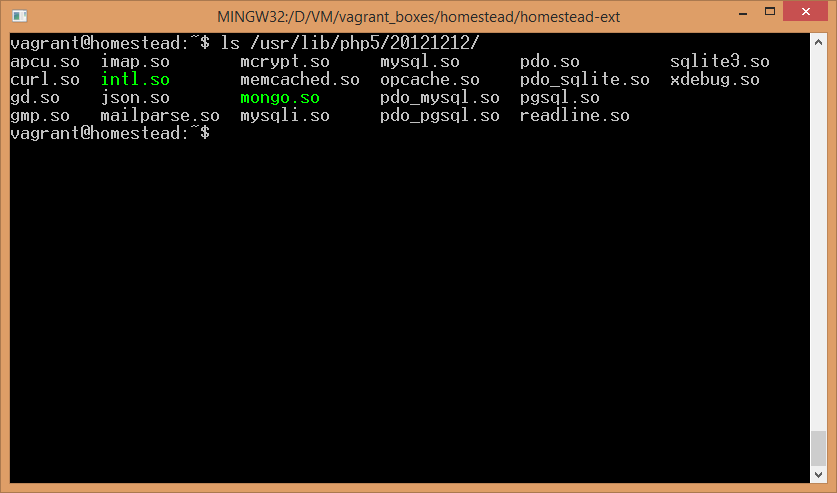
As you can see, there they are, highlighted in bright green.
To enable them, we need to tell php.ini about them. There are several ways to do this:
- You can put the lines extension=mongo.so and extension=intl.so directly into php.ini . This works, and is a perfectly valid approach in most cases.
- You can create a separate ini file for each of these, put them in a folder that gets auto-included after php.ini is loaded, and maintain separation and isolation of php.ini that way. This approach is healthier, though harder to accomplish.
- You can combine 2) and the default tools for enabling PHP mods. Homestead uses this approach, and so will we.
This folder is the repository of all such individual ini files. Create two new files here:
sudo touch mongo.ini echo "extension=mongo.so" | sudo tee -a mongo.ini sudo touch intl.ini echo "extension=intl.so" | sudo tee -a intl.iniThese commands created two new ini files, each for one of the extensions we’ve previously built. As they are now in the mods-available folder, we can use the already available php5enmod (short for PHP enable mod) command line tool.
sudo php5enmod mongo sudo php5enmod intlNote: If you don’t have the php5enmod tool, symlinking the ini files into the conf.d folder of various php runtimes will do the trick:
ln -s /etc/php5/mods-available/mongo.ini /etc/php5/cli/conf.d/mongo.ini ln -s /etc/php5/mods-available/intl.ini /etc/php5/cli/conf.d/intl.ini ln -s /etc/php5/mods-available/mongo.ini /etc/php5/fpm/conf.d/mongo.ini ln -s /etc/php5/mods-available/intl.ini /etc/php5/fpm/conf.d/intl.iniThe reason why there’s four entries is that we have the command line version of PHP and the FPM version of PHP. Each uses its own php.ini file, and each loads its own conf.d folder for extensions – hence, we need to add both extensions to both PHP versions if we want the extensions available all-around. Use this approach only if you don’t have the php5enmod tool.
Finally, let’s restart nginx and php-fpm to load these changes.
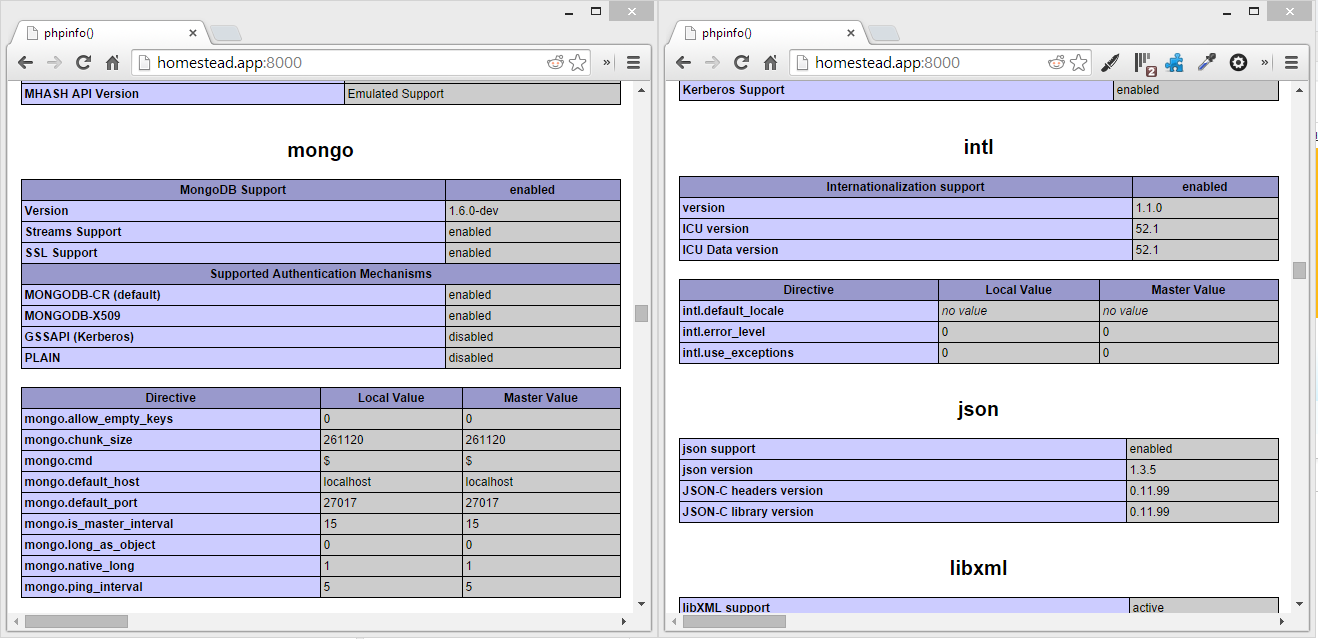
sudo service nginx restart sudo service php5-fpm restartTo see if we’ve got them installed, refresh the PHPinfo screen from before and search for mongo and intl respectively.
Removing Extensions
To remove extensions, there’s no need to delete any actual files unless you’re really low on space. You can do it in three ways:
- Run php5dismod if you have the tool available. It’s the opposite of the php5enmod tool mentioned above. The .so files will stay in place, and the ini files will remain in mods-available , they just won’t load because their symlinks will be removed from the fpm and cli conf.d folders.
- Remove the symlinks manually. E.g. sudo rm /etc/php5/cli/conf.d/mongo.ini
- If you enabled the extensions by putting them directly into the php.ini files, remove those lines from the php.ini files, or better yet, comment them so that they remain accessible for further use should you ever change your mind.
Conclusion
As you can see, installing extensions from source is extremely simple, even if there are no precise instructions and even if the extension isn’t supported by an OS’s official repository. The next time you need to add an extension into your PHP installation on a *nix system (this tutorial applies to OS X as well), refer back to this post for a refresher.
Please leave your feedback below, and let me know if you’re confused by a specific extension and would like help with installing it.
Share This Article
Bruno is a blockchain developer and technical educator at the Web3 Foundation, the foundation that’s building the next generation of the free people’s internet. He runs two newsletters you should subscribe to if you’re interested in Web3.0: Dot Leap covers ecosystem and tech development of Web3, and NFT Review covers the evolution of the non-fungible token (digital collectibles) ecosystem inside this emerging new web. His current passion project is RMRK.app, the most advanced NFT system in the world, which allows NFTs to own other NFTs, NFTs to react to emotion, NFTs to be governed democratically, and NFTs to be multiple things at once.
Установка PHP-расширения в Windows
В Windows есть два способа загрузки PHP-расширения: скомпилировать его вместе с PHP или загрузить DLL. Загрузка заранее скомпилированного расширения является наиболее простым и предпочитаемым способом.
Для загрузки расширения, оно должно присутствовать на вашей системе в виде «.dll» файла. Все расширения автоматически и периодически компилируются командой PHP (см. следующий раздел для загрузки).
За инструкциями по компиляции расширения в PHP обратитесь к разделу «Сборка из исходников».
Для компиляции отдельного расширения (или DLL-файла), обратитесь к разделу » Сборка из исходников». Если DLL-файла нет ни в стандартной поставке PHP ни в PECL, возможно, вам придется скомпилировать его вручную.
Где найти расширение?
PHP-расширения обычно имеют имена вида «php_*.dll» (где звездочка обозначает имя расширения) и располагаются в папке «PHP\ext».
PHP поставляет расширения наиболее полезные большинству разработчиков. Такие расширения называются «основными» («core»).
Однако, если вам требуется функционал, который не предоставляется ни одним из основных расширений, возможно, нужное вам расширение есть в PECL. Библиотека расширений сообщества PHP (The PHP Extension Community Library, PECL) является хранилищем расширений PHP, предоставляя каталог и хостинг всех известных расширений для скачки и дальнейшей разработки расширений в PHP.
Если вы разработали какое-либо расширение для собственных нужд, возможно, вы захотите хранить его в PECL, так, чтобы другие также могли воспользоваться результатами вашего труда. Хорошим побочным эффектом будет неплохой шанс получить обратную связь, благодарности (надеемся, что так и будет), сообщения об ошибках и даже исправления/патчи. Пожалуйста, прочтите » публикация PECL; перед отправкой вашего расширения в PECL.
Какое расширение нужно загрузить?
- Различные номера версий (по крайней мере первые два числа должны совпадать)
- Различные настройки потокобезопасности
- Различная архитектура процессора (x86, x64, . )
- Различные настройки отладки
- и т.д.
Помните, что настройки ваших расширений должны совпадать со всеми настройками используемого вами бинарного файла PHP. Следующий PHP-скрипт выведет вам все настройки PHP:
Пример #1 Вызов phpinfo()
Или запустите из командной строки: