- matplotlib.pyplot.plot#
- Рисуем геометрические фигуры в Python с помощью Pillow
- Создание объекта Draw в Python
- Рисуем фигуры в Pillow: ellipse, rectangle и line
- Справочник по параметрам методов рисования
- Область рисования — xy
- Параметр fill — заполняем фигуру определенным цветом
- Параметр outline — цвет границ
- Параметр width — размер границ
- Рисование эллипса и прямоугольника в Python
- Matplotlib Line
- Example
- Result:
- Example
- Result:
- Shorter Syntax
- Example
- Result:
- Line Styles
- Line Color
- Example
- Result:
- Example
- Result:
- Example
- Result:
- Line Width
- Example
- Result:
- Multiple Lines
- Example
- Result:
- Example
matplotlib.pyplot.plot#
The coordinates of the points or line nodes are given by x, y.
The optional parameter fmt is a convenient way for defining basic formatting like color, marker and linestyle. It’s a shortcut string notation described in the Notes section below.
>>> plot(x, y) # plot x and y using default line style and color >>> plot(x, y, 'bo') # plot x and y using blue circle markers >>> plot(y) # plot y using x as index array 0..N-1 >>> plot(y, 'r+') # ditto, but with red plusses
You can use Line2D properties as keyword arguments for more control on the appearance. Line properties and fmt can be mixed. The following two calls yield identical results:
>>> plot(x, y, 'go--', linewidth=2, markersize=12) >>> plot(x, y, color='green', marker='o', linestyle='dashed', . linewidth=2, markersize=12)
When conflicting with fmt, keyword arguments take precedence.
Plotting labelled data
There’s a convenient way for plotting objects with labelled data (i.e. data that can be accessed by index obj[‘y’] ). Instead of giving the data in x and y, you can provide the object in the data parameter and just give the labels for x and y:
>>> plot('xlabel', 'ylabel', data=obj)
All indexable objects are supported. This could e.g. be a dict , a pandas.DataFrame or a structured numpy array.
Plotting multiple sets of data
There are various ways to plot multiple sets of data.
- The most straight forward way is just to call plot multiple times. Example:
>>> plot(x1, y1, 'bo') >>> plot(x2, y2, 'go')
>>> x = [1, 2, 3] >>> y = np.array([[1, 2], [3, 4], [5, 6]]) >>> plot(x, y)
>>> for col in range(y.shape[1]): . plot(x, y[:, col])
By default, each line is assigned a different style specified by a ‘style cycle’. The fmt and line property parameters are only necessary if you want explicit deviations from these defaults. Alternatively, you can also change the style cycle using rcParams[«axes.prop_cycle»] (default: cycler(‘color’, [‘#1f77b4’, ‘#ff7f0e’, ‘#2ca02c’, ‘#d62728’, ‘#9467bd’, ‘#8c564b’, ‘#e377c2’, ‘#7f7f7f’, ‘#bcbd22’, ‘#17becf’]) ).
Parameters : x, y array-like or scalar
The horizontal / vertical coordinates of the data points. x values are optional and default to range(len(y)) .
Commonly, these parameters are 1D arrays.
They can also be scalars, or two-dimensional (in that case, the columns represent separate data sets).
These arguments cannot be passed as keywords.
fmt str, optional
A format string, e.g. ‘ro’ for red circles. See the Notes section for a full description of the format strings.
Format strings are just an abbreviation for quickly setting basic line properties. All of these and more can also be controlled by keyword arguments.
This argument cannot be passed as keyword.
data indexable object, optional
An object with labelled data. If given, provide the label names to plot in x and y.
Technically there’s a slight ambiguity in calls where the second label is a valid fmt. plot(‘n’, ‘o’, data=obj) could be plt(x, y) or plt(y, fmt) . In such cases, the former interpretation is chosen, but a warning is issued. You may suppress the warning by adding an empty format string plot(‘n’, ‘o’, », data=obj) .
A list of lines representing the plotted data.
Other Parameters : scalex, scaley bool, default: True
These parameters determine if the view limits are adapted to the data limits. The values are passed on to autoscale_view .
**kwargs Line2D properties, optional
kwargs are used to specify properties like a line label (for auto legends), linewidth, antialiasing, marker face color. Example:
>>> plot([1, 2, 3], [1, 2, 3], 'go-', label='line 1', linewidth=2) >>> plot([1, 2, 3], [1, 4, 9], 'rs', label='line 2')
If you specify multiple lines with one plot call, the kwargs apply to all those lines. In case the label object is iterable, each element is used as labels for each set of data.
Here is a list of available Line2D properties:
a filter function, which takes a (m, n, 3) float array and a dpi value, and returns a (m, n, 3) array and two offsets from the bottom left corner of the image
Рисуем геометрические фигуры в Python с помощью Pillow

Модуль ImageDraw из библиотеки обработки изображений Pillow (PIL) предоставляет методы для рисования круга, квадрата и прямой линии в Python.
Создание объекта Draw в Python
Используя объекта Image мы создадим фоновое изображение на которой мы будем рисовать наши фигуры при помощи объекта Draw . Не забудьте импортировать модуль Image и ImageDraw в начале кода.
Здесь создается пустое изображение с размером 500 на 300 пикселей и с тёмно желтым фоном.

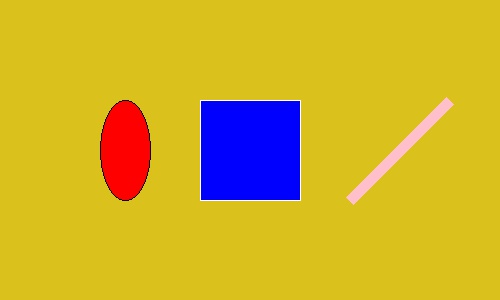
Рисуем фигуры в Pillow: ellipse, rectangle и line
Вызываем методы рисования из объекта Draw для рисования фигур на нашем желтом фоне.
Рисуем эллипс, прямоугольник и прямую линию в качестве примера.
Справочник по параметрам методов рисования
Даже если, способы рисования отличаются в зависимости от используемого метода, следующие параметры являются общими для всех.
Область рисования — xy
Параметр xy указывает прямоугольную область для рисования новой фигуры.
Уточняется один из следующих форматов:
- (((Верхняя левая x координата, Верхняя левая y координата), (нижняя правая x координата, нижняя правая y координата)) ;
- (Верхняя левая x координата, Верхняя левая y координата, нижняя правая x координата, нижняя правая y координата) .
В методах line() , polygon() и point() используются многочисленные координаты вместо двух точек, представляющих прямоугольную область.
Метод line() рисует прямую линию, которая связывает каждую точку, polygon() рисует многоугольник, а метод point() рисует точку в 1 пиксель для каждой указанной точки.
Параметр fill — заполняем фигуру определенным цветом
Параметр fill указывает какой цвет будет использован для заполнения нашей геометрической формы.
Спецификация формата цвета отличается в зависимости от указанного режима изображения (объект Image ):
- RGB : Указывает значение цвета в форме (R, G, B) ;
- L (Черно-белое): Указывает значение (0-255) как целое число).
Значение по умолчанию None (не заполнено).
Есть три способа указать цвет, возьмем красный цвет, его можно записать так:
- текстовый формат: red;
- CSS формат (Шестнадцатеричный): #FF0000
- RGB: (255, 0, 0)
Стоит учесть тот факт, что текстовый формат не имеет все цвета, кол-во доступных цветов ограничено в коде самой библиотеки. Вот весь список: https://github.com/python-pillow/Pillow/blob/8.1.0/src/PIL/ImageColor.py#L148
Лучше всего использовать шестнадцатеричный формат #FFFFFF (белый).
Параметр outline — цвет границ
Параметр outline указывает на цвет границы фигуры.
Спецификация формата цвета такая же, как и у параметра fill которого мы обсуждали выше. Значение по умолчанию равно None (без границ).
Параметр width — размер границ
Вне зависимости от рисуемой фигуры, вы можете указать размер в пикселях для границы фигуры.
Рисование эллипса и прямоугольника в Python
Метод ellipse() рисует эллипс, область рисования указывается в параметр xy . Если мы зададим четыре координата которые будут соответствовать квадрату, то у нас получится ровный круг.
Нарисуем небольшой смайл используя круги.
Matplotlib Line
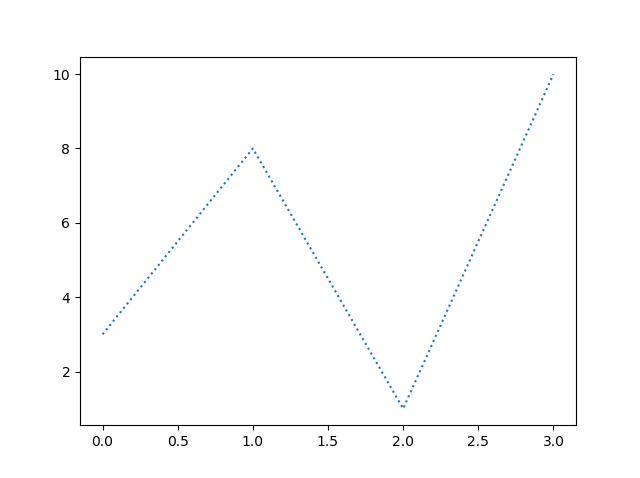
You can use the keyword argument linestyle , or shorter ls , to change the style of the plotted line:
Example
import matplotlib.pyplot as plt
import numpy as np
plt.plot(ypoints, linestyle = ‘dotted’)
plt.show()
Result:
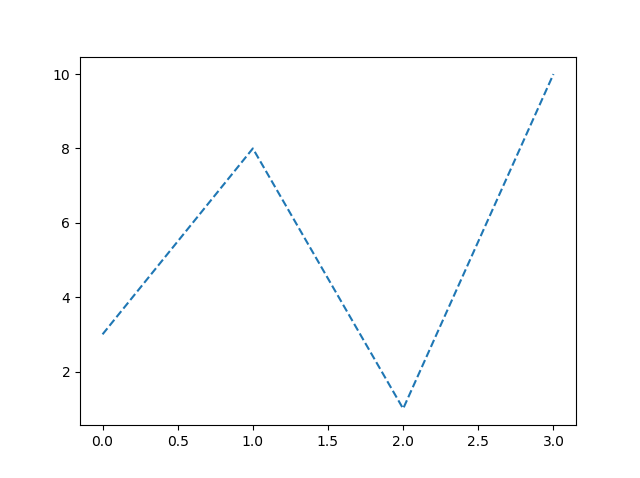
Example
plt.plot(ypoints, linestyle = ‘dashed’)
Result:
Shorter Syntax
The line style can be written in a shorter syntax:
linestyle can be written as ls .
Example
Result:
Line Styles
You can choose any of these styles:
| Style | Or | |
|---|---|---|
| ‘solid’ (default) | ‘-‘ | Try it » |
| ‘dotted’ | ‘:’ | Try it » |
| ‘dashed’ | ‘—‘ | Try it » |
| ‘dashdot’ | ‘-.’ | Try it » |
| ‘None’ | » or ‘ ‘ | Try it » |
Line Color
You can use the keyword argument color or the shorter c to set the color of the line:
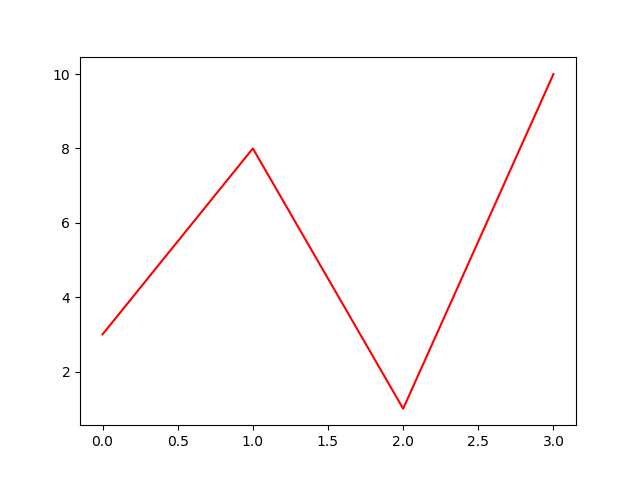
Example
Set the line color to red:
import matplotlib.pyplot as plt
import numpy as np
plt.plot(ypoints, color = ‘r’)
plt.show()
Result:
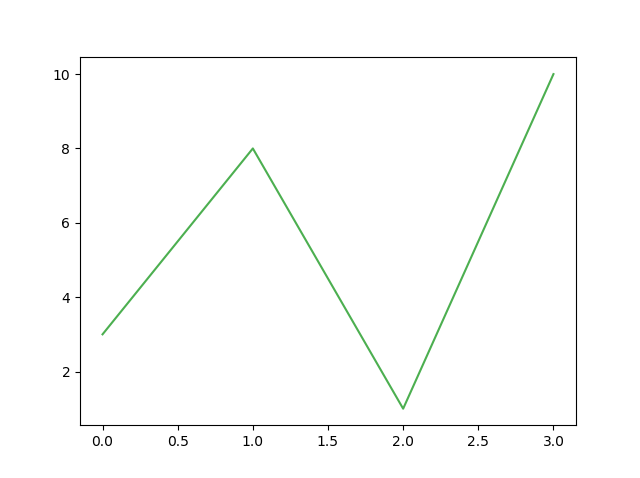
Example
Plot with a beautiful green line:
Result:
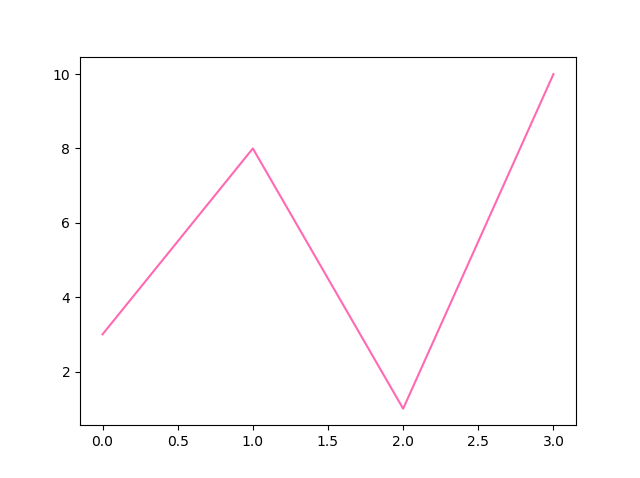
Example
Plot with the color named «hotpink»:
Result:
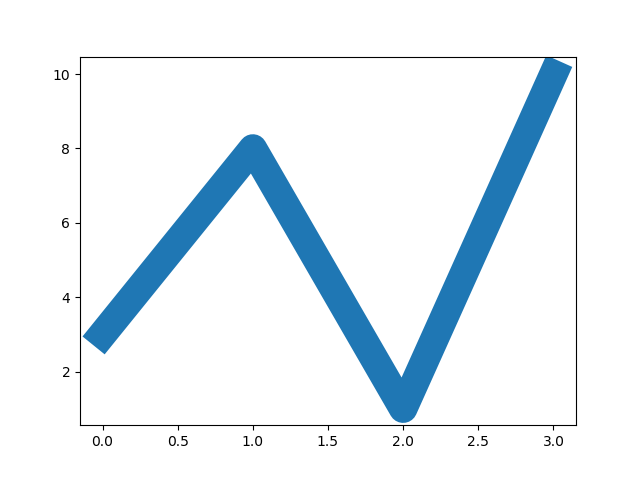
Line Width
You can use the keyword argument linewidth or the shorter lw to change the width of the line.
The value is a floating number, in points:
Example
Plot with a 20.5pt wide line:
import matplotlib.pyplot as plt
import numpy as np
plt.plot(ypoints, linewidth = ‘20.5’)
plt.show()
Result:
Multiple Lines
You can plot as many lines as you like by simply adding more plt.plot() functions:
Example
Draw two lines by specifying a plt.plot() function for each line:
import matplotlib.pyplot as plt
import numpy as np
y1 = np.array([3, 8, 1, 10])
y2 = np.array([6, 2, 7, 11])
Result:

You can also plot many lines by adding the points for the x- and y-axis for each line in the same plt.plot() function.
(In the examples above we only specified the points on the y-axis, meaning that the points on the x-axis got the the default values (0, 1, 2, 3).)
The x- and y- values come in pairs:
Example
Draw two lines by specifiyng the x- and y-point values for both lines:
import matplotlib.pyplot as plt
import numpy as np
x1 = np.array([0, 1, 2, 3])
y1 = np.array([3, 8, 1, 10])
x2 = np.array([0, 1, 2, 3])
y2 = np.array([6, 2, 7, 11])
plt.plot(x1, y1, x2, y2)
plt.show()