- Easy hamburger menu with JS — Beginners
- And that’s it!
- Thanks for reading 😄!!
- 10+ Hamburger Menu Examples [CSS Only]
- What Is A Hamburger Menu?
- Different Types Of CSS Hamburger Menu Icons
- 10 Amazing Hamburger Menu CSS Designs
- 1 Responsive CSS Hamburger Menu — CSS only
- 2. Simple Centred Hamburger Menu
- 3. Left Sliding Responsive Hamburger Menu
- 4. Full-screen Hamburger Menu
- 5. Hamburger menu animations
- 6. Snappy Sliding Hamburger Menu
- 7. Top Left Animated Hamburger Menu
- 8. Simple Left-Sliding Hamburger Menu Overlay
- 9. Animated Full Screen Hamburger Menu
- 10. Full Screen Morphing Hamburger Menu
- 11. Multi-Depth Hamburger Menu
- Takeaway
- Related articles
Easy hamburger menu with JS — Beginners
A hamburger menu is a classic UI feature present in countless websites. It’s used to show and hide a menu on click, especially used in mobile design. In this tutorial, we’ll learn to create a hamburger menu with HTML, CSS and Javascript. Here’s the HTML:
Begin by adding a basic menu with a class of menu and menu links with a class of menuItem . Then add a button with a class of hamburger and both a menu and a close icons inside of it. Later on we will hide the close icon by default with CSS and alternate which icon to show with Javascript. You can use any icons family you want. I’ve used material icons by loading their CDN in the head and adding the menu and close icons inside of the button. The menuIcon and closeIcon classes are used to reference the icons in CSS and Javascript later on. Now let’s add some CSS. Add to the button position: fixed; so scrolling won’t affect it. And z-index:100; to make sure it stays above every other element. Add top and right with a value of 1rem to place it at the top-right corner of the screen.
.hamburger position: fixed; z-index: 100; top: 1rem; right: 1rem; padding: 4px; border: black solid 1px; background: white; cursor: pointer; > In the menu class, add position: fixed; so it can’t be scrolled away. Set the top , right , bottom and left to 0 to make the menu cover the whole screen.
.menu position: fixed; transform: translateY(-100%); transition: transform 0.2s; top: 0; left: 0; right: 0; bottom: 0; z-index: 99; background: black; color: white; list-style: none; padding-top: 4rem; > - transform: translateY(-100%); is used to hide the menu by default above the screen.
- transition: transform 0.2s; is optional. It is used to animate the change in translation value to create a slide up/down effect.
By resetting translateY to 0, the menu will slide down and cover the whole screen.
Add it in a showMenu class:
.showMenu transform: translateY(0); > This class will be added and removed from the menu with Javascript to show and hide the menu.
Here’s the Javascript for toggling the menu:
const menu = document.querySelector(".menu"); const menuItems = document.querySelectorAll(".menuItem"); const hamburger= document.querySelector(".hamburger"); const closeIcon= document.querySelector(".closeIcon"); const menuIcon = document.querySelector(".menuIcon"); function toggleMenu() if (menu.classList.contains("showMenu")) menu.classList.remove("showMenu"); closeIcon.style.display = "none"; menuIcon.style.display = "block"; > else menu.classList.add("showMenu"); closeIcon.style.display = "block"; menuIcon.style.display = "none"; > > hamburger.addEventListener("click", toggleMenu); Clicking on the hamburger button will call toggleMenu() .
It checks if the menu contains the class showMenu .
If the menu contains the showMenu class, we remove it to hide the menu. We also toggle the display to hide the close icon and show the menu icon.
If the menu doesn’t have the showMenu class, we add it, show the close icon and hide the menu icon.
The hardest part is over! All that’s left is to hide the menu when the user click on the links.
In the Javascript above, we got all the menu items with querySelectorAll .
const menuItems = document.querySelectorAll(".menuItem"); With forEach , we can iterate through each link and add a call to toggleMenu() .
toggleMenu() will in turn hide the menu (because if the user can click on the menu items it means that the menu is showing).
menuItems.forEach( function(menuItem) menuItem.addEventListener("click", toggleMenu); > ) And that’s it!
Thanks for reading 😄!!
(2nd rewrite 01/10/21)
I hope you’ve found it useful and happy coding 👨💻!
10+ Hamburger Menu Examples [CSS Only]
On today’s menu are CSS hamburgers. A responsive way to display an off-canvas menu, using only HTML and CSS.
Every website needs to be responsive if it wants to be successful. Having a mobile-supported menu is vital to appeal to all audiences and devices. This is something which we will learn about in this article with how CSS responsive hamburger menus can help.
What Is A Hamburger Menu?
A Hamburger Menu is a way to display navigation links on a website, usually for mobile devices and smaller screens. However, CSS hamburger menus can be used for desktop websites as well. Once you click the “hamburger” icon, a sliding menu will appear, displaying on top of the main content.
They are also used when you have too many buttons and links on your header navigation bar. A responsive hamburger menu allows you to shrink all this into a more scalable menu design, creating a compact menu. Ideal for sticky navbars and one page websites.
As you might have guessed, it is called a hamburger menu because the icon looks like a stacked burger 😋

Different Types Of CSS Hamburger Menu Icons
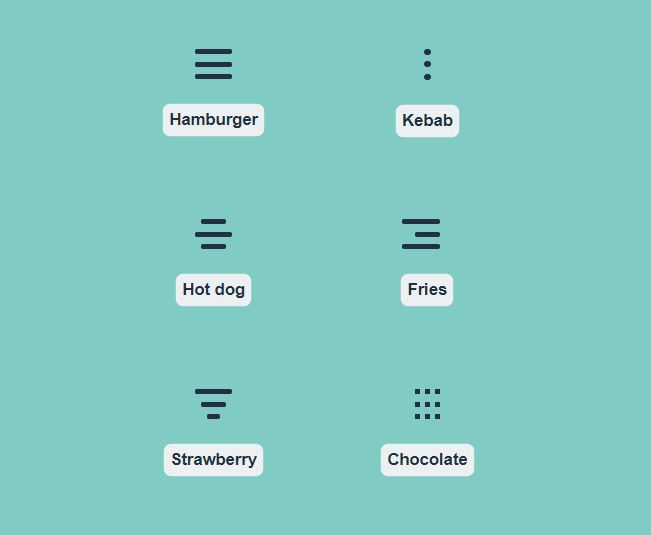
We know where the hamburger menu gets its name from but not all menu icons have to be the same. There are lots of different designs and icon animations to choose from, some of which you will see in our examples.
Consider the different icons above, not all will work for every website design but as you can see, these menu icons can be quite creative. The same goes for their animations.
10 Amazing Hamburger Menu CSS Designs
Now that we understand what a CSS hamburger menu is and its main purpose, let’s go through some examples and you can use yourself and get inspiration from them.
If you are looking to create a responsive design, mobile or just to fit more content in your navigation elements, a CSS responsive hamburger menu is one of the best solutions to go with.
1 Responsive CSS Hamburger Menu — CSS only
It’s quite common to have burger menus to replace standard horizontal menus on small viewports. This way, the menu becomes completely responsive and provides the best experience depending on the viewport size.
If that’s what you are looking for, this example will do exactly that, and with only CSS. To test it out open the codepen in a new window and resize the result panel.
On responsive mode, the hamburger menu will open the list of items one after the other in a vertical column coming from the top. Quite a standard behavior for mobile devices.
2. Simple Centred Hamburger Menu
This one is very simple but effective, it only uses HTML and CSS to pull off a hamburger menu with some cool animations.
The hamburger icon itself, when clicked transforms into a cross and works as the close button. The menu slides into view and displays in the centre with its navigation links.
If you like sliding menu designs and cool animations with many options, you may be interested in fullPage.js — A library that allows you to build full-width, full-screen web pages that are scrollable. It is even available for WordPress with Elementor and Gutenberg plugins and a WordPress theme.
3. Left Sliding Responsive Hamburger Menu
If you are looking for a more complete example of how a CSS hamburger menu can be useful, this CodePen renders an example website to showcase the use of the CSS hamburger menu.
It only uses pure HTML and CSS, so it is easy to learn from and understand what is happening. The menu icon is animated and transforms into a cross when the menu is open.
The menu itself slides out from the slide and overlays the main website. As this design is responsive, it will automatically hide the header menu and make the burger menu available once the screen width decreases.
If you are also interested in menus and not only on the hamburger elemenet, check out these examples of great side menus for your webpage!
4. Full-screen Hamburger Menu
Considering opening the menu element in full-screen? Then you’ll love this example. A CSS-only solution to display a burger menu and open it on a full-screen layer.
This kind of full-screen menus can come on handy when our menu has many items, sub-menus, or extra information.
5. Hamburger menu animations
If you are looking for different animations for your hamburger menu icon, you have to take a look at these ones.
It’s using a single line of JavaScript (or jQuery) to set the state of the burger. The rest is all pure CSS.
6. Snappy Sliding Hamburger Menu
A very snappy and slick CSS hamburger menu that only uses HTML and CSS to pull this off.
The menu itself quickly slides out from the left and does not take up the whole screen, just the left side. The menu items have a nice hover effect as well. And if this effect is not fancy enough for you, you can create a better hover effect by getting inspiration from these CSS Button hover effects.
Good to work from if you are looking to add this to an existing website or you only want the basic structure.
7. Top Left Animated Hamburger Menu
Most CSS hamburger menus either slide out from the left and right or take up the whole screen. But this one is a bit different because it only uses the top left corner inside a bubble-shaped menu.
Very unique compared to the traditional hamburger menu design, this example could easily be changed to edit the colours or add an effective shadow on the background.
This one does use JavaScript but it is only very minimal: basically just to toggle the CSS classes to change the menu status, open or closed. Nothing complicated. No libraries or dependencies to rely on, just pure JavaScript that is very basic.
8. Simple Left-Sliding Hamburger Menu Overlay
The animation is smooth and doesn’t feel tacky. The menu slides out from the left and sits on top of any main content behind.
Doesn’t require any JavaScript, just works purely based on HTML and CSS, easy to work from or adapt to your liking.
The menu itself will be easy to edit and add your own content, simply write your own HTML elements inside and the menu will slide out.
The hamburger menu icon also has a smooth open and close animation that only uses CSS.
9. Animated Full Screen Hamburger Menu
Featuring a floating CSS hamburger menu icon inside a circular background, once clicked the menu uses a curricular opening animation.
The animation is very smooth and opens from the point of the menu icon itself.
Taking up the full screen, would be great for busy navigation menus that require a lot of space with images, icons, and text.
Only uses pure HTML and CSS to pull this off.
10. Full Screen Morphing Hamburger Menu
A fun animated CSS hamburger menu that morphs outwards from the top right corner of the screen into a full-screen menu.
Only using HTML and CSS, the structure is simple to follow and make edits to add your own content and navigation links/style.
11. Multi-Depth Hamburger Menu
Sliding out from the left side of the screen, this menu design is more suited for complex navigation.
It has a lovely sliding animation but the menu itself uses a very well-structured item list that can go multiple depths, useful for inner categories.
It uses HTML and CSS which are generated from SCSS.
Takeaway
We’ve seen a lot of different designs for CSS hamburger menus, some traditional, some a little different. Hopefully, you have found something you like from our examples and found inspiration to use one on your next website.
Find the perfect combination for your hamburger menu by using one of these amazing JavaScript menus.
The CSS hamburger menu has a wide range of uses: from responsive design, interactive experiences with floating menu icons, and providing you with more space with an off-canvas menu.
Overall, CSS responsive hamburger menus are a great way to make your website layout responsive and scale down to smaller screens on mobile devices. It is an easy way to make your header navigation section responsive and adaptable to different screen sizes.
Related articles
More articles which you may find interesting.
Luke Embrey is a full-stack developer, BSc in Computer Science and based in the UK.
You can find out more about him at https://lukeembrey.com/
Join 2,000+ readers and learn something new every month!