- How to create a Floating Action Button in Android using Kotlin
- How to create a Floating Action Button in Android using Kotlin:
- YouTube Video:
- Android Studio project:
- Building the UI:
- How to change the icon color and background color of a Floating action button:
- How to change the size of a Floating action button:
- How to add click listener to Floating action button:
- Android Floating Action Button (FAB) Using Kotlin with Example
- Create Project
- Floating Action Button
- Extended Floating Action Button
- XML Code
- Kotlin Code
- Output
- Recommended Articles
- Android Tutorials
- Step 1: Create a new project OR Open your project
- Step 3: Place an image in res>drawable folder
- Step 4: Code
How to create a Floating Action Button in Android using Kotlin
How to create a Floating Action Button in Android using Kotlin:
In this post, we will learn how to create a Floating Action Button in Android Studio with Kotlin. If you are using Java, you can follow the same steps.
YouTube Video:
I have published one video on Floating Action Button. You can watch it here:
Android Studio project:
For this example, I will use one basic Android Studio project with one activity MainActivity.kt and its layout file activity_main.xml.
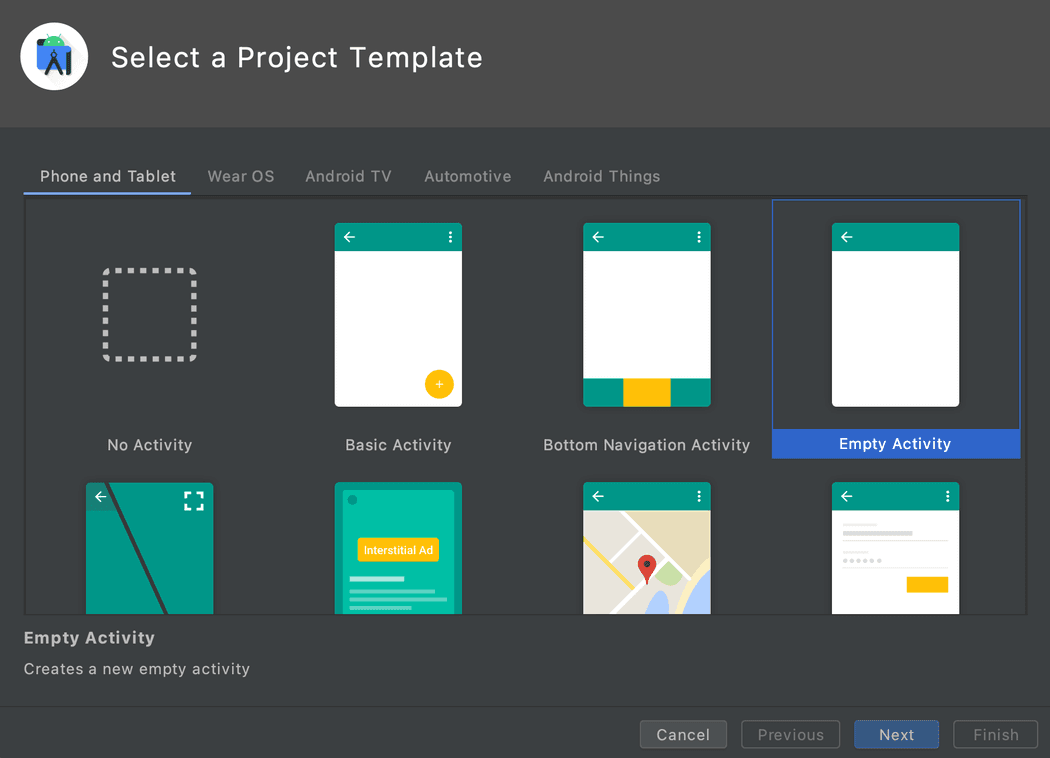
Open your Android Studio, click on Create a new project, choose Empty Activity, click on Next, fill the options and click on Finish to create the project.
By default, it will create one activity file MainActivity.kt and one layout file activity_main.xml.
Building the UI:
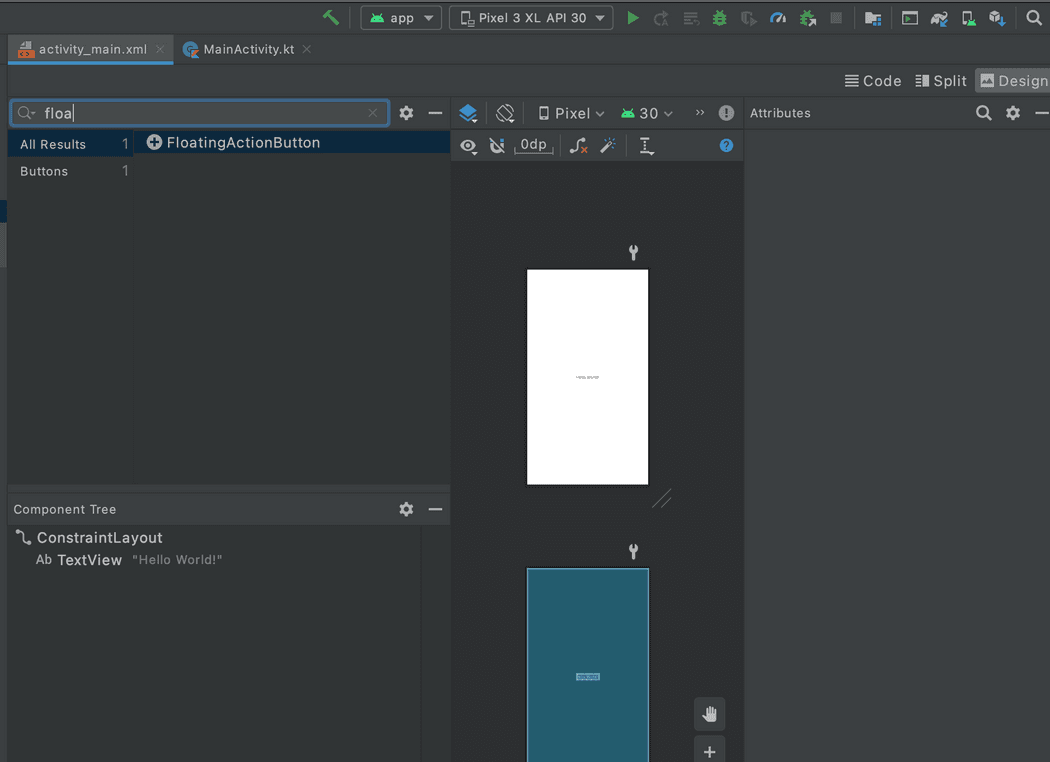
Open your activity_main.xml file in Design mode and search for Floating action button in the left search bar. It will show you the widget for Floating action button. Drag and drop it in the main layout UI.
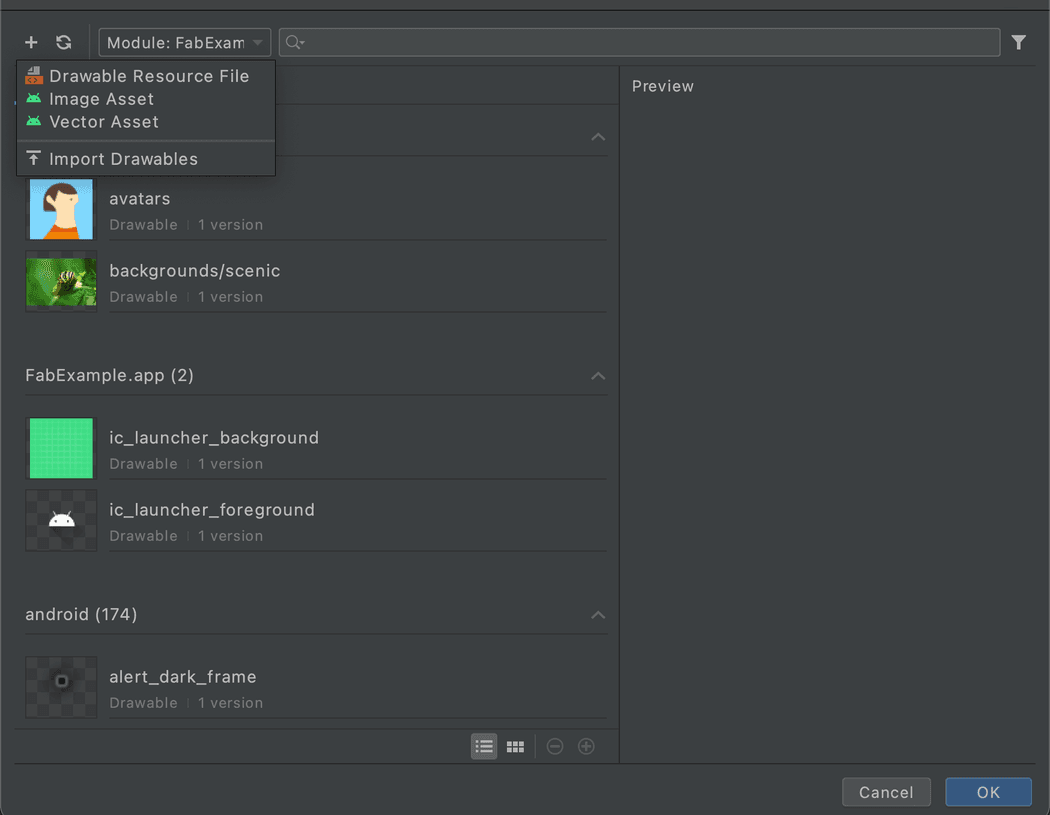
This will open one new window, that will ask to pick a resource for the button.
You can select from any existing resource or you can click on the + button to create one new drawable, image or vector asset.
Now, add the constraints to the floating action button and it will show it if you run the app in a simulator.
Below is the layout file for my project:
androidx.constraintlayout.widget.ConstraintLayout xmlns:android="http://schemas.android.com/apk/res/android"xmlns:app="http://schemas.android.com/apk/res-auto"xmlns:tools="http://schemas.android.com/tools"android:layout_width="match_parent"android:layout_height="match_parent"tools:context=".MainActivity">com.google.android.material.floatingactionbutton.FloatingActionButtonandroid:id="@+id/floatingActionButton"android:layout_width="wrap_content"android:layout_height="wrap_content"android:layout_marginEnd="52dp"android:layout_marginBottom="50dp"android:clickable="true"app:layout_constraintBottom_toBottomOf="parent"app:layout_constraintEnd_toEndOf="parent"app:srcCompat="@drawable/ic_baseline_add_24" />androidx.constraintlayout.widget.ConstraintLayout>How to change the icon color and background color of a Floating action button:
Floating action button background color can be changed by changing the app:backgroundTint property and icon color can be changed by changing the app:tint property.
com.google.android.material.floatingactionbutton.FloatingActionButtonandroid:id="@+id/floatingActionButton"android:layout_width="wrap_content"android:layout_height="wrap_content"android:layout_marginEnd="52dp"android:layout_marginBottom="50dp"app:backgroundTint="@color/purple_700"app:tint="@color/white"android:clickable="true"app:layout_constraintBottom_toBottomOf="parent"app:layout_constraintEnd_toEndOf="parent"app:srcCompat="@drawable/ic_baseline_add_24" />It will change the background color and icon color of the Floating action button.
How to change the size of a Floating action button:
We have two predefined sizes for the Floating action button: mini and normal. We can use app:fabSize to change the size. For example:
com.google.android.material.floatingactionbutton.FloatingActionButtonandroid:id="@+id/floatingActionButton"android:layout_width="wrap_content"android:layout_height="wrap_content"android:layout_marginEnd="52dp"android:layout_marginBottom="50dp"app:backgroundTint="@color/purple_700"app:fabSize='mini'app:tint="@color/white"android:clickable="true"app:layout_constraintBottom_toBottomOf="parent"app:layout_constraintEnd_toEndOf="parent"app:srcCompat="@drawable/ic_baseline_add_24" />How to add click listener to Floating action button:
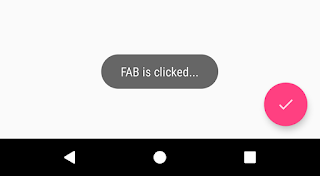
We can use android:onClick to add a click listener method to a Floating action button. It works as like normal buttons.
com.google.android.material.floatingactionbutton.FloatingActionButtonandroid:id="@+id/floatingActionButton"android:layout_width="wrap_content"android:layout_height="wrap_content"android:layout_marginEnd="52dp"android:layout_marginBottom="50dp"app:backgroundTint="@color/purple_700"android:onClick="onClickFab"app:fabSize='mini'app:tint="@color/white"android:clickable="true"app:layout_constraintBottom_toBottomOf="parent"app:layout_constraintEnd_toEndOf="parent"app:srcCompat="@drawable/ic_baseline_add_24" />It will show red marked in the onClickFab. You can click Alt + Enter to create the method in the MainActivity file. It will create the method as like below:
class MainActivity : AppCompatActivity()override fun onCreate(savedInstanceState: Bundle?)super.onCreate(savedInstanceState)setContentView(R.layout.activity_main)>fun onClickFab(view: View) >>We can put code inside onClickFab method.
Android Floating Action Button (FAB) Using Kotlin with Example
Read later
Save important notes and articles from internet using arusaquotes app.Create Project
Open Android Studio and create a new project. Give the project name FABExample.
Floating Action Button
To add Floating Action Button first change the root tag of activity_main.xml to CoordinatorLayout. Now put the following XML code uder LinearLayout tag.
Extended Floating Action Button
To add Extended Floating Action Button go to activity_main.xml file. Now put the following XML code uder LinearLayout tag.
XML Code
Here is the final xml code of activity_main.xml.
Kotlin Code
Go to app > java > com.example.fabexample > MainActivity.kt and put the following code after initializing both FAB and Extended FAB.
Adding setOnClickListener on Floating Action Button
// Set onClickListener on Floating Action Button(FAB) fab.setOnClickListenerAdding setOnClickListener on Extended Floating Action Button
// Set onClickListener on Extended Floating Action Button(FAB) extendedFAB.setOnClickListenerHere is the final Kotlin code MainActivity.kt
package com.example.fabexample import androidx.appcompat.app.AppCompatActivity import android.os.Bundle import android.widget.Toast import com.google.android.material.floatingactionbutton.ExtendedFloatingActionButton import com.google.android.material.floatingactionbutton.FloatingActionButton class MainActivity : AppCompatActivity() < private lateinit var fab: FloatingActionButton private lateinit var extendedFAB: ExtendedFloatingActionButton override fun onCreate(savedInstanceState: Bundle?) < super.onCreate(savedInstanceState) setContentView(R.layout.activity_main) fab = findViewById(R.id.fab) extendedFAB = findViewById(R.id.extendedFAB) // Set onClickListener on Floating Action Button(FAB) fab.setOnClickListener < Toast.makeText(this, "You clicked FAB", Toast.LENGTH_LONG).show() >// Set onClickListener on Extended Floating Action Button(FAB) extendedFAB.setOnClickListener < Toast.makeText(this, "You clicked Extended FAB", Toast.LENGTH_LONG).show() >> >Output
Android FAB and Extended FAB Recommended Articles
Migrating to Material 3: A Step-by-Step Guide
Mastering Android Bottom Sheets: A Comprehensive Tutorial in Kotlin
Understanding RecyclerView in Android using Kotlin
Creating a Chatbot App like ChatGPT using Kotlin: A Step-by-Step Guide
Android CardView With Image and Text Using Kotlin
Creating an Option Menu in Android with Kotlin
Help us create more content by becoming a patron! Our supporters get exclusive access to our android tutorial project source code.
Android Tutorials
The Floating Action Button (FAB) is a circular button that triggers primary action in your app's UI . This tutorial shows you how to add the FAB to your layout, customize some of its appearance, and respond to the button taps. We will show Snackbar on FAB click.
We will use Kotlin and Android Studio .
Minimum API: Android 2.1 is API level 7
Step 1: Create a new project OR Open your project
Step 2: Add design library in build.gradle(Module:app) under dependencies
implementation 'com.android.support:design:27.1.0'Step 3: Place an image in res>drawable folder
Step 4: Code
xmlns:android="http://schemas.android.com/apk/res/android" xmlns:app="http://schemas.android.com/apk/res-auto" xmlns:tools="http://schemas.android.com/tools" android:layout_width="match_parent" android:layout_height="match_parent" tools:context=".MainActivity"> android:id="@+id/textView" android:layout_width="wrap_content" android:layout_height="wrap_content" android:text="Click Floating Action Button to show Toast. " android:textStyle="bold" android:layout_centerVertical="true" android:layout_centerHorizontal="true"/> android:id="@+id/fab" android:layout_width="wrap_content" android:layout_height="wrap_content" android:src="@drawable/done" android:layout_margin="16dp" android:layout_alignParentBottom="true" android:layout_alignParentEnd="true" android:layout_alignParentRight="true" />package com.blogspot.devofandroid.myapplication import android.support.design.widget.FloatingActionButton import android.support.v7.app.AppCompatActivity import android.os.Bundle import android.widget.Toast class MainActivity : AppCompatActivity() < override fun onCreate(savedInstanceState: Bundle?) < super.onCreate(savedInstanceState) setContentView(R.layout.activity_main) val mFab = findViewById(R.id.fab) mFab.setOnClickListener < Toast.makeText(this@MainActivity, "FAB is clicked. ", Toast.LENGTH_LONG).show() > > >