- Форма обратной связи в модальном окне на PHP и Ajax
- HTML
- CSS
- Скрипт для модального окна
- PHP
- Модальное окно на затемненном фоне
- Затемнение фона
- Верстка модального окна
- События jQuery
- Результат
- Всплывающее окно по клику
- Комментарии 4
- Другие публикации
- jQuery Modal
- # Install
- # Example 1: Open & Close with links
- # Example 2: styled login form & events
- # Example 3: adjusting to content
- # Example 4: AJAX
- # Example 5: the un-closable window
- # Example 6: Multiple Modals
- # Example 7: Fade Transitions
- # Example 8: Custom Class for Close Button
Форма обратной связи в модальном окне на PHP и Ajax
Сегодня я вам покажу как сделать форму обратной связи в модальном окне. Модальное окно будет написано на jQuery. Мы соберем код из ранее выпущенных записей и создадим новую форму обратной связи.
HTML
Открыть форму ОСТАВЬТЕ СВОИ ДАННЫЕ И МЫ С ВАМИ СВЯЖЕМСЯ
и мы удешевим решение вашей задачи без потери качества
CSS
@import url(https://fonts.googleapis.com/css?family=Montserrat:400,700); html, body < width: 100%; height: 100%; margin: 0; >.page-wrapper < width: 100%; height: 100%; background-size: cover; >a.btn < width: 200px; padding: 18px 0; position: absolute; top: 50%; left: 50%; -webkit-transform: translate(-50%, -50%); transform: translate(-50%, -50%); font-family: 'Montserrat', Arial, Helvetica, sans-serif; font-weight: 700; text-align: center; text-decoration: none; text-transform: uppercase; color: #fff; border-radius: 0; background: #e2525c; >.modal-wrapper < width: 100%; height: 100%; position: fixed; top: 0; left: 0; visibility: hidden; opacity: 0; -webkit-transition: all 0.25s ease-in-out; transition: all 0.25s ease-in-out; background: rgba(0, 0, 0, 0.5); >.modal-wrapper.open < opacity: 1; visibility: visible; >.modal < width: 500px; display: block; margin: 30% 0 0 -250px; position: relative; top: 50%; left: 50%; opacity: 0; -webkit-transition: all 0.5s ease-in-out; transition: all 0.5s ease-in-out; background: #fafafa; >.modal-wrapper.open .modal < margin-top: -200px; opacity: 1; >.head < width: 100%; height: 100%; margin: 0 0 14px; padding: 5px 30px; overflow: hidden; position: absolute; >.btn-close < font-size: 28px; display: block; float: right; color: #fff; >.modal .content < padding: 0 0 20px 0; >.good-job < text-align: center; font-family: 'Montserrat', Arial, Helvetica, sans-serif; color: #e2525c; >.good-job .fa-thumbs-o-up < font-size: 60px; >.good-job h1 < font-size: 45px; >.form_modal_window < max-width: 70%; display: flex; flex-direction: column; margin: auto; >.modal .content .text < background: url("../Bright-Purple-Wallpaper-59-images.jpg"); color: #fff; padding: 10px; margin: 20px 0; >.modal .content .text h2 < margin:0; font-size: 35px; >.modal .content .text p < margin:0; font-size: 14px; >.modal-wrapper < margin: 0 0 20px 0; >.modal .content form input < color: #000; padding: 15px; border: none; margin-bottom: 15px; box-shadow: 0px 1px 3px 1px #e9e9e9; font-size: 15px; >.modal .content form input[type=submit] Скрипт для модального окна
$( document ).ready(function() < $('.trigger').on('click', function() < $('.modal-wrapper').toggleClass('open'); $('.page-wrapper').toggleClass('blur-it'); return false; >); $('.head').on('click', function ()< $('.modal-wrapper').removeClass('open'); >) >);
PHP
else< /*ЕСЛИ ВСЕ ПОЛЯ ЗАПОЛНЕНЫ НАЧИНАЕМ СОБИРАТЬ ДАННЫЕ ДЛЯ ОТПРАВКИ*/ $to = "your_mail@mail.ru"; /* Адрес, куда отправляем письма*/ $subject = "Письмо с обратной связи"; /*Тема письма*/ $headers = "MIME-Version: 1.0\r\n"; $headers .= "Content-type: text/html; charset=utf-8\r\n"; $headers . ;/*ОТ КОГО*/ /*ВО ВНУТРЬ ПЕРЕМЕННОЙ $message ЗАПИСЫВАЕМ ДАННЫЕ ИЗ ПОЛЕЙ */ $message .= "Имя пользователя: ".$name."\n"; $message .= "Почта: ".$email."\n"; $message .= "Телефон: ".$tel."\n"; /*ДЛЯ ОТЛАДКИ ВЫ МОЖЕТЕ ПРОВЕРИТЬ ПРАВИЛЬНО ЛИ ЗАПИСАЛИCM ДАННЫЕ ИЗ ПОЛЕЙ*/ //print_r($message); $send = mail($to, $subject, $message, $headers); /*ЕСЛИ ПИСЬМО ОТПРАВЛЕНО УСПЕШНО ВЫВОДИМ СООБЩЕНИЕ*/ if ($send == "true") < echo "Ваше сообщение отправлено. Мы ответим вам в ближайшее время.\r\n
"; > /*ЕСЛИ ПИСЬМО НЕ УДАЛОСЬ ОТПРАВИТЬ ВЫВОДИМ СООБЩЕНИЕ ОБ ОШИБКЕ*/ else < echo "Не удалось отправить, попробуйте снова!
"; > > ?>
На этом всё!
Больше интересных статей в нашей группе — https://vk.com/progtime
Вы так же можете разместить свой вопрос на нашем форуме, где другие программисты смогут вам помочь в решение вашей задачи — https://vk.com/prog_time
Так же прокачивайте свои навыки на нашем канале — https://www.youtube.com/c/ProgTime
- Написание материала для курса по разработке ботов на Telegram
- Разработка универсального парсера на PHP
Каждый переведённый донат, мотивирует на создание новых записей и уроков на YouTube
Модальное окно на затемненном фоне
Для модальных окон есть множество плагинов такие, как fancybox, Twitter Bootstrap и т.д. Но бывают случаи когда нет возможности их использовать, рассмотрим примеры статического окна и всплывающего по клику.
Затемнение фона
Для затемнения сайта достаточно добавить в верстку и CSS стили к нему:
Стили задаются псевдоклассом :before для того чтобы opacity не влиял на контент, который будет в этом блоке. Полупрозрачный фон будет растянут на все окно браузера.
Верстка модального окна
Добавим в div.popup-fade блок с контентом, ссылку «закрыть» и стили для них.
Закрыть Всплывающие окна имеют широкий диапазон применений.
События jQuery
$(document).ready(function($) < // Клик по ссылке "Закрыть". $('.popup-close').click(function() < $(this).parents('.popup-fade').fadeOut(); return false; >); // Закрытие по клавише Esc. $(document).keydown(function(e) < if (e.keyCode === 27) < e.stopPropagation(); $('.popup-fade').fadeOut(); >>); // Клик по фону, но не по окну. $('.popup-fade').click(function(e) < if ($(e.target).closest('.popup').length == 0) < $(this).fadeOut(); >>); >);
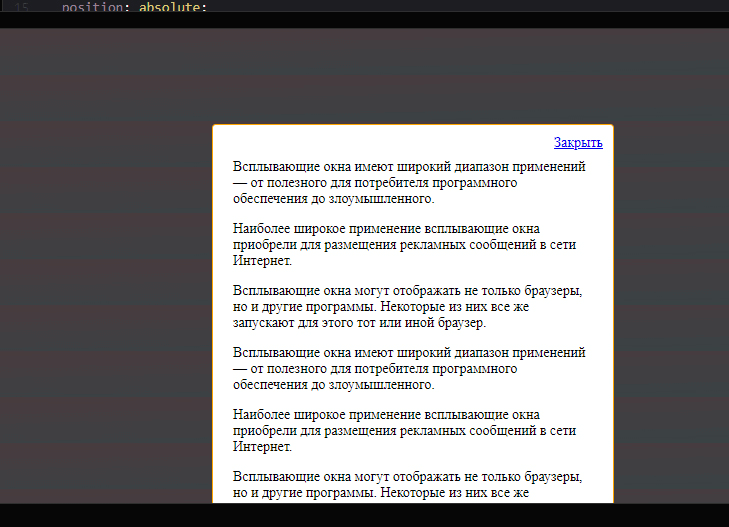
Результат
Всплывающее окно по клику
Для реализации popup-а достаточно скрыть блок .popup-fade и добавить событие для открытия окна.
Открыть popup Закрыть Всплывающие окна имеют широкий диапазон применений.
.popup-fade < display: none; >.popup-fade:before < content: ''; background: #000; position: fixed; left: 0; top: 0; width: 100%; height: 100%; opacity: 0.7; z-index: 9999; >.popup < position: fixed; top: 20%; left: 50%; padding: 20px; width: 360px; margin-left: -200px; background: #fff; border: 1px solid orange; border-radius: 4px; z-index: 99999; opacity: 1; >.popup-close Комментарии 4
Просто и со вкусом! Спасибо!
Подскажите, а как реализовать это решение для следующей задачи:
На странице расположены несколько превьюшек изображений по ходу статьи.
Нужно чтобы по клику на превьюхе, в модальном окне, открывался соотвтествующий ей хайрез.
Пробовал разные стили назначать, но открываются всё равно сразу все, просто в одну колонку ((
Здравствуйте. Взял ваш скрипт и внедрил в свою верстку. Работает. Но есть одно Но. Как сделать так, чтобы можно было прочитать содержимое попапа, если там много текста? Скрол крутит только задний фон. А как прочитать попап не понятно. Вот например

Авторизуйтесь, чтобы добавить комментарий.
Другие публикации

При работе с множеством сайтов возникает необходимость в постоянном контроле срока окончания доменов и особенно.
jQuery Modal
Rewardful is a simple way for SaaS companies to create affiliate and referral programs with Stripe. Just connect your account and let us track referrals, discounts, and commissions for you!
# Install
The simplest method is to use the hosted version from cdnjs:
Refer to the README for more installation options.
# Example 1: Open & Close with links
- Embed modal HTML in document
- Create a link with rel=»modal:open» and set the href attribute to the modal’s DOM id.
Thanks for clicking. That felt good.
Click close, click the overlay, or press ESC
# Example 2: styled login form & events
This example demonstrates how visually customizable the modal is.
# Example 3: adjusting to content
This example shows how modals are centered automatically. It also demonstrates how a vertical scrollbar appears whenever the modal content overflows.
Lorem ipsum dolor sit amet, consectetur adipisicing elit, sed do eiusmod tempor incididunt ut labore et dolore magna aliqua. Ut enim ad minim veniam, quis nostrud exercitation ullamco laboris nisi ut aliquip ex ea commodo consequat.
# Example 4: AJAX
Use rel=»modal:open» to automatically load the page contents into a modal via AJAX:
You can also manually load AJAX pages into a modal. Note that the AJAX response must be wrapped in a div with class modal :
// Open modal in AJAX callback $('#manual-ajax').click(function(event) < event.preventDefault(); this.blur(); // Manually remove focus from clicked link. $.get(this.href, function(html) < $(html).appendTo('body').modal(); >); >);
# Example 5: the un-closable window
This demonstrates how to disable the default methods of closing the modal.
If you do this, be sure to provide the user with an alternate method of closing the window.
# Example 6: Multiple Modals
By default, only one modal can be open at a time. If you open a new modal while an existing modal is open, the existing modal is closed first.
However, if you need to stack multiple modals at the same time, just set the closeExisting option to false .
I’m the third modal. You get the idea.
Lorem ipsum dolor sit amet, consectetur adipisicing elit, sed do eiusmod tempor incididunt ut labore et dolore magna aliqua. Ut enim ad minim veniam, quis nostrud exercitation ullamco laboris nisi ut aliquip ex ea commodo consequat. Duis aute irure dolor in reprehenderit in voluptate velit esse cillum dolore eu fugiat nulla pariatur. Excepteur sint occaecat cupidatat non proident, sunt in culpa qui officia deserunt mollit anim id est laborum.
Duis aute irure dolor in reprehenderit in voluptate velit esse cillum dolore eu fugiat nulla pariatur. Excepteur sint occaecat cupidatat non proident, sunt in culpa qui officia deserunt mollit anim id est laborum.
I’m the third modal. You get the idea.
# Example 7: Fade Transitions
You can achieve a simple fade effect by specifying the fadeDuration option.
You can also use fadeDelay to control the point during the overlay’s fade in at which the modal fades in. For example, to fade in the modal when the overlay transition is 50% complete:
The default value is 1.0 , meaning the window transition begins once the overlay transition has finished. Values greater than 1.0 mean there is a delay between the completed overlay transition and the start of the window transition:
Tip: set fadeDelay: 0 to have the overlay and window fade in simultaneously.
In the spirit of keeping this library small, fading is the only supported transition. When the modal is closed, both the overal and window transition out simultaneously.
Lorem ipsum dolor sit amet, consectetur adipisicing elit, sed do eiusmod tempor incididunt ut labore et dolore magna aliqua. Ut enim ad minim veniam, quis nostrud exercitation ullamco laboris nisi ut aliquip ex ea commodo consequat. Duis aute irure dolor in reprehenderit in voluptate velit esse cillum dolore eu fugiat nulla pariatur. Excepteur sint occaecat cupidatat non proident, sunt in culpa qui officia deserunt mollit anim id est laborum.
This modal starts fading in once the overlay is 50% faded in.
This modal starts fading in well after the overlay has finished transitioning.
# Example 8: Custom Class for Close Button
This example demonstrates how to add extra classes to the close button (for custom styles for the close button):
And then of course your custom CSS
.modal a.close-modal[class*="icon-"]
This modal has a fancy-shmancy close button.