- How to export MySQL data to HTML
- Export MySQL data using the command-line
- Using a third-party extension to export MySQL data
- Conclusion
- Related posts:
- How to export data to HTML file in Python
- 1. EasyXLS on Windows using .NET Framework with Python
- 2. EasyXLS on Linux, Mac, Windows using Java with Python
- EasyXLS on Windows using .NET Framework with Python
- Step 1: Download EasyXLS Excel Library for .NET
- Step 2: License file setup
- Step 3: Install Pythonnet
- Step 4: Include EasyXLS library into project
- Step 5: Run Python code that exports data to HTML file
- EasyXLS on Linux, Mac, Windows using Java with Python
- Step 1: Download EasyXLS Excel Library for Java
- Step 2: License file setup
- Step 3: Install Py4j
- Step 4: Create additional Java program
- Step 5: Add py4j library to CLASSPATH
- Step 6: Add EasyXLS library to CLASSPATH
- Step 7: Run additional Java program
- Step 8: Run Python code that exports data to HTML file
How to export MySQL data to HTML
Many developers, during their work, are required from their superiors to export MySQL data to various file formats like Excel, CSV, JSON, or HTML file.
In this article, a couple of ways to export MySQL data to HTML file format will be shown. First, export steps will be explained by using MySQL functionality via the command-line. Next, HTML options for export MySQL data will be shown using features from the ApexSQL Database Power Tool for VS Code, the third-party extension.
The following methods for exporting will be used:
- Using HTML option from the command-line
- Export to HTML using a third-party software
- Export results from the Results grid
- Export results from Text search result grid
- Export results from Object search result grid
To see other export functionalities aside from HTML, please see the following articles:
For the purpose of this article, an example below will be used:
CREATE DATABASE `employees` CREATE TABLE `employees_address` ( `address_id` int(11) NOT NULL AUTO_INCREMENT, `location` varchar(100) NOT NULL, `location2` varchar(150) DEFAULT NULL, PRIMARY KEY (`address_id`) ) ENGINE=InnoDB DEFAULT CHARSET=latin1 INSERT INTO employees_address VALUES (NULL, '1586 1700 W Blancke St', '30 Commercial Road'), (NULL, '934 San Felipe de Puerto Plata Street', 'Piedras 623'), (NULL, 'Avenida João Jorge, 112, ap. 31', '219–241 Cleveland St');
Export MySQL data using the command-line
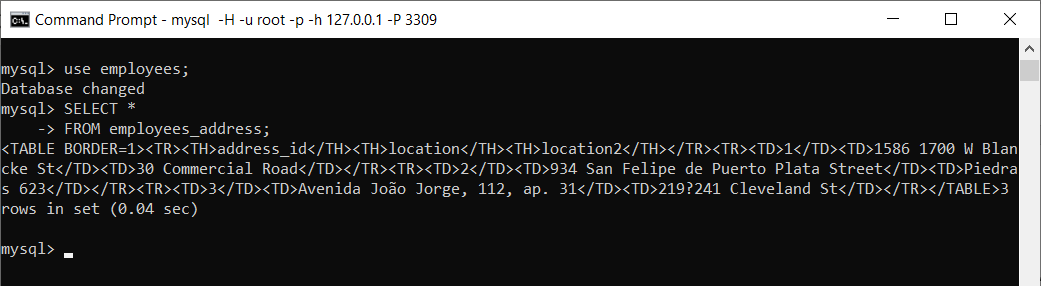
By default, MySQL returns query results in text table format. To generates a query results in an HTML table format, use the -H (or –HTML) option:
mysql -H -u root -p -h 127.0.0.1 -P 3309

Now, when logged on MySQL Server, pick a database and table from which data should be shown in HTML file format. In our case, the employees database and the employees_address table will be used:
Execute the following code:
SELECT * FROM employees_address;
The output will be something like this:
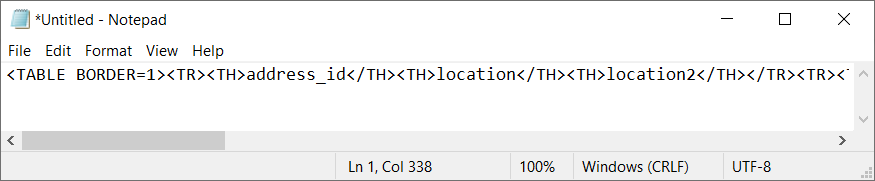
TABLE BORDER=1>TR>TH>address_id/TH>TH>location/TH>TH>location2/TH>/TR>TR>TD>1/TD>TD>1586 1700 W Blancke St/TD>TD>30 Commercial Road/TD>/TR>TR>TD>2/TD>TD>934 San Felipe de Puerto Plata Street/TD>TD>Piedras 623/TD>/TR>TR>TD>3/TD>TD>Avenida João Jorge, 112, ap. 31/TD>TD>219?241 Cleveland St/TD>/TR>/TABLE> Copy that code in a text editor (e.g. Notepad) and save it as a .html file:
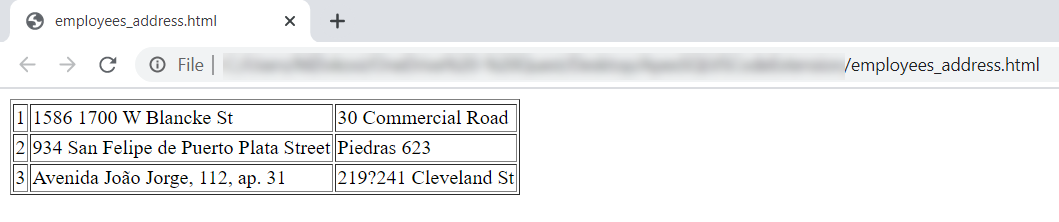
The output will look like this when opened in a browser:
To create output that contains only data values and suppress the column header, use the –skip-column-names option.
Lat’s connect to MySQL using this option:
mysql -H –skip-column-names -u root -p -h 127.0.0.1 -P 3309
Now, when the SELECT statement is executed:
SELECT * FROM employees_address;
As the result, only the data values without column header will appear:
TABLE BORDER=1>TR>TR>TD>1/TD>TD>1586 1700 W Blancke St/TD>TD>30 Commercial Road/TD>/TR>TR>TD>2/TD>TD>934 San Felipe de Puerto Plata Street/TD>TD>Piedras 623/TD>/TR>TR>TD>3/TD>TD>Avenida João Jorge, 112, ap. 31/TD>TD>219?241 Cleveland St/TD>/TR>/TABLE> When this is saved and opened as the HTML file, it will look like this:
Using a third-party extension to export MySQL data
With ApexSQL Database Power Tools for VS Code, there are different ways to export MySQL data to HTML file format.
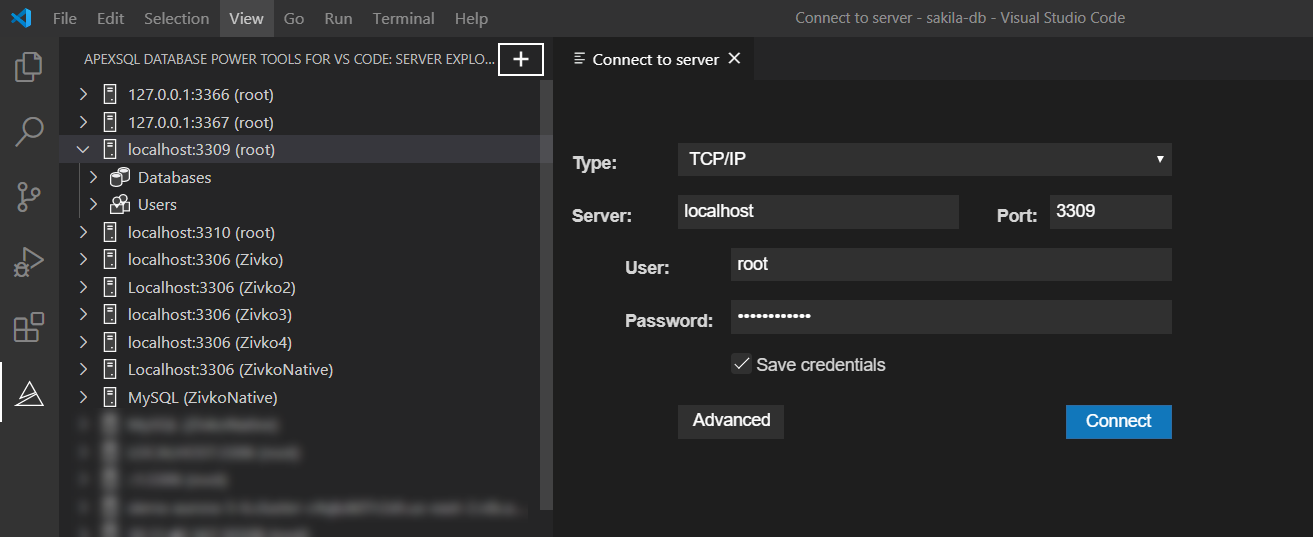
First things first, use ApexSQL Database Power Tools for VS Code connection dialog to connect to the desired MySQL Server that contains the databases with data that should be exported in the desired file format. Currently, extension support exports to Excel, CSV, JSON, and HTML file format:
- More details about the extension, how it can be installed, and used in VS Code can be found on the ApexSQL Database Power Tools for VS Code for a first-time user article
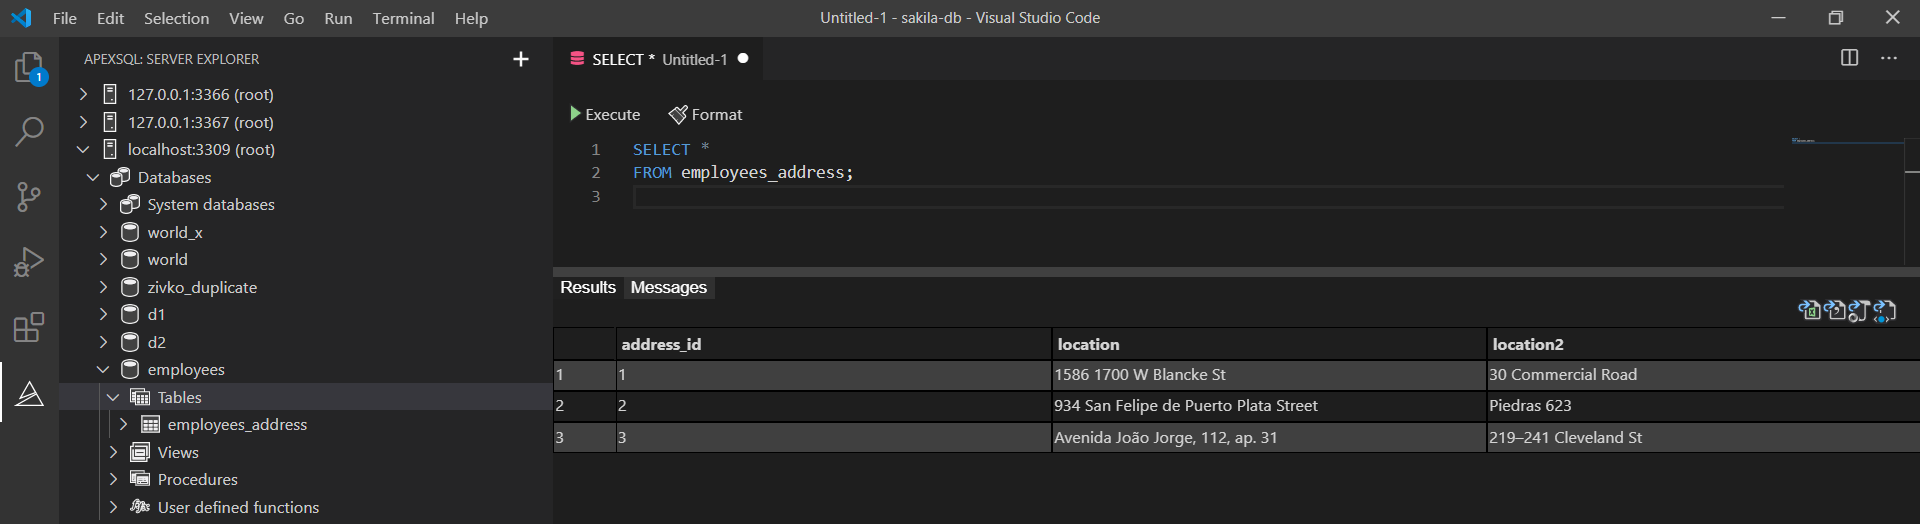
Once the connection with MySQL server is established, in ApexSQL server explorer, drill down to the desired database, right-click and, from the context menu, choose the New query command:

In the newly opened query editor, type and then execute a query:
SELECT * FROM employees_address;
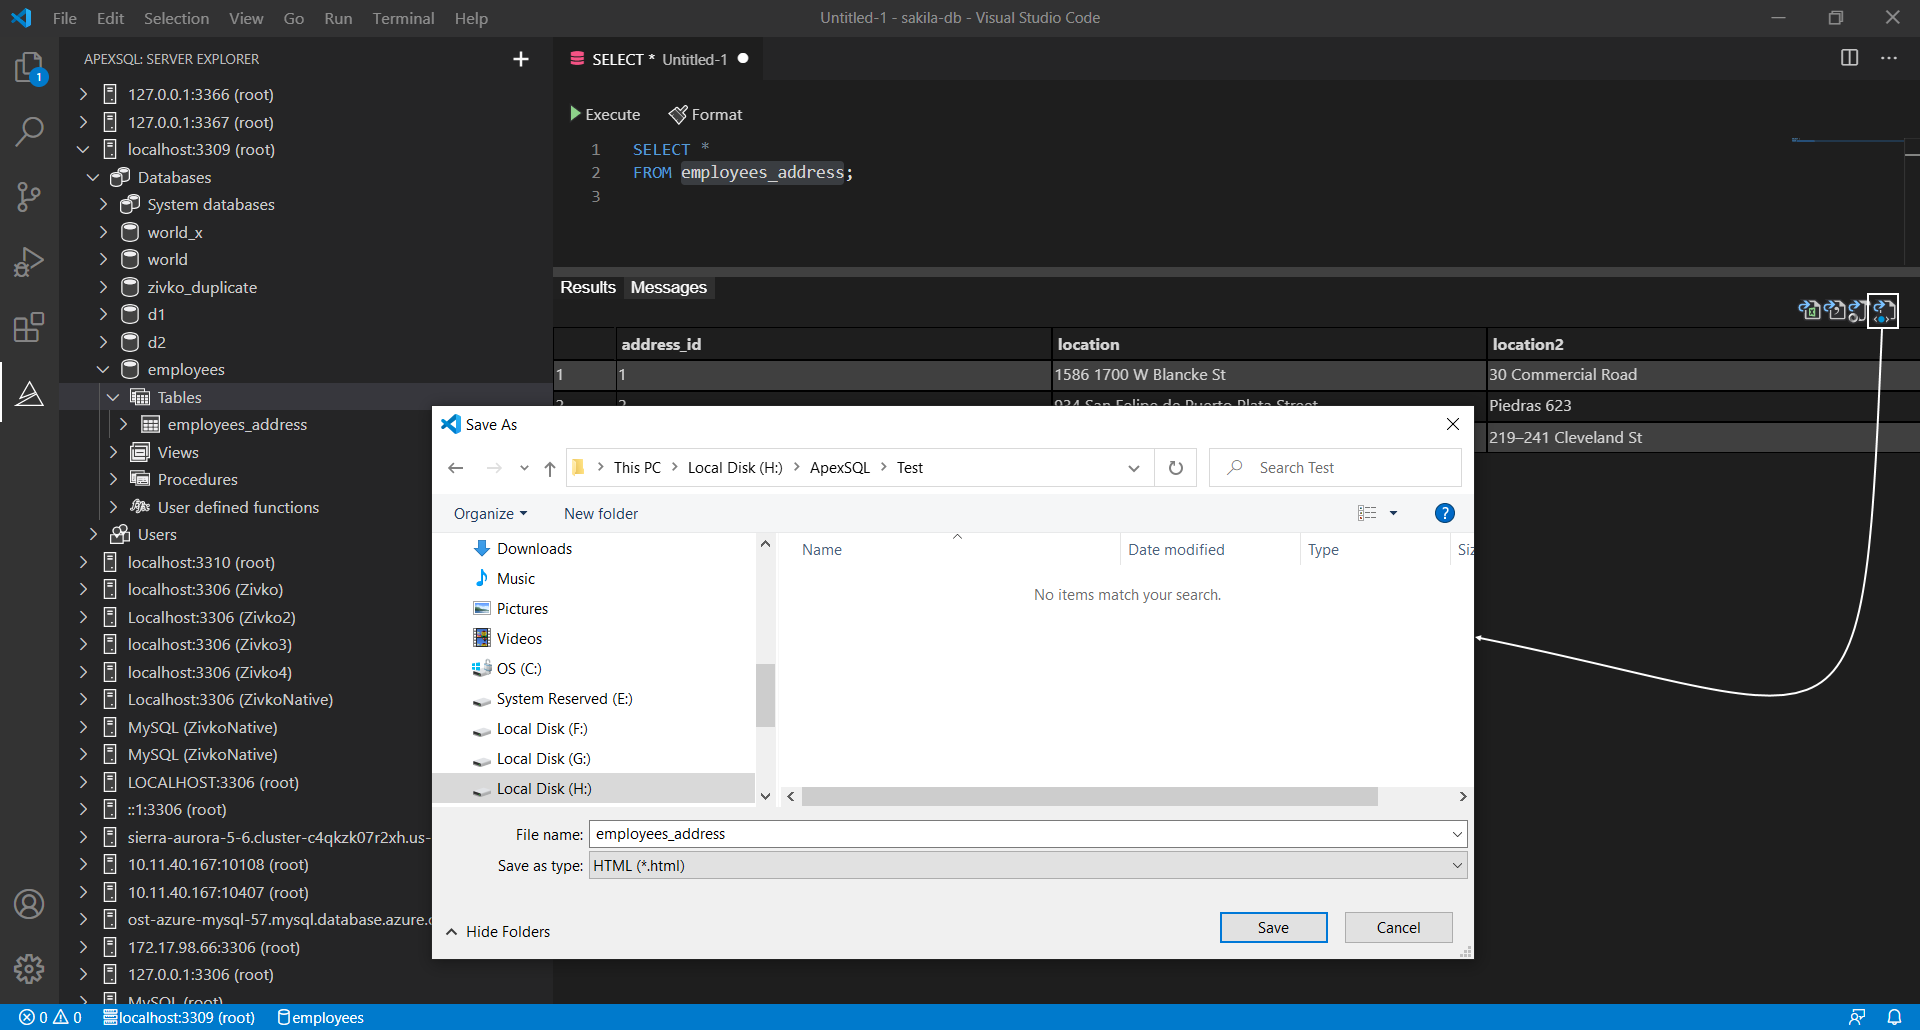
In the top right corner of the Results query grid, options for exporting data from the Results query grid are placed to different file formats, and among these options, the HTML export option is included. Click the Export to HTML button, in the Save as dialog, enter a name for the HTML file and location where the file will be saved. Click Save to continue:
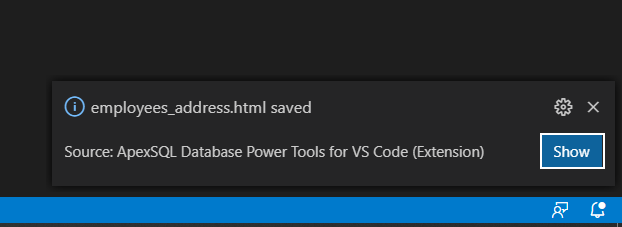
In the bottom right corner of VS Code, click the Show button to direct open location to the saved HTML file:
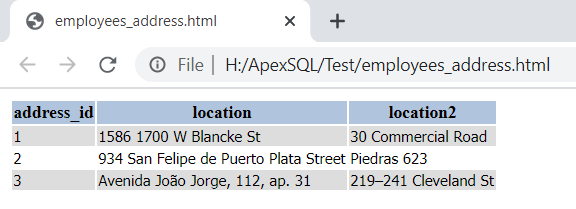
The exported data will look like this:
In case you want to search and export to HTML just particular data from MySQL database, the Export to HTML option from the Text search feature can be very handy.
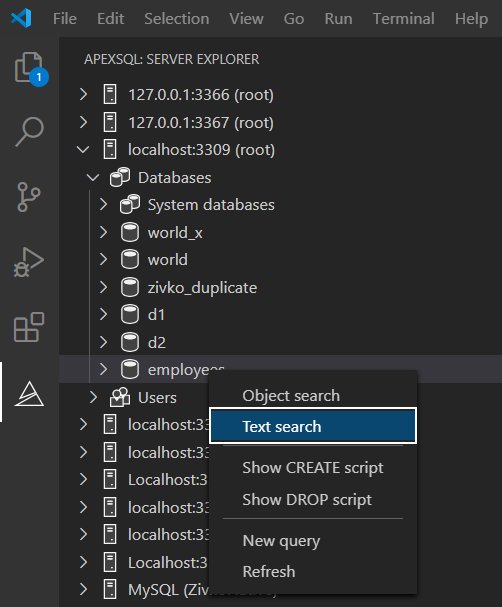
In ApexSQL server explorer, right-click on a database, and from the context menu, choose the Text search command:

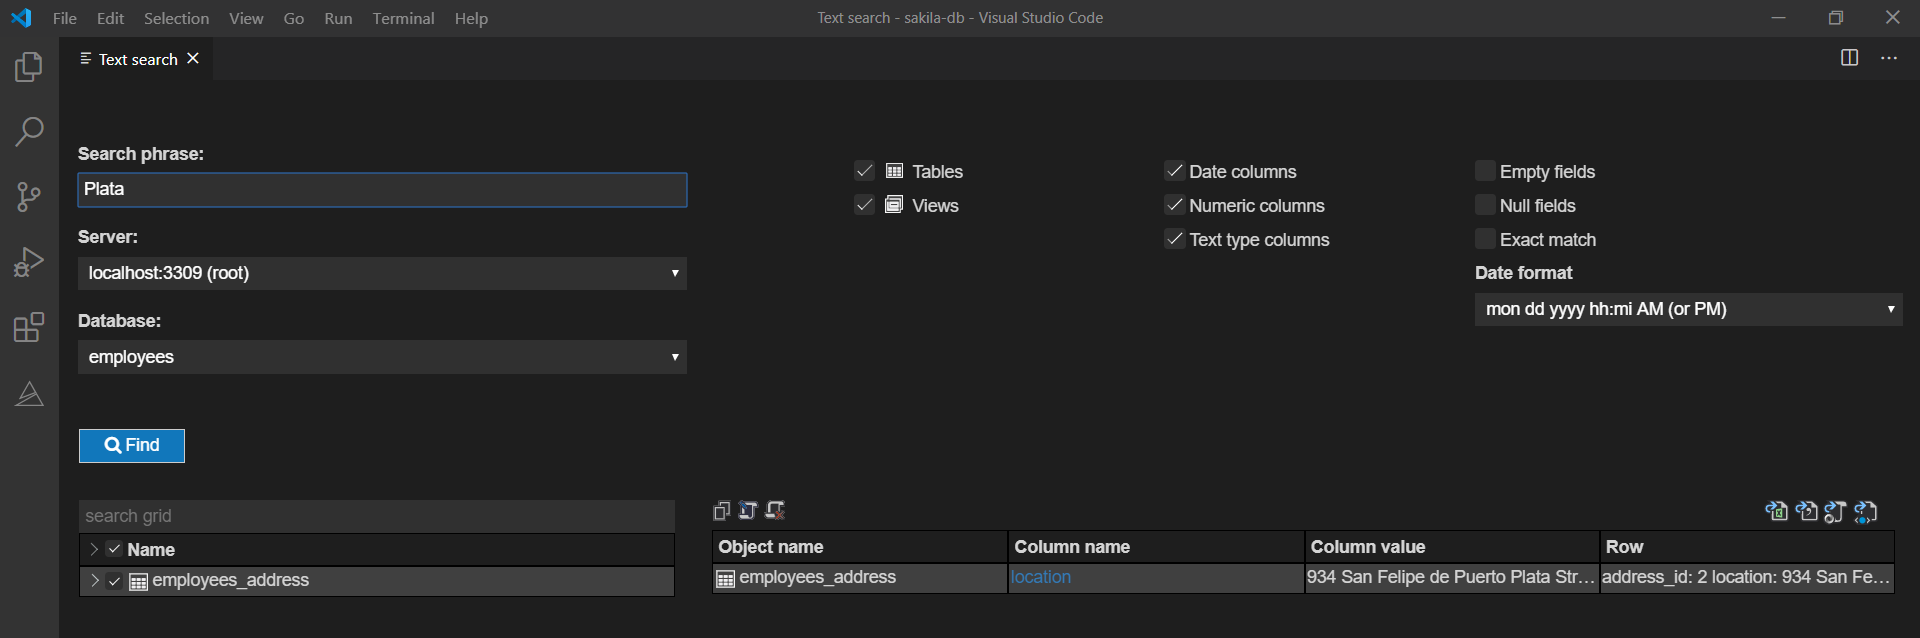
The Text search pane will be opened. Here in the Search phrase box, enter the text that needs to be looked for and, in the search grid, check the tables over which the search will be performed. In our case, that will be an employees_address table. Click the Find button. All matches with the set phrase from the Search phrase box will be listed in the search result grid. In this case, only one result will be shown:
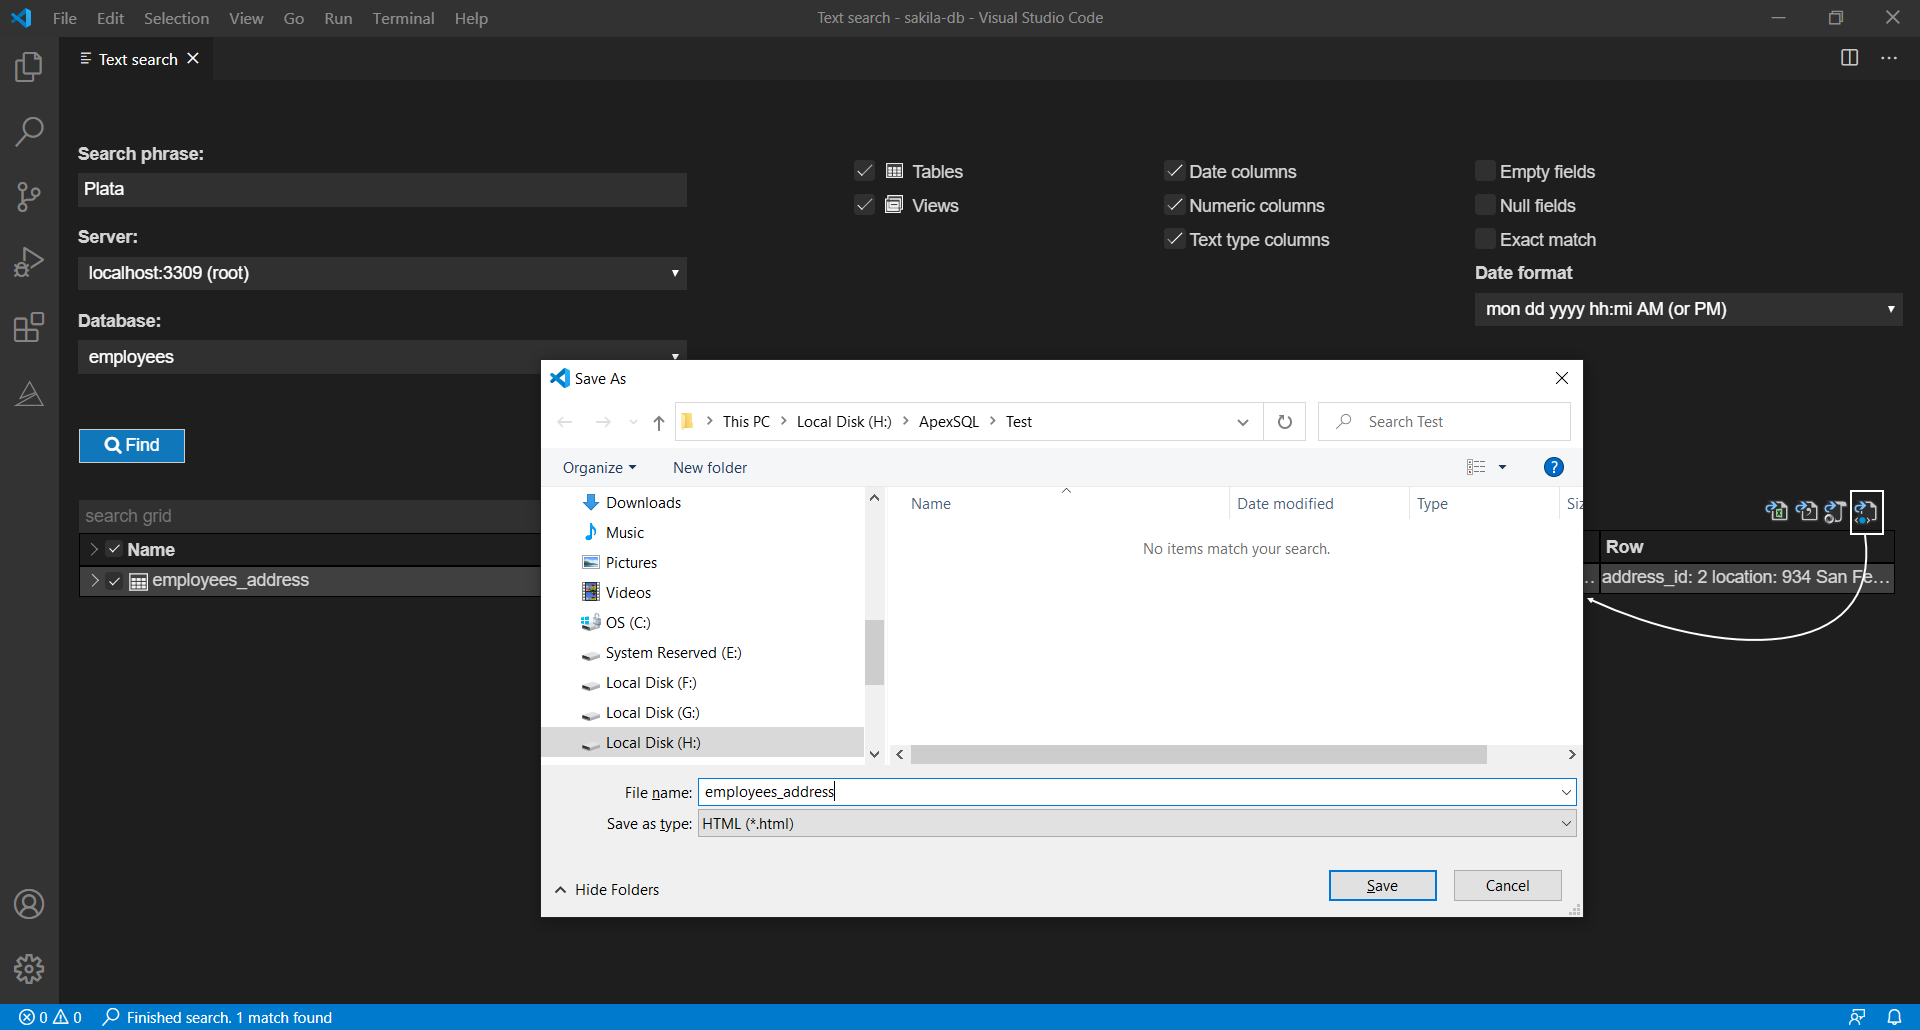
To export that data to HTML, in the top right corner of the search result grid, click the Export to HTML button, set a name and location for the file and click the Save button:
The output will be like this:
Furthermore, if we are interested to find and export only particular objects from a database, the Object search feature can be used for such a task.
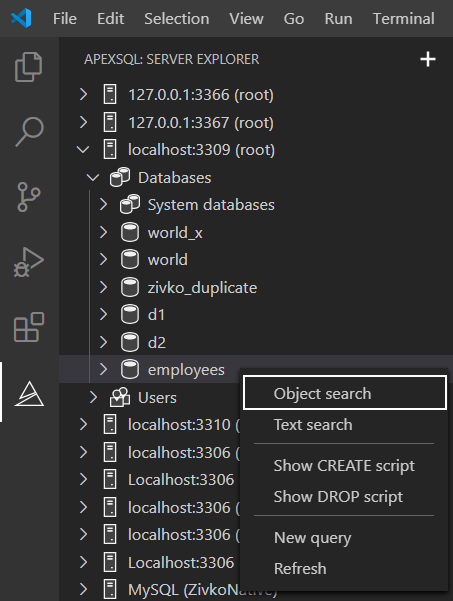
Under the ApexSQL server explorer pane, right-click on a database, and from the context menu, select the Object search command:

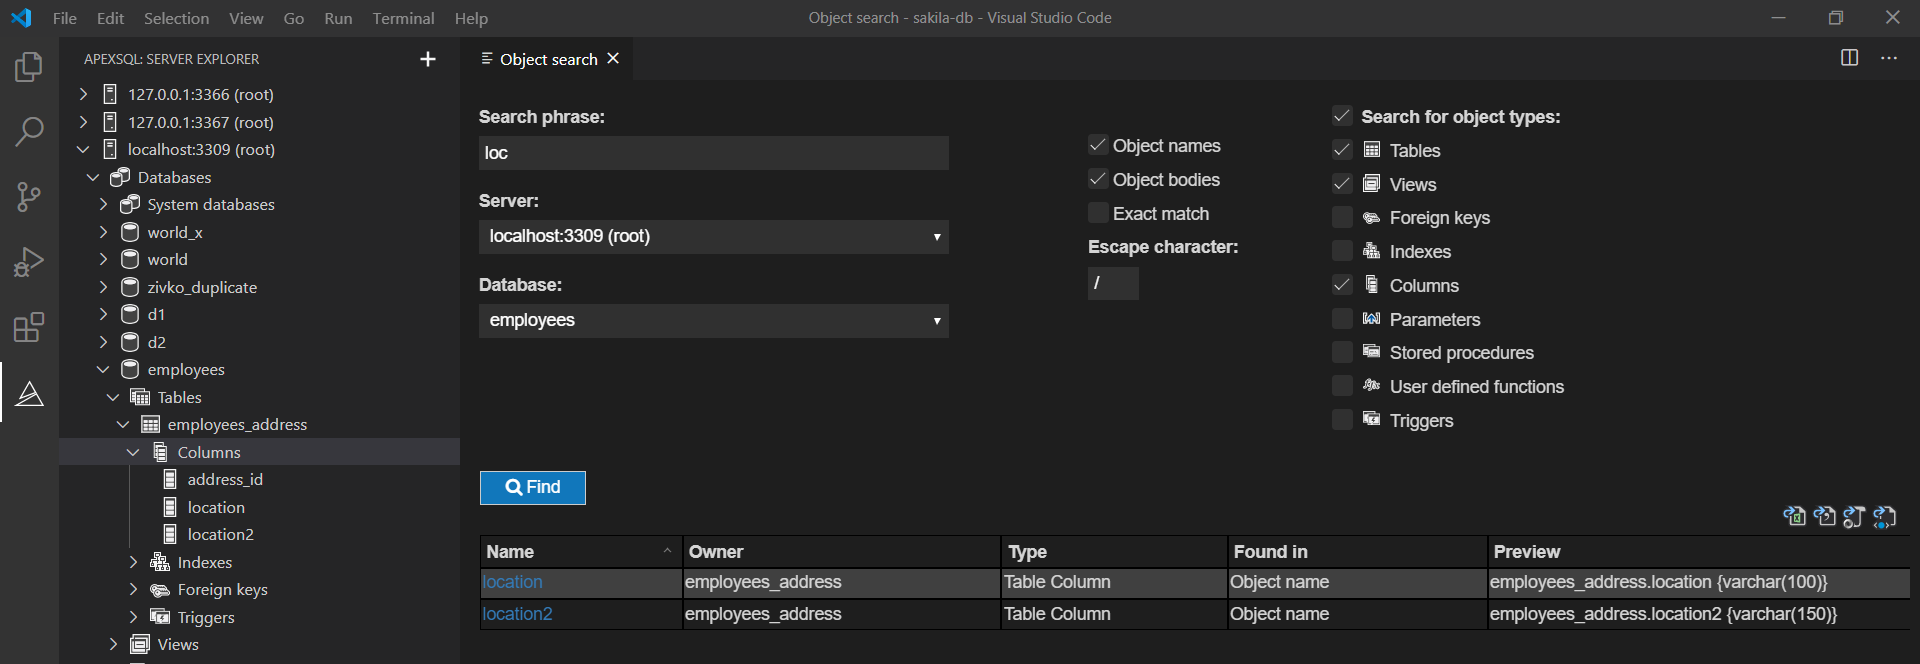
Once the Object search pane is opened in the Search phrase box, enter a name or part of the object name, specify where the search is by checking the Object name or Object bodies checkboxes and which of object types needs to be searched by checking the options under the Search for object types section. The result will be shown in the object search result grid:
The Export to HTML button is in the same location as it is described previously for the Test search feature.
Click the Export to HTML button and save the results on the desired location. The exported data will be like from the image below:
Conclusion
ApexSQL Database Power Tools for VS Code is a handy database management extension for developers using this IDE. In this article, we’ve seen how MySQL data can be exported to HTML file format using the native way and an easier way using the features from this extension. Not only HTML file format is supported, but also some other popular formats too.
Related posts:
How to export data to HTML file in Python
EasyXLS Excel library can be used to export Excel files with Python on Windows, Linux, Mac or other operating systems. The integration vary depending on the operating system or if the bridge for .NET Framework of Java is chosen:
1. EasyXLS on Windows using .NET Framework with Python
2. EasyXLS on Linux, Mac, Windows using Java with Python
EasyXLS on Windows using .NET Framework with Python
If you opt for the .NET version of EasyXLS, the below code requires Pythonnet, a bridge between Python and .NET Framework.
Step 1: Download EasyXLS Excel Library for .NET
To download the trial version of EasyXLS Excel Library, press the below button:
If you already own a license key, you may login and download EasyXLS from your account.
Install the downloaded EasyXLS installer for v8.6 or earlier.
Step 2: License file setup
Step required for EasyXLS v9.0 or later.
If you are using a trial, generate a trial license file from EasyXLS trials page. The trial license is valid for 30-days.
If you own a license key, you may login to the account that purchased the license and generate the license file from:
https://www.easyxls.com/my-ordersSetup the license file into your project using these guidelines.
Step 3: Install Pythonnet
For the installation you need to run «pip» command as it follows. Pip is a package-management system used to install and manage software packages written in Python.
\Scripts>pip install «pythonnet.whl»Step 4: Include EasyXLS library into project
EasyXLS.dll must be added to your project. EasyXLS.dll can be found:
— Inside the downloaded archive at Step 1 for EasyXLS v9.0 or later
— Under installation path for EasyXLS v8.6 or earlier, in «Dot NET version» folder.Step 5: Run Python code that exports data to HTML file
Execute the following Python code that exports data to HTML file.
) workbook = ExcelDocument(1) workbook.easy_getSheetAt(0).setSheetName() xlsFirstTable = workbook.easy_getSheetAt(0).easy_getExcelTable() + str(column + 1)) xlsFirstTable.easy_getCell(0,column).setDataType(DataType.STRING) + str(row + 1) + + str(column + 1)) xlsFirstTable.easy_getCell(row+1,column).setDataType(DataType.STRING) xlsFirstTable.easy_setRangeAutoFormat( print() workbook.easy_WriteHTMLFile( , ) sError = workbook.easy_getError() ) + sError + gc.collect()EasyXLS on Linux, Mac, Windows using Java with Python
If you opt for the Java version of EasyXLS, a similar code as above requires Py4J, Pyjnius or any other bridge between Python and Java.
Step 1: Download EasyXLS Excel Library for Java
To download the trial version of EasyXLS Excel Library, press the below button:
If you already own a license key, you may login and download EasyXLS from your account.
Install the downloaded EasyXLS installer for v8.6 or earlier.
Step 2: License file setup
Step required for EasyXLS v9.0 or later.
If you are using a trial, generate a trial license file from EasyXLS trials page. The trial license is valid for 30-days.
If you own a license key, you may login to the account that purchased the license and generate the license file from:
https://www.easyxls.com/my-ordersSetup the license file into your project using these guidelines.
Step 3: Install Py4j
For the Py4j installation you need to run «pip» command as it follows. Pip is a package-management system used to install and manage software packages written in Python.
\Scripts>pip install «py4j.whl»Step 4: Create additional Java program
The following Java code needs to be running in the background prior to executing the Python code.
Step 5: Add py4j library to CLASSPATH
py4j.jar must be added to your classpath of the additional Java program. py4j.jar can be found after installing Py4j, in «\share\py4j» folder.
Step 6: Add EasyXLS library to CLASSPATH
EasyXLS.jar must be added to your classpath of the additional Java program. EasyXLS.jar can be found:
— Inside the downloaded archive at Step 1 for EasyXLS v9.0 or later
— Under installation path for EasyXLS v8.6 or earlier, in «Lib» folder.Step 7: Run additional Java program
Start the gateway server application and it will implicitly start Java Virtual Machine as well.
Step 8: Run Python code that exports data to HTML file
Execute a code as below Python code that exports data to HTML file.
) workbook = gateway.jvm.ExcelDocument(1) workbook.easy_getSheetAt(0).setSheetName() xlsFirstTable = workbook.easy_getSheetAt(0).easy_getExcelTable() + str(column + 1)) xlsFirstTable.easy_getCell(0,column).setDataType(gateway.jvm.DataType.STRING) + str(row + 1) + + str(column + 1)) xlsFirstTable.easy_getCell(row+1,column).setDataType(gateway.jvm.DataType.STRING) xlsFirstTable.easy_setRangeAutoFormat( print() workbook.easy_WriteHTMLFile(, ) sError = workbook.easy_getError() ) + sError + gc.collect()