- How to disable button with CSS
- Contents
- How to disable button with CSS?
- HTML :-
- Result :-
- How to style disabled button with CSS?
- CSS :-
- HTML :-
- Result :-
- How to disable hover effect when button is disabled CSS?
- CSS :-
- HTML :-
- Easily Disable a Button with JavaScript or CSS (3 Examples)
- Simple JavaScript Code for Disabling an HTML Button
- CSS Styling for Disabling an HTML Button
- Programmatically Disable Button with CSS Class
- Disabled Button ARIA Considerations
- Resources
- :disabled , :enabled
- Кратко
- Пример
- Как пишется
- Как понять
- Подсказки
- На практике
- Алёна Батицкая советует
- Не активная кнопка с помощью disabled
How to disable button with CSS
In this blog post, we will look into “How to disable button with CSS” on a webpage & get into various ascpects relating to it.
Contents
How to disable button with CSS?
Buttons are placed on a webpage to perform some event. When the user clicks it then something happens on that page as per the coded actions by the programmer.
There are certain scenarios that we want to show the button but it will only be clickable after a certain condition is fulfilled. Example is the Login page, we want the user to enter the username & password then he can click the login button to enter within the application. When the details are not yet entered by the user then clicking the button is of no use so it can be kept disabled.
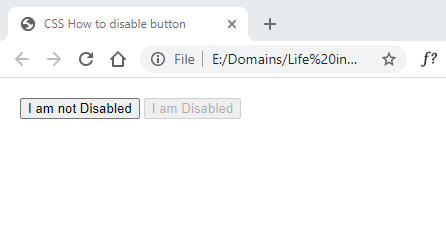
After disabling the button, it will stop performing any action & as a default style it will be grayed out. When the user clicks it, the main event will not be performed.
Disabled buttons can also be styled with the help of CSS styles. We can also change the cursor when the user hovers over the button so that the user can easily understand that the button is disabled.
Let’s walk through the code to disable button with CSS :-
HTML :-
Result :-
background-image property specifying the image to be displayed. It futher sets the width & height of the header element.
How to style disabled button with CSS?
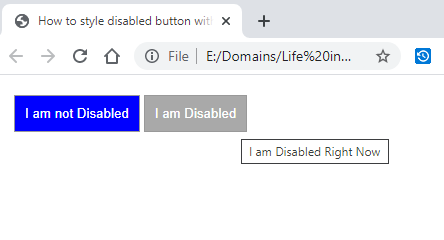
It is necessary to style a disabled button in a proper manner so that user can understand it is disabled. If user is unable to understand he will keep clicking the button & will think there something wrong in this website.
Usually the disabled button can be shown as grayed out with a cursor value of not allowed. Different variations of grayed color can be applied as per the preference.
The title text also helps in giving quick information to the user. Title text appears automatically when the user hovers over the button.
The style of the disabled button should be different from the style of the normal buttons. So there can be 2 different set of styles defined in CSS for normal button & disabled button.
Below code is used for styling the disabled buttons :-
CSS :-
button:disabled, button[disabled] < border: 1px solid #999999; background-color: darkgrey; color: #fff; padding: 10px; cursor: not-allowed; >.btn
HTML :-
Result :-
How to disable hover effect when button is disabled CSS?
When the button hover effect is defined in styles then it gets applied to all the buttons. The button may be enabled or disabled the same style applies to both with no difference.
We can modify this default behavior & apply the style only to the enabled buttons on a web page. For the disabled buttons this style of hover effect will not be applied.
Changing the hover effect is necessary for disabled buttons because the users always hover the buttons before clicking it. If the hover effect for disabled button is the same as the enabled button then there will be no difference & disabled button might look like an enabled button.
The style for the disabled button is usually faint. So the hover effect can also be styled to the same pattern to maintain consistency.
Below code displays the style that can disable hover effect of button :-
CSS :-
.btn < border: 1px solid #999999; background-color: blue; color: #fff; padding: 10px; >.btn:hover:enabled < background-color: black; color: #fff; >button:disabled, button[disabled]
HTML :-
Easily Disable a Button with JavaScript or CSS (3 Examples)
We should also lighten the button’s opacity by about 33% (like Bootstrap’s disabled class does). In this post, I will show full JavaScript and CSS code for disabling HTML buttons.

Finally, make sure the button cannot be tabbed into and that the button is disabled for screen readers. We’ll see how to do that below.
The Resources section has a live Code Sandbox demo link.
In these examples I applied the following styling to my button elements:
Simple JavaScript Code for Disabling an HTML Button
Here are the steps for disabling a button with JavaScript:
- Select the button using document.getElementById, document.querySelector, or your preferred method
- Attach a click event listener
- Set the disabled attribute to false in the click handler (this requires a reference to the button)
It is important to pass a reference to the button into the click handler. Take a look at the below code to see how I accomplished this:
//HTML Button //JS Click Event Listener const jsDisableButton = document.getElementById("jsDisableButton"); if (jsDisableButton) < jsDisableButton.addEventListener("click", () =>handleJSBtnClick(jsDisableButton) ); > //JS Click Handler const handleJSBtnClick = (jsDisableButton) => < jsDisableButton.disabled = true; console.log("JS Disabled"); >;This code gets the job done, but I recommend some basic styling on the button when it is disabled:
The above selector queries for the disabled pseudo class on button elements.
This styling is important because the opacity gives visual indication that the button is unclickable. Removing pointer events keeps hover and click events from occurring. If we only set cursor: default; then the cursor looks inactive but hover and click events can still occur.
You also have the option of passing the click event to the handler. Here’s what the updated code looks like (with TypeScript):
const jsDisableButton = document.getElementById( "jsDisable" ) as HTMLButtonElement; if (jsDisableButton) < jsDisableButton.addEventListener("click", (event: MouseEvent) =>handleJSBtnClick(event, jsDisableButton) ); >CSS Styling for Disabling an HTML Button
We can set a couple of style properties on a button to effectively make it disabled without using the disabled attribute.
The most basic property is pointer-events: none; . This makes the element unable to register clicks or hovers. I also recommend reducing the opacity so the button renders as a lighter color.
.disabled < pointer-events: none; opacity: .65; >//HTML These can easily be applied using a class on the element.
You may have noticed that I recommended adding both of these styles in the previous section where we set the button attribute disabled=true . Styling with these properties is good practice on any disabled button.
One disadvantage of using a CSS approach is that users can still tab in to the button and ‘click’ it by pressing enter . Interestingly, this first triggers a keypress event and then triggers a click event.
The two solutions to this are setting tabindex to -1 or adding a keypress event listener and preventing the default behavior. Both are described below.
Programmatically Disable Button with CSS Class
Toggling a CSS class on an HTML button element is similar to toggling the disabled attribute.
Once again, we select the button and attach a click event listener. Then in the click handler we need to add the disabled class using classList.add(«disabled») .
const handleCSSBtnClick = ( event, cssDisabledButton ) => < cssDisabledButton.classList.add("disabled"); console.log(event); >; const cssDisabledButton = document.getElementById("cssDisable"); if (cssDisabledButton) < cssDisabledButton.addEventListener("click", (event) =>< handleCSSBtnClick(event, cssDisabledButton); >); cssDisabledButton.addEventListener("keypress", (event) => < event.preventDefault(); >); >I also included the code for adding a keypress listener in case the user tabs into the button and presses enter . Later I will show how to eliminate tabbing.
Disabled Button ARIA Considerations
Users requiring screen readers and non-mouse users need to be supported when a button is disabled.
Screen readers need the aria-disabled attribute to be set to true on the button. This indicates that the element is perceivable but not operable, according to MDN.
Next, the tabIndex attribute needs to be set to -1 while the button is disabled. This keeps users from tabbing into a disabled element and interacting with it through the keyboard.
Here’s an example button that has both attributes set.
Resources
Code Sandbox Link (This includes TypeScript as well)
:disabled , :enabled
Эта кнопка серая. Она не доступна для клика. Как написать селектор на основе состояния элемента?
Время чтения: меньше 5 мин
Кратко
Скопировать ссылку «Кратко» Скопировано
Псевдоклассы :disabled и :enabled помогают стилизовать интерактивные элементы — на которые можно и нельзя нажать.
Легко применяются к любым элементам, которым можно задать атрибут disabled : , , , , , , , и .
Пример
Скопировать ссылку «Пример» Скопировано
Часто требуется, чтобы на кнопку отправки формы нельзя было нажать, пока не заполнены все поля этой формы. Проще всего заблокировать кнопку атрибутом disabled . Но недостаточно просто указать его в HTML, нужно ещё и при помощи оформления показать пользователю, что кнопка не активна. Как раз для этого нам пригодится псевдокласс :disabled .
Кнопка будет полупрозрачной:
button:disabled opacity: 0.5;>button:disabled opacity: 0.5; >
Псевдокласс :enabled , наоборот, поможет стилизовать все доступные для взаимодействия элементы. По факту его чаще всего не указывают, потому что записи с ним и без него, как правило, равноценны: .input = .input : enabled .
Как пишется
Скопировать ссылку «Как пишется» Скопировано
Любому селектору, указывающему на интерактивный элемент, дописываем двоеточие и указываем одно из ключевых слов: enabled или disabled .
Как понять
Скопировать ссылку «Как понять» Скопировано
Браузер ориентируется на атрибут disabled и, в зависимости от его наличия или отсутствия, добавляет элементу состояние enabled — доступен, или disabled — недоступен.
Подсказки
Скопировать ссылку «Подсказки» Скопировано
💡 Даже если дизайнер забыл про неактивное состояние, обязательно прописывайте его в стилях, чуть приглушая фоновый цвет или делая элемент полупрозрачным — чтобы пользователь точно знал, что с этим элементом взаимодействовать нельзя.
💡 enabled чаще всего не используется, потому что все интерактивные элементы по умолчанию доступны (включены). Это значит, что прописав стили для селектора .input , вы закрываете сценарий с активным элементом.
На практике
Скопировать ссылку «На практике» Скопировано
Алёна Батицкая советует
Скопировать ссылку «Алёна Батицкая советует» Скопировано
🛠 «Выключать» взаимодействие с кнопками или другими элементами формы удобнее именно атрибутом disabled , потому что он сразу же отключает возможность нажать на этот элемент без дополнительных стилей. И, ориентируясь на него, гораздо удобнее прописывать стили для неактивных элементов, используя псевдокласс disabled .
Код для кнопки из моего последнего проекта:
Стили для активной кнопки в обычном состоянии:
.additional-btn padding: 2rem 3rem; border: 1px solid currentColor; font-family: inherit; font-size: 1.6rem; color: #FF6650; text-decoration: none; background-color: transparent; transition: border 0.3s, color 0.3s; cursor: pointer; user-select: none;>.additional-btn padding: 2rem 3rem; border: 1px solid currentColor; font-family: inherit; font-size: 1.6rem; color: #FF6650; text-decoration: none; background-color: transparent; transition: border 0.3s, color 0.3s; cursor: pointer; user-select: none; >
Стили для кнопки при наведении курсора или клике:
.additional-btn:active,.additional-btn:hover color: #FF5050; transition: none;>.additional-btn:active, .additional-btn:hover color: #FF5050; transition: none; >
Стили для кнопки, когда она неактивна:
.additional-btn:disabled cursor: default; color: #A44234;>.additional-btn:disabled cursor: default; color: #A44234; >
Не активная кнопка с помощью disabled

HTML-CSS-JQUERY
В этой статье мы рассмотрим как сделать кнопку не активной, при не выполнении определенных условий в форме отправки данных на сайте. Напишем код для кнопки подтверждающей «Согласие на обработку персональных данных», данная тема сейчас востребована в связи с введение закона о «Персональных данных». То есть пока клиент при отправке формы не установит чекбокс напротив надписи «Согласие на обработку персональных данных», кнопка отправки будет не активна.

Зададим тегу значение disabled, которое задает не активность кнопки «Отправить». И немного украсим нашу кнопку и type «checkbox» с помощью CSS.
body < background-color: #1684af; color: #fff; >label < margin-bottom: 8px; font-size: 13px; >input[type=»checkbox»]:checked, input[type=»checkbox»]:not(:checked) < position: absolute; left: -9999px; >input[type=»checkbox»]:checked + label, input[type=»checkbox»]:not(:checked) + label < display: inline-block; position: relative; padding-left: 20px; line-height: 1; cursor: pointer; >input[type=»checkbox»]:checked + label:before, input[type=»checkbox»]:not(:checked) + label:before < content: ""; position: absolute; left: 0px; top: 0px; width: 12px; height: 12px; background-color: #ffffff; >input[type=»checkbox»]:checked + label:after, input[type=»checkbox»]:not(:checked) + label:after < content: ""; position: absolute; -webkit-transition: all 0.2s ease; -moz-transition: all 0.2s ease; -o-transition: all 0.2s ease; transition: all 0.2s ease; >input[type=»checkbox»]:checked + label:after, input[type=»checkbox»]:not(:checked) + label:after < left: 1px; top: 1px; width: 2px; height: 2px; border: 4px solid #F2622E; >input[type=»checkbox»]:not(:checked) + label:after < opacity: 0; >input[type=»checkbox»]:checked + label:after < opacity: 1; >.check-policy < font-size: 13px; >.btn < padding: 0.75em 1.75em; display: inline-block; line-height: 1; margin: 2em 0; color: #fff; background-color: #F2622E; border: none; >.btn:hover < cursor: pointer; >.btn:disabled, .btn:hover:disabled
А теперь добавим к input JS событие:
что бы при нажатии на строчку с «Согласие на обработку персональных данных» кнопка «Отправить» стала активной.

Посмотреть как это работает можно здесь: