- WordPress – Simple CSS Text Boxes In Posts
- Using Inline CSS
- Using External CSS
- Creating a Quicktag button for your text box style
- Next article: Rounded Corners
- 65 responses on “ WordPress – Simple CSS Text Boxes In Posts ”
- CSS use Placeholder value as a title of the text box when user clicks on it
- CSS Style
- HTML Body
- Related
- CSS стили текста
- Примеры записи стилей с заданными свойствами
- font-family
- font-size
- font-style
- font-variant
- font-weight
- Пример записи стилей текста в одной строке
WordPress – Simple CSS Text Boxes In Posts
In this article, I outline how to create simple text boxes using both inline and external CSS and how to set up a quicktag button so you can use them with the minimum of effort. You’ll be surprised at how easy it is to do!
I often have information that I want to include in a post, without it being part of the main body of the article. For example, additional information that may be useful to readers, but that disrupts the flow of the post.
The ideal way to include this sort of information is in a text box with formatting that sets it apart.
The information is available, but the formatting separates it from the main body of the post in the reader’s mind.
Books and websites often use this technique, so why not inside posts? It’s possible to use blockquotes for this purpose, but I wanted to keep that for quoting other people, so I decided to create text boxes using CSS.
If you’re interested in text boxes with rounded corners, this is a little more difficult (but so much cooler). I don’t cover that in this article, as it would make it too long, but you can read about it in my Rounded Text Boxes in Posts article.
Using Inline CSS
It is simple to use inline CSS to create a box around a paragraph.
First, use the default WordPress Editor (ie the Visual tab page) to write the entire post, including the text you want displayed in a text box. When you are finished, go to the Code tab page and locate the paragraph to go in the box. Add:
immediately before the text and
immediately after it. Save this and you should get a text box similar to this one:
Note, if you are using the Visual Editor, with the default settings, you cannot use instead of . If you do, WordPress converts it to anyway and may break the code in the process! Unfortunately this means that this method only works for one paragraph – see my rounded text boxes in posts”>Rounded Text Boxes in Posts article for boxes with more than one paragraph.
You can change the style of the text box (ie the colours, font, size, border, etc), simply by changing the CSS in the style=»» section. This requires a basic knowledge of CSS, which is beyond the scope of this article, but an Internet search will reveal many sites with information on CSS.
Note: I now created have a Colour Selector, which can create the appropriate code for you. This works for simple text boxes (inline CSS or external CSS) as outlined in this post or for rounded text boxes.
Using External CSS
If you want your text boxes to have a common style across your site, use external, rather than internal, CSS. You set up the style information once, in your external CSS file and reference it each time you add a text box.
If you want to change the style, you only need to change it in one place (the external CSS file) and it will automatically change in every post using this style. With inline CSS you would have to manually change each post.
The external CSS file for the theme you are using is normally style.css in the wp-content/themes/yourtheme folder. Download this file using an FTP program, make a copy of it in case you make a mistake, then use a text editor to add the following to the end of style.css :
The style information can be changed to suit your needs. When finished, save the file, then ftp it back up to the server, overwriting the original.
To create a text box, simply reference the new class (textbox) in a
tag. Use the Visual Editor to write the entire post, go to the Code tab page, locate the paragraph to go in the box and add:
immediately before the text and
immediately after it.
WORDPRESS.COM Users
Apparently wordpress.com does not allow any inline CSS and charges extra for external CSS. If so, the inline CSS solution above will not work for you. If you have purchased the CSS Editing upgrade, the external CSS solution above should work.
There are other options that don’t use CSS, as outlined by Lorelle VanFossen, but be warned: these techniques are considered out of date by most people, including Lorrelle who is providing them as as workaround to wordpress.com’s CSS policy.
Creating a Quicktag button for your text box style
If you are going to use text boxes often, you can set up a quicktag button for either the internal or external CSS method. This means you don’t even need to type the line calling the text box style. Simply go the Code tab page, select the paragraph you want and click the quicktag. Easy!
I found an excellent tutorial on setting up quicktags by Podz, and a useful article by Lorelle VanFossen. Note Lorelle’s advice on making a copy of your changes so you can add them again if lost when upgrading WordPress.
To set up a quick tag for the text box styles outlined above, you need to change the quicktags.js file in the wp-includes/js folder. Download this file using an ftp program, make a copy of it and open the original with a text editor. Find the following section (at about line 126):
and add this on the line after it (if using the inline CSS method):
[php]edButtons[edButtons.length] =new edButton(‘ed_textbox’
,’textbox’
,’<p style=»padding:2px 6px 4px 6px; color: #555555; background-color: #eeeeee; border: #dddddd 2px solid»>’
,’</p>’
,”
);[/php]
If you are using the external CSS method, you need to add this instead:
[php]edButtons[edButtons.length] =new edButton(‘ed_textbox’
,’textbox’
,’<p/> ,’</p>’
,”
);[/php]
When you are finished, save the file, then ftp it back up to the server, overwriting the original file.
You’re done! You should now have a textbox quicktag in the Code tab page of the editor, which will add the appropriate code when you select the paragraph and click the quicktag.
Next article: Rounded Corners
As you can see, simple square text boxes are easy and effective. However, what I really want are text boxes with rounded corners. I explain how to create these in my Rounded Text Boxes in Posts article.
Note: I now created have a Colour Selector, which can create the appropriate code for you. This works for simple text boxes (inline CSS or external CSS) as outlined in this post or for rounded text boxes.
65 responses on “ WordPress – Simple CSS Text Boxes In Posts ”
CSS use Placeholder value as a title of the text box when user clicks on it
The following tutorial shows you how to use CSS to do «CSS use Placeholder value as a title of the text box when user clicks on it».
CSS Style
The CSS style to do «CSS use Placeholder value as a title of the text box when user clicks on it» is
input:focus~.floating-label, input:not(:focus):valid~.floating-label < top:8px; bottom:10px; left:20px; font-size:11px; opacity:1; > .inputText !-- w w w . d e m o 2 s . co m --> font-size:14px; width:200px; height:35px; > .floating-label < position:absolute; pointer-events:none; left:20px; top:18px; transition:0.2s ease all; >
HTML Body
body> div> input type="text" >"inputText" required> span >"floating-label">Email or phone The following iframe shows the result. You can view the full source code and open it in another tab.
html> head> meta name="viewport" content="width=device-width, initial-scale=1"> style id="compiled-css" type="text/css"> input:focus ~ .floating-label, input:not(:focus):valid ~ .floating-label< top: 8px; bottom: 10px; left: 20px; font-size: 11px; opacity: 1; > .inputText !-- ww w . d em o2 s . c o m --> font-size: 14px; width: 200px; height: 35px; > .floating-label < position: absolute; pointer-events: none; left: 20px; top: 18px; transition: 0.2s ease all; > body> div> input type="text" >"inputText" required/> span >"floating-label">Email or phone Related
- CSS split two textbox with an vertical bar with an OR text on it (Demo 3)
- CSS stop textbox moving inside its container in WebKit
- CSS Use JQuery to Find All Readonly Text Boxes on a Web Page
- CSS use Placeholder value as a title of the text box when user clicks on it
- CSS how use checkBox is Checked change textcolor
- CSS how use checkBox is Checked change textcolor (Demo 2)
- CSS boxed content being «annoyed» by the text supposed to be under it
demo2s.com | Email: | Demo Source and Support. All rights reserved.
CSS стили текста

В браузере содержание выводится в виде символов, которые имеют характерный размер, цвет, наклон, а также тип шрифта и другие визуальные варианты. С помощью CSS можно задать отображение текста, исходя из потребности оформления конкретной страницы и сайта в целом.
Примеры записи стилей с заданными свойствами
font-family
Для того чтобы задать тот шрифт который будет уместен при отображении на интернет ресурсе используется свойство font-family, значением которого будет название шрифта.
font-family : Arial, Gadget, sans-serif; font-family : Courier New, monospace; font-family : Impact, fantasy; Запись нескольких шрифтов осуществляется через запятую и делается это для того чтобы в случае отсутствия на компьютере необходимого шрифта, который идёт первым до запятой, назначался следующий.

CSS .box < width: 260px; margin: 0px auto; padding: 3px 20px; background-color: #fc0; >.box .title, .box .meaning < text-align: center; padding-top: 10px; padding-bottom: 10px; >.box .title < font-size: 25px; font-weight: bold; >.box .meaning
font-size
Для определения размера шрифта в CSS делается следующая запись:
font-size : 250%; font-size : 30px; font-size : 11pt; font-size : 0.5em; 
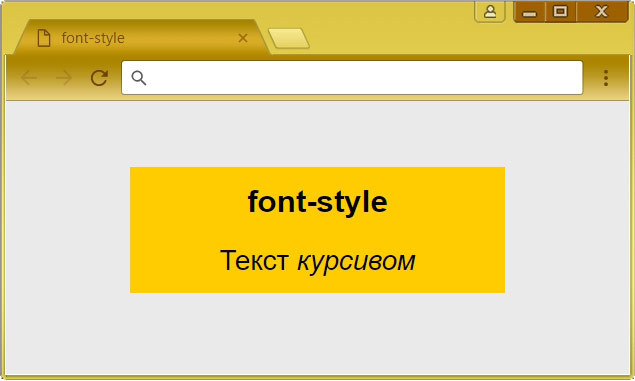
font-style
Чтобы задать наклонный шрифт или отменить курсивное отображение запись ведётся следующим образом:
font-style : normal; font-style : italic; normal – обычное начертание текста
italic – курсивное начертание
oblique – наклонный текст. Отличается от курсива тем, что наклоняет текст, а не выводит соответствующие символы.
font-variant
Стилями CSS можно задать вывод символов в верхнем регистре либо в исходном формате.
font-variant : normal; font-variant : small-caps; normal – формат символов остаётся по умолчанию
small-caps – данная опция преобразует все строчные символы как заглавные буквы с уменьшенным размером.

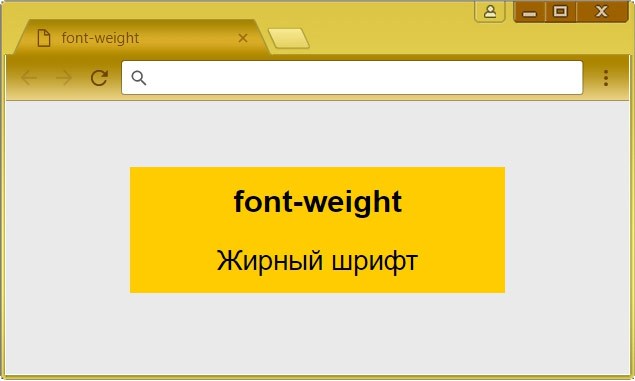
font-weight
Для того чтобы придать шрифту насыщенность можно воспользоваться следующими вариантами записи стилей:
font-weight : lighter; font-weight : bold; font-weight : normal; font-weight : bolder; font-weight: 100; font-weight: 200; font-weight: 300; font-weight: 400; font-weight: 500; font-weight: 600; font-weight: 700; font-weight: 800; font-weight: 900; normal – установка стандартного начертания
100 – 900 – значение насыщенности с шагом через 100
400 – Нормальное начертание шрифта, которое установлено по умолчанию
Пример записи стилей текста в одной строке
font : bold italic 22px Times New Roman, serif; font : bold italic 22px Arial, sans-serif; font : 12pt/10pt Courier New, monospace; font : bold italic 110% Parkavenue, cursive; font : normal small-caps 12px/14px Impact, fantasy;