- Как изменить цвет SVG в CSS
- Основы
- 1. Меняем цвет с помощью свойства fill
- 2. Меняем цвет в файле style.css
- Подключаем SVG-иконку на сайт и меняем цвет через CSS
- В предыдущих сериях…
- Подключение через тег в html
- Иконки
- Подключение фона в .css
- Описываем svg-графику inline
- Заключение
- How to change color of SVG (Various ways using CSS)
- Change SVG color using CSS
- Another way (Using SVG as background image)
- Using Filter and SVG inside IMG tag
- Using CSS Mask
- CSS SVG Color
- Example 1
- Example 2
- Example 3
- Example 4
- Example 5
- Conclusion
- About the author
- Aqsa Yasin
Как изменить цвет SVG в CSS
В этой статье рассмотрим несколько примеров, как задать цвет любому изображению в формате svg с использованием css-стилей.
Есть множество вариантов, как использовать SVG. От того, как вы применяете SVG и будет зависеть способы редактирования.
Основы
SVG (Scalable Vector Graphic) — масштабируемая векторная графика. Это уникальный формат для изображений. В отличии от привычных нам форматов, в svg не используются пиксели. Здесь картинка строется на векторах. Это значит, что вы можете, например, масштабирать размер картинки до любых значений и при этом не терять качество.
Изображение svg можно вставить кодом прямо в файл html — это будет инлайновый вариант:
А можно вставить через тег img:
Если заглянуть «под капот» и изучить код, который отвечает за отрисовку SVG, то можно выделить два свойства, которые отвечают за цвет — fill (заливка) и stroke (обводка). Их можно редактировать и тем самым менять цвет иконки.
Давайте выделим несколько методов, которые позволяют менять цвет SVG.
1. Меняем цвет с помощью свойства fill
Смотрите, у нас два квадрата — они идентичны, за исключением свойства fill. В одном случае мы залили квадрат красным цветом, в другом вообще не прописали это свойство.
Свойство fill можно применять к отдельному вектору в вашем изображении.
2. Меняем цвет в файле style.css
Или в любом другом файле css, который подключен к html.
Подключаем SVG-иконку на сайт и меняем цвет через CSS

HTML, CSS
В предыдущих сериях…
В прошлой статье мы выяснили, в чем отличие растровых форматов изображения от векторных. Теперь будем работать с векторной графикой. Для начала, научимся подключать эти изображения разными способами.
Возьмем стандартную папку с проектом, в которой есть отдельная папка для изображений, отдельная — для файлов .css , а также файл .html
Подключение через тег ![]() в html
в html
Работаем как с обычной картинкой. Тег , атрибут src , прописываем путь к файлу. Можно использовать любые атрибуты
, включая атрибут width .
Иконки
Подключение фона в .css
Можно подключить svg-графику в качестве фона элемента. Часто используются фоновые паттерны. Это небольшой фрагмент, впоследствии повторяющийся и создающий орнамент.

Укажите в html нужный класс и пропишите свойства фона background-image в файле css. Используйте функцию url() , чтобы задать путь к файлу с изображением.
/* SVG фоновое изображение */ .block-bg < width: 600px; height: 200px; background-image: url('./../img/bg-zigzag.svg'); > 
Описываем svg-графику inline
Существуют специальные теги и атрибуты для описания графики прямо в коде. При этом, изображение становится интерактивным — мы можем, например, менять цвет, или размер по наведению на иконку.
Тег используется как контейнер для хранения SVG графики. При помощи тега и его атрибутов создается фигура. Посмотрите, как выглядит иконка YouTube в inline формате.
Стилизуем в файле .css по классу youtube-icon .
Будем менять цвет иконки по наведению при помощи свойства fill .
/* SVG inline код. Смена цвета по ховеру */ .youtube-icon < width: 64px; height: 64px; fill: black; >.youtube-icon:hover
Заключение
- Мы разобрали 3 стандартных способа подключения SVG-графики на сайт: тег
, свойства CSS, тег .
- Узнали про то, как можно менять цвет SVG-иконки через CSS и свойство fill .
- В следующей статье продолжим работу с тегам , , разберем как можно ещё кастомизировать векторную графику.
How to change color of SVG (Various ways using CSS)
In one of the previous articles, I have mentioned Best 5+ Free HTML Rich Text Editor to use but now in this article, I have provided few possible ways to change the color of SVG images using CSS or Javascript.
If you are using SVG image icons or SVG image logo and want to change the color of the image, then you can have an issue while changing its color, because if you will use CSS property like background-color or color for SVG files it will not work, so I have provided solutions to resolve this issue.
Change SVG color using CSS
Every SVG has XML file like structure so, it could be as below
So, if you want to change SVG color, then you can directly target » path » element or » polygon » element of SVG structure and use CSS property » fill «
So, you can have CSS has below
Here is the complete Fiddle sample
But the above solution will only work when you have SVG with path information.
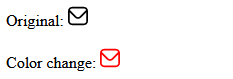
You can also open SVG in any Text Editor and then get to it’s XML as shown above and then in tag use property «fill» to add change color, as shown below
Another way (Using SVG as background image)
You can also use SVG as a background image for an icon and then use CSS ‘mask’ property to fill it as Background.
Once you have set it as the background image, you can simply use ‘background-color’ CSS property to change image’s color
.icon < width: 48px; height: 48px; display: inline-block; -webkit-mask: url(https://s3-us-west-2.amazonaws.com/s.cdpn.io/18515/heart.svg) no-repeat 50% 50%; mask: url(https://s3-us-west-2.amazonaws.com/s.cdpn.io/18515/heart.svg) no-repeat 50% 50%; -webkit-mask-size: cover; mask-size: cover; >.icon-red < background-color: red; >.icon-orange < background-color: orange; >.icon-yellow

Using Filter and SVG inside IMG tag
If you are using SVG with IMG tag, you can use CSS property ‘filter’ with saturation, which will change the color of the SVG image
Using CSS Mask
We can also use CSS mask property to change SVG color
body < overflow:hidden; >.icon < --size: 70px; display: inline-block; width: var(--size); height: var(--size); transition: .12s; -webkit-mask-size: cover; mask-size: cover; >.icon-heart < background: black; animation: 4s frames infinite linear; -webkit-mask-image: url(https://s3-us-west-2.amazonaws.com/s.cdpn.io/18515/heart.svg); mask-image: url(https://s3-us-west-2.amazonaws.com/s.cdpn.io/18515/heart.svg); >@keyframes frames < 0% < transform:translatex(100vw) >25% < background: red; >75% < background: lime; >100% < transform:translatex(-100%) >>This approach can be useful if SVG is external, and included via URL.
That’s it, these are some 4 useful ways to change color of SVG using CSS.
CSS SVG Color
![]()
“The SVG is the acronym for “Scalable Vector Graphics.” It is used for defining vector-based graphics. It is a two-dimensional graphic. We can apply different colors to this SVG. We can also change the color of the SVG by hovering over the mouse by utilizing the CSS properties. The CSS provides different properties for changing the color of SVG. We use these properties for coloring the SVG in CSS. In this tutorial, we will explain the SVG color and will do some examples here in which we color the SVG using different properties of CSS. Look at the example below; you will learn how to color the SVG in CSS.”
Example 1
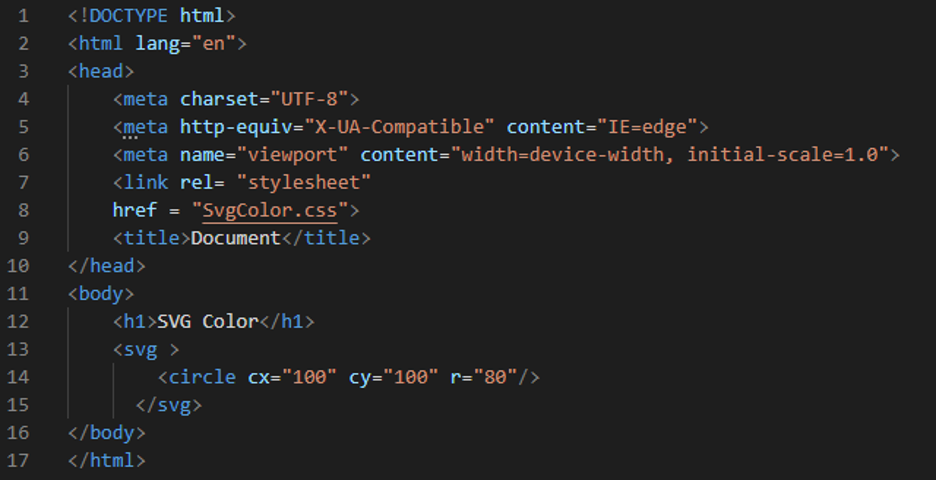
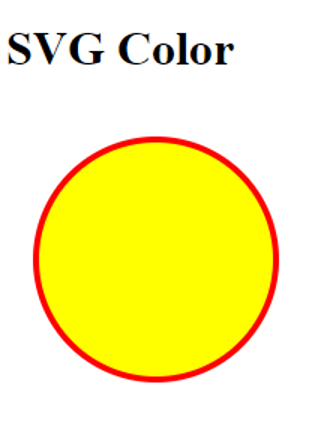
To start writing HTML, open Visual Studio Code and create a new file and choose HTML as the language. The file has been created, and all that remains is to append the “!” mark in this empty file which is created here to obtain the basic tags. After, pressing “Enter” causes all of the HTML’s basic tags to appear in the file. The body is where we begin the coding process. We place a heading and the “svg” tag. This “svg” tag is used here for defining the container for the SVG image. We put the “circle” inside the “svg” tag for creating an SVG circle. And then close the “svg” tag. Now, we are creating the CSS file and starting coding in the CSS file to apply color to this SVG circle. We also link the CSS file to this current HTML file by utilizing the “link” tag in the “head.”
Here is the CSS code in which we set the “width” of the “svg” as “300px” and the “height” of this “svg” is “300px”. We are using “stroke” here because when we have to add some border to this “svg” circle. We set the “stroke” value as “red.” We also set its width using the “stroke-width,” and we set this “stroke-width” to “4px”. Now, we are coloring this svg circle with the help of the “fill” property of CSS. We use this “fill” property when we have] to color any SVG graphic. Here we have the svg circle, and we are adding color to this svg circle, so we use the “fill” property. We set this “fill” property value as “yellow.”
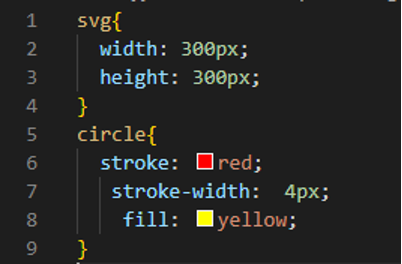
You can see the circle in the output; the color of this svg circle is yellow because we added this color using the “fill” property in CSS, and the border of this svg circle is in red color because we used the “stroke” property in CSS code.
Example 2
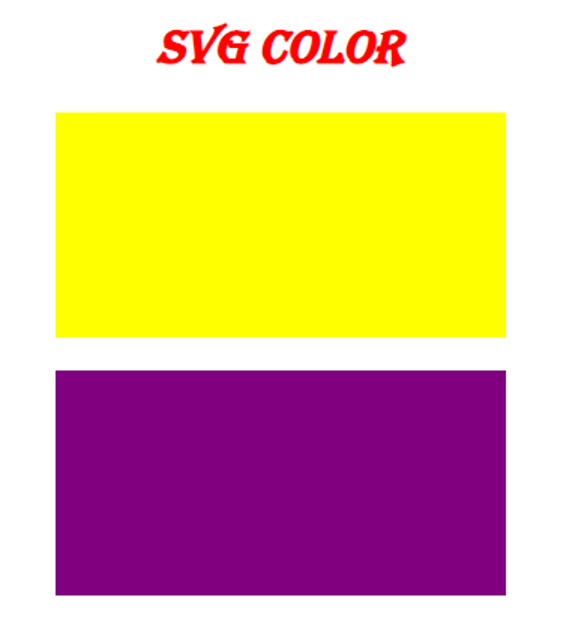
We are creating two rectangle svgs here by placing the “div,” and inside this “div,” we have two different “svgs.” We use “rect” for creating a rectangle. Here we use two rect with the names “rect1” and “rect2” inside the svg and then close the “div” here. Now, we will apply different colors to these rectangle svgs using the CSS properties.
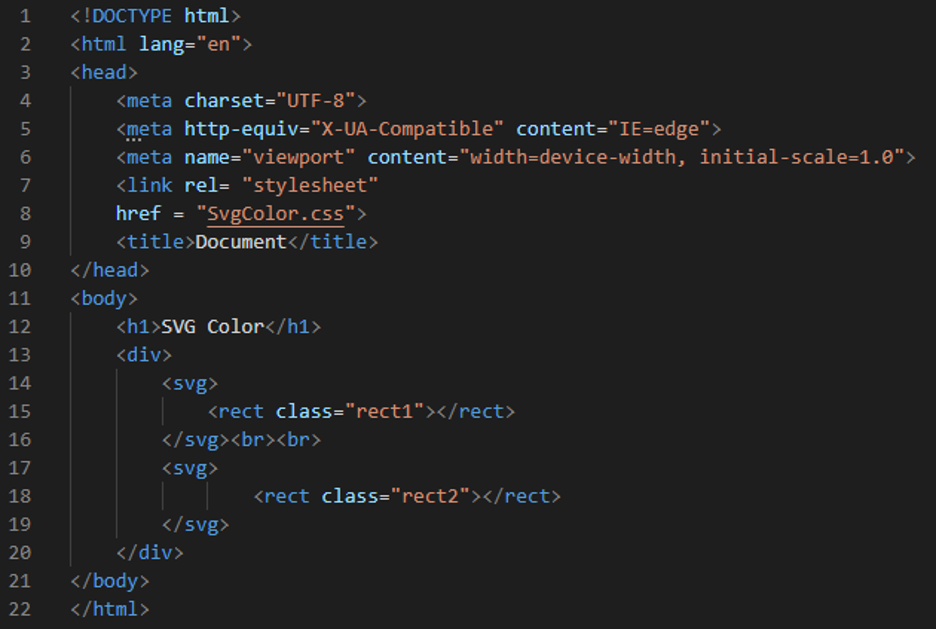
We align all the “body” elements to the “center.” Then, we apply the “red” color to the heading, and “Algerian” we use as the “font-family.” We also style this heading to “italic.” The “height” of the first “rect1” svg is “300px,” and the “width” we are using here is “500px”. We “fill” this rectangle with “yellow” as it is the svg shape, so we use “fill” here. Then we set the same height and width to the next svg rectangle and “fill” this rectangle with “purple.”

There are two svg rectangles in the output. We use the CSS properties for coloring these svg rectangles. Both rectangles are svgs.
Example 3
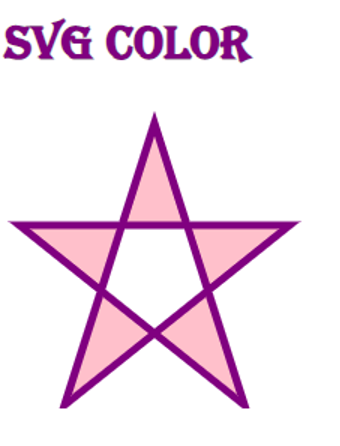
In this code, we are creating an svg polygon, so we use the “svg” tag and create a “polygon” here by defining the points of the polygon and then closing the “svg” tag.

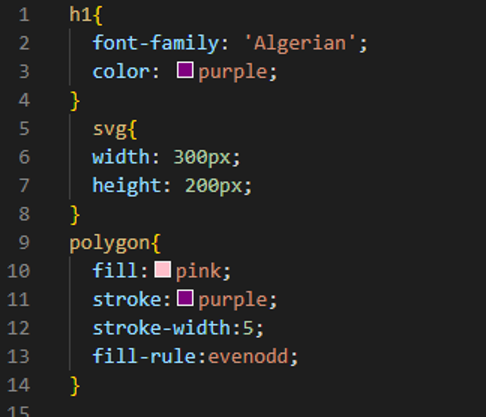
We are utilizing the “Algerian” font and “purple” color for the heading. We set the “svg” “width” and “height” as “300px” and “200px,” respectively. Then we use the “fill” property. We set this “fill” to “pink” so the polygon color will appear “pink.” We also put some borders for this polygon, so we are using “stroke” to give the color of the border, which we set as “purple.” We set the width of this border by utilizing the “stroke-width” property and set it to “5”. Then we use the “fill-rule,” which is used for determining the inside part of the polygon, and set it to “even-odd.”
Here, you see a star which is also called a polygon. This polygon is the svg polygon, and we color this svg polygon here in this example using the “fill” property.
Example 4
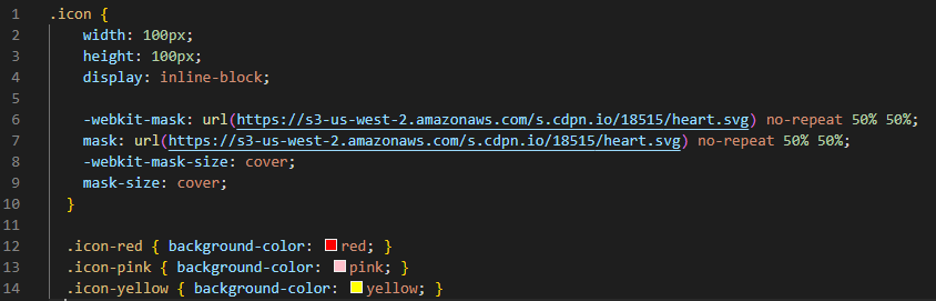
We are going to generate three different icons here, so we are using the “i” tag in this HTML file. We give different names to each icon, so; we will set a different color for each SVG icon.
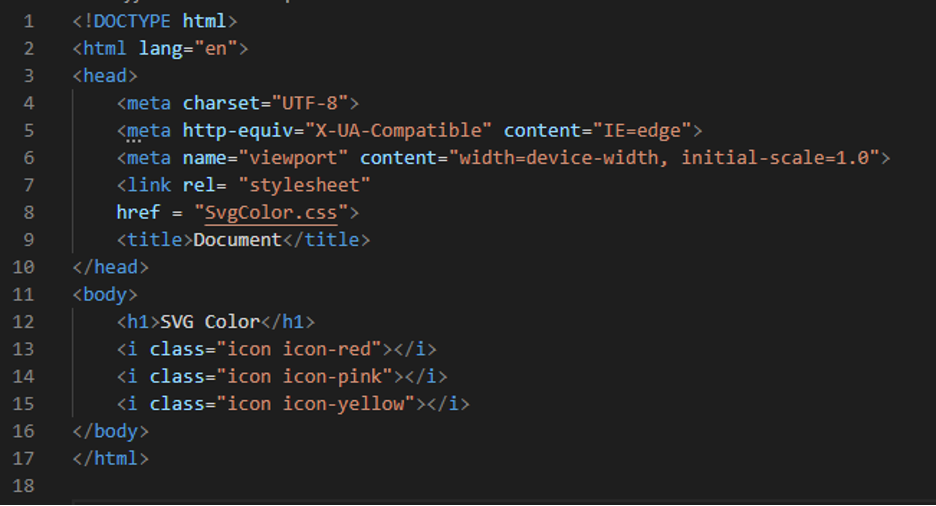
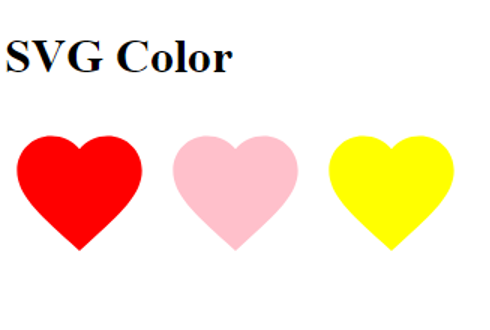
We first set the “icon,” “width,” and “height,” and both are set as “100px”. We also set these icons in one line, so we use the “display” property and set it to “inline-block.” Now, in the “WebKit-mask,” we give the “url” of the SVG image and set the “WebKit-mask-size” to “cover.” Also, the “mask-size” is “cover” here. Then we are going to apply colors to these svg icons with the help of the “background-color” property. We set “red” for the first SVG icon, “pink” as the “background color” for the second SVG icon, and “yellow” color for the third SVG icon.
All three svgs icons appear in different colors because we set these colors in CSS by applying the background-color property to all these icons separately.
Example 5
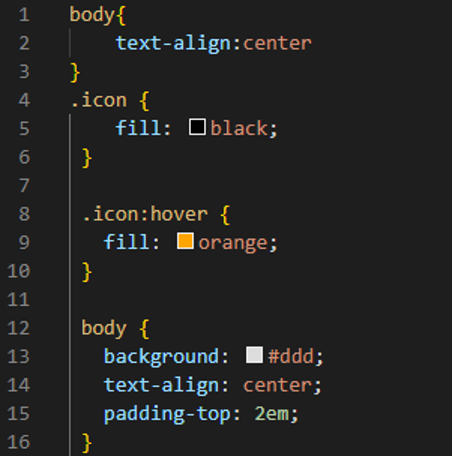
Here, we are using the “XML” version and then give the path of the SVG icon here, and then we will change the color of this icon on hovering, and this will be done in the CSS code.

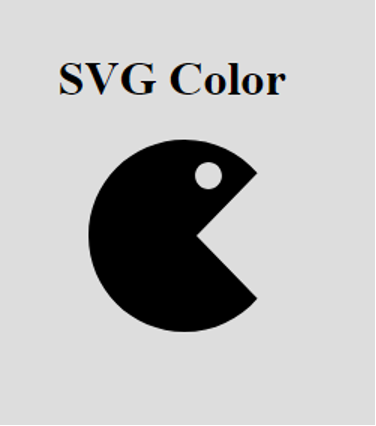
We set the color of this icon by using the “fill” property, as it is the svg icon, so that’s why we are using “fill” here. We set it “black.” This icon will appear in black. We also use “hover” with this “icon” and set “fill” “orange,” so when we hover the mouse over this SVG icon, the color of this will change to “orange,” as we have set “orange” here in the “fill” of “hover.” The “text-align” sets to “center,” and the “padding” we are using here is “2em”.
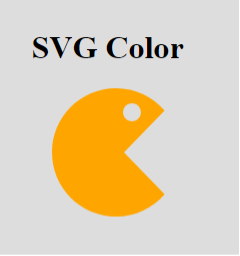
The first output shows before hovering, and you can notice that the color of this SVG icon appears in black, which we have set in the CSS code, but when we hover over this SVG icon, its color changes, and you can see this in the next output.
In this second output, the color of the SVG icon renders “orange” because we set “orange” as “fill” when we hover over this SVG icon in CSS.
Conclusion
This tutorial was created to assist you in understanding the CSS properties, which allows us to color the SVG. This tutorial has covered this concept in great depth. We have presented five different examples here in which we design different SVGs and then color those SVGs, and we have changed the color of different SVGs icons. We have provided the outputs of all these codes in this tutorial. We have utilized two properties here for applying color to the SVGs, which were “fill” and “background-color” properties, and explained them in detail here. After carefully following this tutorial, I hope you’ll be able to color SVGs by using these properties in CSS.
About the author
Aqsa Yasin
I am a self-motivated information technology professional with a passion for writing. I am a technical writer and love to write for all Linux flavors and Windows.