- Change Range Slider Color Using CSS
- Change Range Slider Color Example
- Related:
- Background Color Change Slider with HTML CSS and JavaScript
- HTML Code
- CSS Code
- JavaScript Code
- Demo
- Video Tutorial
- Подборка слайдеров для сайта на чистом CSS
- Пример 1: Маленький слайдер с автоматической прокруткой фото
- HTML разметка
- CSS оформление
- Пример 2: Слайдер, стилизованный под рамку картины
- HTML разметка
- CSS оформление
- Пример 3: Обычный слайдер со стрелками — вперед и назад
Change Range Slider Color Using CSS
To change the color of a range slider using CSS, you can use the ::-webkit-slider-thumb pseudo-element to style the thumb of the slider and the background-color property to set the color. Here is an example:
Change Range Slider Color Example
input[type=»range»]::-webkit-slider-thumb
This will set the color of the thumb of the range slider to a dark gray color. You can change the color to any other color by using the appropriate color code or name.
Here is an example of how you can use this CSS code to style a range slider:
input[type=»range»]::-webkit-slider-thumb
This will apply the style to the thumb of the range slider, changing its color to the specified color.
You can also use the ::-webkit-slider-thumb pseudo-element in combination with other CSS selectors to target specific range sliders. For example:
/* Style only range sliders with the «volume» class */ .volume input[type=»range»]::-webkit-slider-thumb < background-color: #333; >/* Style only range sliders inside a «brightness» element */ #brightness input[type=»range»]::-webkit-slider-thumb
These examples demonstrate some of the ways that you can use the ::-webkit-slider-thumb pseudo-element and the background-color property to style range sliders with CSS. You can use these techniques to create more sophisticated and user-friendly interfaces in your web applications.
Here are some more examples of using the ::-webkit-slider-thumb pseudo-element to style range sliders with CSS:
/* Use a custom font color for the thumb of the range slider */ input[type=»range»]::-webkit-slider-thumb < color: #00f; >/* Add a border around the thumb of the range slider */ input[type=»range»]::-webkit-slider-thumb < border: 1px solid #333; >/* Change the size of the thumb of the range slider */ input[type=»range»]::-webkit-slider-thumb
You can also use the ::-webkit-slider-thumb pseudo-element in combination with other CSS selectors to target specific range sliders. For example:
/* Style only range sliders with the «volume» class */ .volume input[type=»range»]::-webkit-slider-thumb < background-color: #333; >/* Style only range sliders inside a «brightness» element */ #brightness input[type=»range»]::-webkit-slider-thumb
These examples demonstrate some of the ways that you can use the ::-webkit-slider-thumb pseudo-element and the background-color property to style range sliders with CSS. You can use these techniques to create more customizable and user-friendly interfaces in your web applications.Try again
Related:
Background Color Change Slider with HTML CSS and JavaScript
In this tutorial we will see how to change Background Color with Range Slider using HTML, CSS and JavaScript. We have used input range slider for this with CSS linear-gradient property and JavaScript setProperty method.
HTML Code
Take a look at the HTML code given below, in this we have a range type input element inside the div with class of container.
CSS Code
CSS code is given below, in this code we have changed appearance of our range slider using simple CSS properties.
JavaScript Code
Take a look at the JavaScript Code given below, in this code getElementsByTagName() method is used to select body tag and getElementById() method is used to select input range slider.
Then oninput event is attached with input range slider which will trigger a JavaScript function when the value of range slider is changed.
This value is read in real time and percentage of two colors for the CSS linear-gradient is calculated. Variable bg contains complete value of linear-gradient which is dynamic and changes with the value of input range slider.
In simple words this linear-gradient will change when the position of range slider is changed.
The linear-gradient background is then applied to the body of HTML page using .style javascript property and setProperty() method.
var body = document.getElementsByTagName('BODY')[0]; var sliderValue = document.getElementById('range'); sliderValue.oninput = function() Demo
Video Tutorial
Подборка слайдеров для сайта на чистом CSS
Пример 1: Маленький слайдер с автоматической прокруткой фото
Это самый простой слайдер без возможности самостоятельного скроллинга фотографий. Рекомендуемый размер изображений 500x300px.


HTML разметка
CSS оформление
.container_slider_css{margin:50px auto;width:500px;height:300px;overflow:hidden;position:relative} .photo_slider_css{position:absolute;animation:round 16s infinite;opacity:0;width:100%} @keyframes round { 25%{opacity:1} 40%{opacity:0} } img:nth-child(1){animation-delay:12s} img:nth-child(2){animation-delay:8s} img:nth-child(3){animation-delay:4s} img:nth-child(4){animation-delay:0} @media(min-width:0px) and (max-width:320px) { .container_slider_css{width:80%;height:190px} } @media(min-width:321px) and (max-width:480px) { .container_slider_css{width:80%;height:190px} } Пример 2: Слайдер, стилизованный под рамку картины
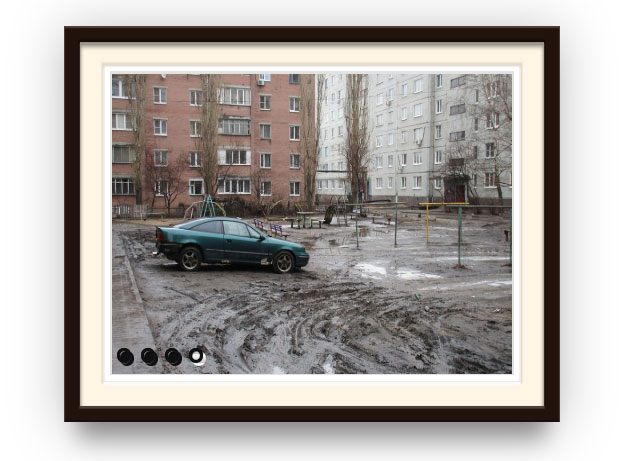
Рекомендуемый размер изображений 400x300px. Слайдер отображается ровно по центру страницы. Адаптива под мобильные устрайства — нет. Если вы новичок в веб, то корректно установить данный слайдер себе на сайт будет проблематично из-за абсолютного позиционирования. Используются тени (box-shadow). Есть возможность самостоятельно скроллить фото. Radio кнопки для прокрутки изображений появляются при наведении мышки. Скачать пример 2
HTML разметка
CSS оформление
.slider_picture{background-color:#fff;box-shadow:inset 0 0 2px hsla(0,0%,0%,.2),0 3px 1px hsla(0,0%,100%,.75),0 -1px 1px 2px hsla(0,0%,0%,.1);height:18.75em;left:50%;margin:-9.875em -13em;padding:.5em;position:absolute;top:50%;width:25em} .slider_picture:before{background-color:#22130c;bottom:-2.5em;box-shadow:inset 0 1px 1px 1px hsla(0,0%,100%,.2),inset 0 -2px 1px hsla(0,0%,0%,.4),0 5px 50px hsla(0,0%,0%,.25),0 20px 20px -15px hsla(0,0%,0%,.2),0 30px 20px -15px hsla(0,0%,0%,.15),0 40px 20px -15px hsla(0,0%,0%,.1);content:'';left:-2.5em;position:absolute;right:-2.5em;top:-2.5em;z-index:-1} .slider_picture:after{background-color:#fff5e5;bottom:-1.5em;box-shadow:0 2px 1px hsla(0,0%,100%,.2),0 -1px 1px 1px hsla(0,0%,0%,.4),inset 0 2px 3px 1px hsla(0,0%,0%,.2),inset 0 4px 3px 1px hsla(0,0%,0%,.2),inset 0 6px 3px 1px hsla(0,0%,0%,.1);content:'';left:-1.5em;position:absolute;right:-1.5em;top:-1.5em;z-index:-1} .slider_picture li{box-shadow:0 -1px 0 2px hsla(0,0%,0%,.03);list-style:none;position:absolute} .slider_picture input{display:none} .slider_picture label{background-color:#111;background-image:linear-gradient(transparent,hsla(0,0%,0%,.25));border:.2em solid transparent;bottom:.5em;border-radius:100%;cursor:pointer;display:block;height:.5em;left:24em;opacity:0;position:absolute;transition:.25s;width:.5em;visibility:hidden;z-index:10} .slider_picture label:after{border-radius:100%;bottom:-.2em;box-shadow:inset 0 0 0 .2em #111,inset 0 2px 2px #000,0 1px 1px hsla(0,0%,100%,.25);content:'';left:-.2em;position:absolute;right:-.2em;top:-.2em} .slider_picture:hover label{opacity:1;visibility:visible} .slider_picture input:checked + label{background-color:#fff} .slider_picture:hover li:nth-child(1) label{left:.5em} .slider_picture:hover li:nth-child(2) label{left:2em} .slider_picture:hover li:nth-child(3) label{left:3.5em} .slider_picture:hover li:nth-child(4) label{left:5em} .slider_picture img{height:18.75em;opacity:0;transition:.25s;width:25em;vertical-align:top;visibility:hidden} .slider_picture li input:checked ~ img{opacity:1;visibility:visible;z-index:10} Пример 3: Обычный слайдер со стрелками — вперед и назад
Рекомендуемый размер изображений 960x640px. Слайдер полностью адаптирован под мобильные устройства. Есть возможность подписывать названия слайдов. Для отображения стрелочек — вперед и назад, — используется стандартный набор иконок font-awesome. На мой взгляд этот слайдер самый оптимальный.