- CSS Buttons
- Example
- Button Sizes
- Example
- Example
- Rounded Buttons
- Example
- Colored Button Borders
- Example
- Hoverable Buttons
- Example
- Shadow Buttons
- Example
- Disabled Buttons
- Example
- Button Width
- Example
- Button Groups
- Example
- Bordered Button Group
- Example
- Vertical Button Group
- Example
- Button on Image
- Animated Buttons
- Example
- Example
- Example
- Example
- How to Change Button Color on Click in CSS
- What is “:active” in CSS?
- How to Change Button Color on Click in CSS?
- HTML
- CSS
- HTML
- Conclusion
- About the author
- Sharqa Hameed
- Стилизация Select с помощью css, как будто это 2020
- Примечания по CSS
- Как это выглядит в разных браузерах
- Стилизация пунктов option
CSS Buttons
Use the background-color property to change the background color of a button:
Example
Button Sizes
Use the font-size property to change the font size of a button:
Example
Use the padding property to change the padding of a button:
10px 24px 12px 28px 14px 40px 32px 16px 16px
Example
.button1
.button2
.button3
.button4
.button5
Rounded Buttons
Use the border-radius property to add rounded corners to a button:
Example
Colored Button Borders
Use the border property to add a colored border to a button:
Example
Hoverable Buttons
Use the :hover selector to change the style of a button when you move the mouse over it.
Tip: Use the transition-duration property to determine the speed of the «hover» effect:
Example
.button <
transition-duration: 0.4s;
>
.button:hover background-color: #4CAF50; /* Green */
color: white;
>
.
Shadow Buttons
Use the box-shadow property to add shadows to a button:
Example
.button1 <
box-shadow: 0 8px 16px 0 rgba(0,0,0,0.2), 0 6px 20px 0 rgba(0,0,0,0.19);
>
.button2:hover box-shadow: 0 12px 16px 0 rgba(0,0,0,0.24), 0 17px 50px 0 rgba(0,0,0,0.19);
>
Disabled Buttons
Use the opacity property to add transparency to a button (creates a «disabled» look).
Tip: You can also add the cursor property with a value of «not-allowed», which will display a «no parking sign» when you mouse over the button:
Example
Button Width
By default, the size of the button is determined by its text content (as wide as its content). Use the width property to change the width of a button:
Example
Button Groups
Remove margins and add float:left to each button to create a button group:
Example
Bordered Button Group
Use the border property to create a bordered button group:
Example
Vertical Button Group
Use display:block instead of float:left to group the buttons below each other, instead of side by side:
Example
Button on Image

Button
Animated Buttons
Example
Example
Add a «pressed» effect on click:
Example
Example
Add a «ripple» effect on click:
How to Change Button Color on Click in CSS
![]()
Button is a clickable element used to perform a specific action. Using CSS, you can set different styles of buttons one of them is to change the color of a button on click. The color of a button can be set using the CSS “:active” pseudo-class.
This blog will teach you the procedure related to changing the button color on click. For this, firstly, learn about the :active pseudo-class.
What is “:active” in CSS?
Changing button color on click in CSS is possible with the help of the “:active” pseudo-class. In HTML, it indicates an element that is being activated when the user clicks on it. Moreover, when using a mouse, the activation starts when the mouse key is pressed.
“a” refers to the HTML element on which the :active class will be applied.
Let’s head towards an example to understand the stated concept.
How to Change Button Color on Click in CSS?
To change the color of a button on click, first, create a button in an HTML file and assign the class name “btn”.
HTML
Next, in CSS, set the color of the button. To do so, we will use “.btn” to access the button and set the color of the button as “rgb(0, 255, 213)”.
CSS
background-color : rgb ( 0 , 255 , 213 ) ;
After that, apply :active pseudo-class on the button as “.btn:active” and set the color of the button that will show in its active state as “rgb(123, 180, 17)”:
background-color : rgb ( 123 , 180 , 17 ) ;
This will show the following outcome:
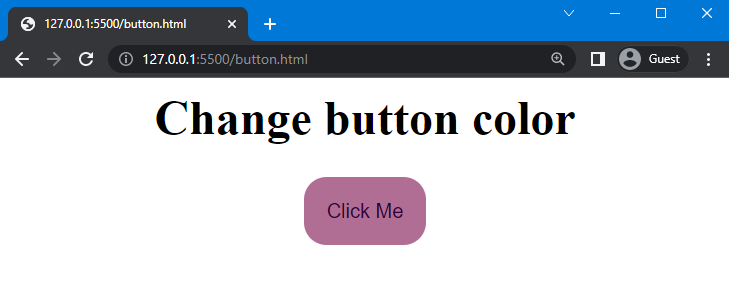
Now, let’s add the heading with tag and button class name “button”, inside the tag.
HTML
Next, we will move to CSS and style the button and apply :active on it. To do so, we will set the border style as “none” and give padding as “15px”. After that, set the color of the button text as “rgb(50, 0, 54)” and its background as “rgb(177, 110, 149)”, and its radius as “15px”:
background-color : rgb ( 177 , 110 , 149 ) ;
This will show the following outcome:
After that, we will apply :active pseudo-class on the button as “.button:active” and set the color of a button as “rgb(200, 255, 0)”:
background-color : rgb ( 200 , 255 , 0 ) ;
Once you implement all of the above code, go to the HTML file and execute it to check out the result:
From the output, it can be observed when the button is clicked its color is changed according to the specified RGB color code.
Conclusion
To change the button color on click in CSS, the “:active” pseudo-class can be used. More specifically, it can represent the button element when it gets activated. Using this class, you can set different button colors when the mouse clicks on it. This article explained the procedure for changing button color on click in CSS.
About the author
Sharqa Hameed
I am a Linux enthusiast, I love to read Every Linux blog on the internet. I hold masters degree in computer science and am passionate about learning and teaching.
Стилизация Select с помощью css, как будто это 2020
Select – этот элемент трудно стилизовать для всех браузеров. Чтобы избегать его недостатки раньше, мы использовали обходные пути, такие как стилизация родительского элемента, добавление псевдоэлементов и даже использование JavaScript для создания подобного элемента управления из различных элементов, которые легче стилизовать. Но обходные пути сложно поддерживать и использовать, не говоря уже о проблемах доступности, которые создают пользовательские элементы.
Как выясняется, разумный набор стилей для select можно создать согласованно и привлекательно для новых браузеров, не меняясь при этом и в старых.
Быстрый Пример
Вот элемент select без стиля . Он будет выглядеть немного иначе, в зависимости от браузера, который вы используете.

Ниже представлен тот же элемент select, стилизованный непосредственно с помощью CSS. Никаких дополнительных элементов обертки или псевдоэлементов не требуется (за исключением одного, который необходим для IE10 +):
HTML-код для приведенного select приведен ниже. Обратите внимание, что CSS применяется к любому select с классом select-css.
А вот CSS, управляющий select:
.select-css < display: block; font-size: 16px; font-family: sans-serif; font-weight: 700; color: #444; line-height: 1.3; padding: .6em 1.4em .5em .8em; width: 100%; max-width: 100%; box-sizing: border-box; margin: 0; border: 1px solid #aaa; box-shadow: 0 1px 0 1px rgba(0,0,0,.04); border-radius: .5em; -moz-appearance: none; -webkit-appearance: none; appearance: none; background-color: #fff; background-image: url('data:image/svg+xml;charset=US-ASCII,%3Csvg%20xmlns%3D%22http%3A%2F%2Fwww.w3.org%2F2000%2Fsvg%22%20width%3D%22292.4%22%20height%3D%22292.4%22%3E%3Cpath%20fill%3D%22%23007CB2%22%20d%3D%22M287%2069.4a17.6%2017.6%200%200%200-13-5.4H18.4c-5%200-9.3%201.8-12.9%205.4A17.6%2017.6%200%200%200%200%2082.2c0%205%201.8%209.3%205.4%2012.9l128%20127.9c3.6%203.6%207.8%205.4%2012.8%205.4s9.2-1.8%2012.8-5.4L287%2095c3.5-3.5%205.4-7.8%205.4-12.8%200-5-1.9-9.2-5.5-12.8z%22%2F%3E%3C%2Fsvg%3E'), linear-gradient(to bottom, #ffffff 0%,#e5e5e5 100%); background-repeat: no-repeat, repeat; background-position: right .7em top 50%, 0 0; background-size: .65em auto, 100%; >.select-css::-ms-expand < display: none; >.select-css:hover < border-color: #888; >.select-css:focus < border-color: #aaa; box-shadow: 0 0 1px 3px rgba(59, 153, 252, .7); box-shadow: 0 0 0 3px -moz-mac-focusring; color: #222; outline: none; >.select-css option < font-weight:normal; >*[dir="rtl"] .select-css, :root:lang(ar) .select-css, :root:lang(iw) .select-css Примечания по CSS
CSS для этого прекрасно использовать как есть, но если вы хотите его редактировать, вам может понадобиться знать о нескольких числах и значениях, которые помогают ему выглядеть правильно.
- Select Устанавливается на display: block; по умолчанию, но вы можете поменять его, display: inline-block; width: auto; если хотите, чтобы он сидел рядом с label.
- Фон select создается с использованием двух фоновых изображений: первое — это значок стрелки svg (выраженный в виде URI данных), а второе — повторяющийся линейный градиент. Любой URL может быть внешним изображением, если хотите. Если вы меняете изображение значка, имейте в виду, что его размер установлен в первом разделе последующего background-size: .65em auto, 100%; свойства. И его положение задается через background-position: right .7em top 50%, 0 0;(который находится .7em с правой стороны, соответственно). Кроме того, если размер изменяется, вы можете захотеть сделать более правый отступ для кнопки, чтобы она не перекрывала select текст, но имейте в виду, что в IE9 и более ранних версиях пользовательская стрелка не появится и браузер по умолчанию Стрелка будет отображаться слева от отступа, поэтому не добавляйте слишком много, иначе стрелка IE9 будет вставлена очень далеко.
- Важно сохранить линейный градиентный фон, потому что его наличие на самом деле мешает IE9 и старше распознавать свойство background, и в результате он не будет показывать пользовательский значок рядом со своим невидимым собственным. Если вы хотите плоский цвет, используйте линейный градиент между двумя одинаковыми значениями цвета.
- Appearance Правило и его и приставочные версии имеют важное значение, чтобы сбросить стили некоторых браузеров по умолчанию.
- font-size: 16px; Правило важно , потому что IOS Safari будет увеличивать его в макете сайта , если select текст меньше 16px. Обычно такое поведение раздражает, поэтому мы стараемся избегать его с размером шрифта 16 пикселей на select.
- .select-css::-ms-expand Правило предписывает IE11 и IE10 , чтобы скрыть псевдоэлемент меню значка, поэтому может появиться пользовательский значок позади него.
Как это выглядит в разных браузерах
Вот несколько скриншотов select в различных браузерах. В некоторых браузерах, таких как IE9 и старше, дизайн иконок не полностью поддерживается, но элемент управления можно использовать и выглядит достаточно хорошо для наших обычных целей.


Наслаждайтесь!
Обновление статьи 3.06.20
Стилизация пунктов option
В интернете есть много решений как стилизовать пункты выбора. Ниже приведены три популярных способа.
2. С помощью стилизации label со скрытыми input
3. С помощью списка li и скрытого input
Стилизация — это конечно хорошо, но доступность нужна не меньше.
Заменяя стандартные элементы управления самодельными, придется реализовывать штатные возможности самостоятельно.
В последних двух приведенных примерах без мыши/тачскрина (с помощью клавиатуры/скринридера) сделать ничего нельзя. Скринридер в режиме чтения тоже ограничен. После долгих изысканий в дизайне и функционале я пришел к выводу, что лучше просто оставить select как есть.
И это все. Спасибо за прочтение.