- How to Align Labels Next to Inputs
- Solutions with CSS properties
- Example of right aligning labels next to inputs with the text-align property:
- Result
- Example of left aligning labels next to inputs:
- Example of left aligning labels next to inputs:
- : The Label element
- Try it
- Attributes
- Styling with CSS
- Examples
- Defining an implicit label
- How to Put Label Above Input Field in HTML & CSS?
- Use CSS Flexbox to Put Label Above Input Field
- Conclusion
- Related posts:
How to Align Labels Next to Inputs
When you create a web form, you’ll probably need to know how to align labels with inputs. Here, we’ll show how it’s possible to create right-aligned and left-aligned elements next to inputs.
Solutions with CSS properties
In our example below, we use three elements and place and elements within each of them. Note that we use a type attribute for each . We specify the margin-bottom of our element. Then, we set the display of the element to «inline-block» and give a fixed width. After that, set the text-align property to «right», and the labels will be aligned with the inputs on the right side.
Example of right aligning labels next to inputs with the text-align property:
html> html> head> title>Title of the document title> style> div < margin-bottom: 10px; > label < display: inline-block; width: 150px; text-align: right; > style> head> body> form action="/form/submit" method="post"> div> label>Short label> input type="text" /> div> div> label>Simple label label> input type="text" /> div> div> label>Label having more text label> input type="text" /> div> form> body> html>Result
We can remove the text-align property, and the labels will be left-aligned by default. Let’s see an example, where we also add placeholder , id and name attributes on inputs and for attribute on labels. As a result, the input will be activated when a label is clicked.
Example of left aligning labels next to inputs:
html> html> head> title>Title of the document title> style> div < margin-bottom: 10px; > label < display: inline-block; width: 150px; > style> head> body> form action="/form/submit" method="post"> div> label for="name">Name label> input type="text" id="name" placeholder="Enter your name" /> div> div> label for="age">Your Age label> input type="text" id="age" name="age" placeholder="Enter your age" /> div> div> label for="country">Enter Your Country label> input type="text" id="country" name="country" placeholder="Country" /> div> input type="submit" value="Submit" /> form> body> html>In our next example too, we’ll left-align the labels. Here, we also make the inline-block and give a fixed width. For the element, we add padding.
Example of left aligning labels next to inputs:
html> html> head> title>Title of the document title> style> div < margin-bottom: 10px; > label < display: inline-block; width: 110px; color: #777777; > input < padding: 5px 10px; > style> head> body> form action="/form/submit" method="post"> div> label for="name">Your name: label> input id="name" name="username" type="text" autofocus /> div> div> label for="lastname">Your Last name: label> input id="lastname" name="lastname" type="text" /> div> input type="submit" value="Submit" /> form> body> html>Regarding the inclusion of input tags in label tags, this can be useful for accessibility purposes as it helps screen readers associate the label with the input field. However, it’s not strictly necessary and can add unnecessary markup to the HTML. It’s generally up to the designer or developer to decide whether to include input tags in label tags based on their specific needs and preferences.
: The Label element
The HTML element represents a caption for an item in a user interface.
Try it
Associating a with a form control, such as or offers some major advantages:
- The label text is not only visually associated with its corresponding text input; it is programmatically associated with it too. This means that, for example, a screen reader will read out the label when the user is focused on the form input, making it easier for an assistive technology user to understand what data should be entered.
- When a user clicks or touches/taps a label, the browser passes the focus to its associated input (the resulting event is also raised for the input). That increased hit area for focusing the input provides an advantage to anyone trying to activate it — including those using a touch-screen device.
To explicitly associate a element with an element, you first need to add the id attribute to the element. Next, you add the for attribute to the element, where the value of for is the same as the id in the element.
Alternatively, you can nest the directly inside the , in which case the for and id attributes are not needed because the association is implicit:
label> Do you like peas? input type="checkbox" name="peas" /> label>
The form control that a label is labeling is called the labeled control of the label element. Multiple labels can be associated with the same form control:
label for="username">Enter your username:label> input id="username" name="username" type="text" /> label for="username">Forgot your username?label>
Elements that can be associated with a element include , (except for type=»hidden» ), , , , and .
Attributes
This element includes the global attributes.
The value of the for attribute must be a single id for a labelable form-related element in the same document as the element. So, any given label element can be associated with only one form control.
Note: To programmatically set the for attribute, use htmlFor .
The first element in the document with an id attribute matching the value of the for attribute is the labeled control for this label element — if the element with that id is actually a labelable element. If it is not a labelable element, then the for attribute has no effect. If there are other elements that also match the id value, later in the document, they are not considered.
Multiple label elements can be given the same value for their for attribute; doing so causes the associated form control (the form control that for value references) to have multiple labels.
Note: A element can have both a for attribute and a contained control element, as long as the for attribute points to the contained control element.
Styling with CSS
There are no special styling considerations for elements — structurally they are simple inline elements, and so can be styled in much the same way as a or element. You can apply styling to them in any way you want, as long as you don’t cause the text to become difficult to read.
Examples
Defining an implicit label
label>Click me input type="text" />label>
How to Put Label Above Input Field in HTML & CSS?
The default display type of the and elements is inline , therefore, when you put these elements inside a form, they are displayed in the same line on the webpage and take up only as much space as they need.
Whether an element will take up the full width of its parent or will take up only minimal space is decided by the display property.
So, if you want to put the above the field, you have to change the display type of these two elements from inline to block . This can be done using the display property.
When you make an element of block type, it takes up the full width of its parent element irrespective of the content it has.
Let’s take an example and try to implement it.
Let’s assume we have two input boxes in our HTML each with a label tag. We want to place the label above the inputs:
To place the labels above the input fields simply set their display property to block . This will automatically place each label on a new line.
Here is the CSS that you need to apply:
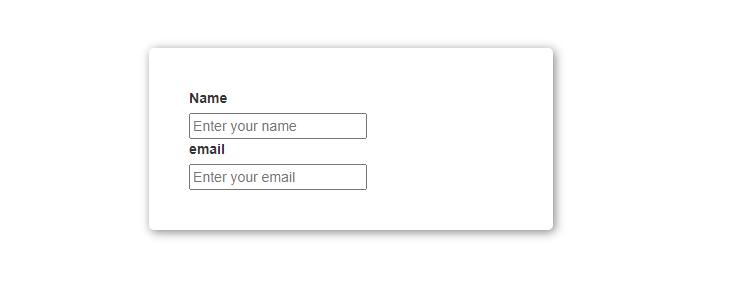
After running the above code, you will get the following output:
As you can see from the above output, the labels are placed above the input fields after changing their display type to block .
Use CSS Flexbox to Put Label Above Input Field
You can also use CSS flexbox module to put the label above the input field. The flexbox module is a flexible layout module in CSS that lets you easily create responsive layouts.
If you want to put the label above the input field using the flexbox module, you have to put the label and input in a div and then make this div a flex container which can be done by changing the display property to flex .
After that, you can simply set the flex-direction property to column . This will put the labels and inputs on a separate line.
Now add the below CSS code:
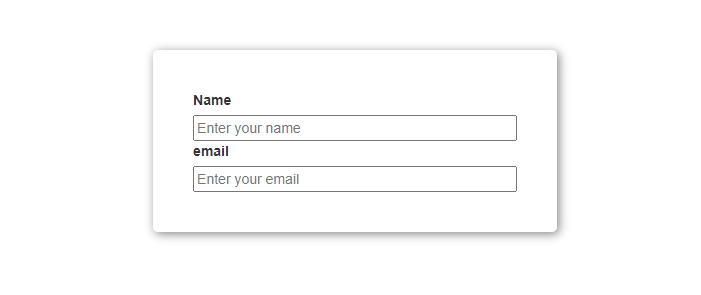
Below is the outcome of the above code:
Conclusion
In this article, we learned how we can put the label above the input field.
The reason why the labels and inputs are placed in the same line is that the and elements are by default of inline type. So, if you want to put them on a separate line, you have to change their display type from inline to block .
You can also put the labels above inputs using the flexbox module of CSS.