- How to include a font in CSS
- Importing a font via HTML
- Importing a font via CSS
- Using the @import rule
- Defining a font (font in a folder)
- The Easy Way to Add Fonts to Your Website (Including Custom Fonts)
- What fonts can be used on the Web?
- Google Fonts (FREE)
- Adobe Fonts (Premium)
- Custom Fonts (Font Squirrel)
- Different Font Formats and Browser Support
- How to add custom fonts to your website using @font-face
- Step 1: Download the font
- Step 2: Create a WebFont Kit for cross-browsing
- Step 3: Upload the font files to your website
- Step 4: Update and upload your CSS file
- Step 5: Use the custom font in your CSS declarations
- How to add fonts in popular website building tools
- Content Management Systems (WordPress, Drupal, Joomla, etc.)
- Website Builders (Pagecloud, Squarespace, Wix, Weebly)
- Google Fonts
- Custom Fonts
- Summary
How to include a font in CSS
Adding a font to a page can be done with both HTML and CSS. Depending on your requirements you can use any of the approaches.
In this article, I will guide you through both approaches in detail of including a font.
Importing a font via HTML
Including a font with HTML is useful when you need to include a Google Font or any other 3rd party font that is hosted on a remote server.
To do that you can use the element with the href attribute that is equal to the URL of the font in the of your page.
href="https://fonts.googleapis.com/css2?family=Roboto&display=swap" rel="stylesheet"> Google Fonts will offer you a ready code snippet that you can insert into your HTML code.
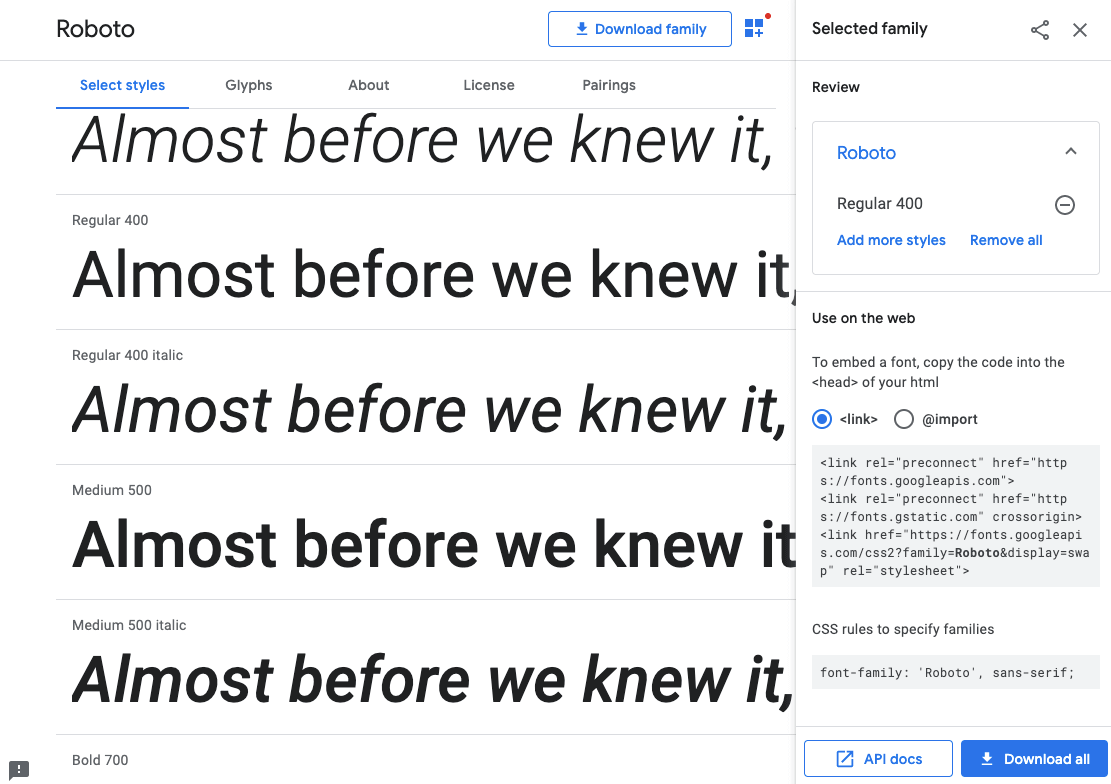
That way you can add multiple fonts to your page. For each font, you can specify a element with a unique URL. However, Google Fonts allows you to select multiple fonts and it will generate a single element with all the fonts included as a URL query.
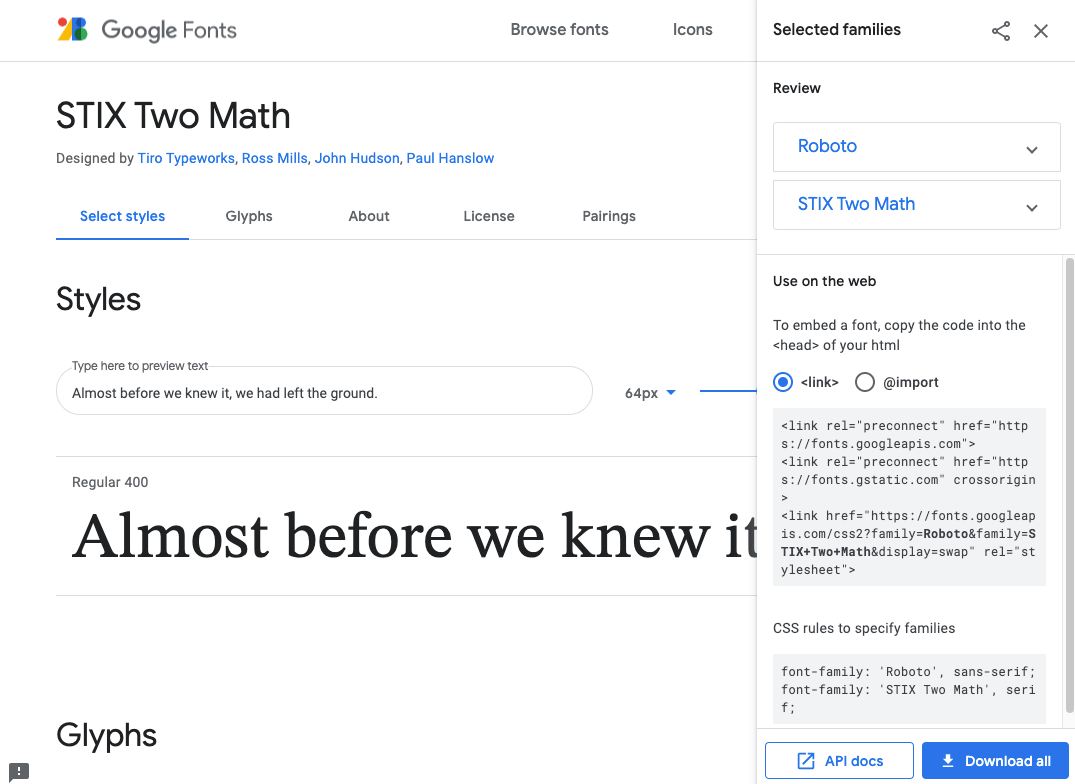
To then apply an imported font to a text use the font-family property.
p font-family: 'Roboto', sans-serif; > Google Fonts is a fast and easy way to include multiple fonts on your page. However, there are some points you should consider when using this approach, such as:
- The request to the remote server may fail, which will result in a font not being loaded;
- The request response time may take longer than from a self-hosted font, which affects page loading time;
- There can be privacy issues with loading Google Fonts (see GDPR).
Importing a font via CSS
You can also include a font with CSS. This approach is quite handy when you don’t have access to the HTML of the page as well as it is more flexible and allows for more customization.
Using the @import rule
The first way to include a font is to use the @import rule. Inside your CSS file or inside the tag on your page define the @import rule with the specified URL of the font.
@import url('https://fonts.googleapis.com/css2?family=Roboto&display=swap'); If you’re importing Google Fonts, then like in the example above they provide you with code snippet for the @import .
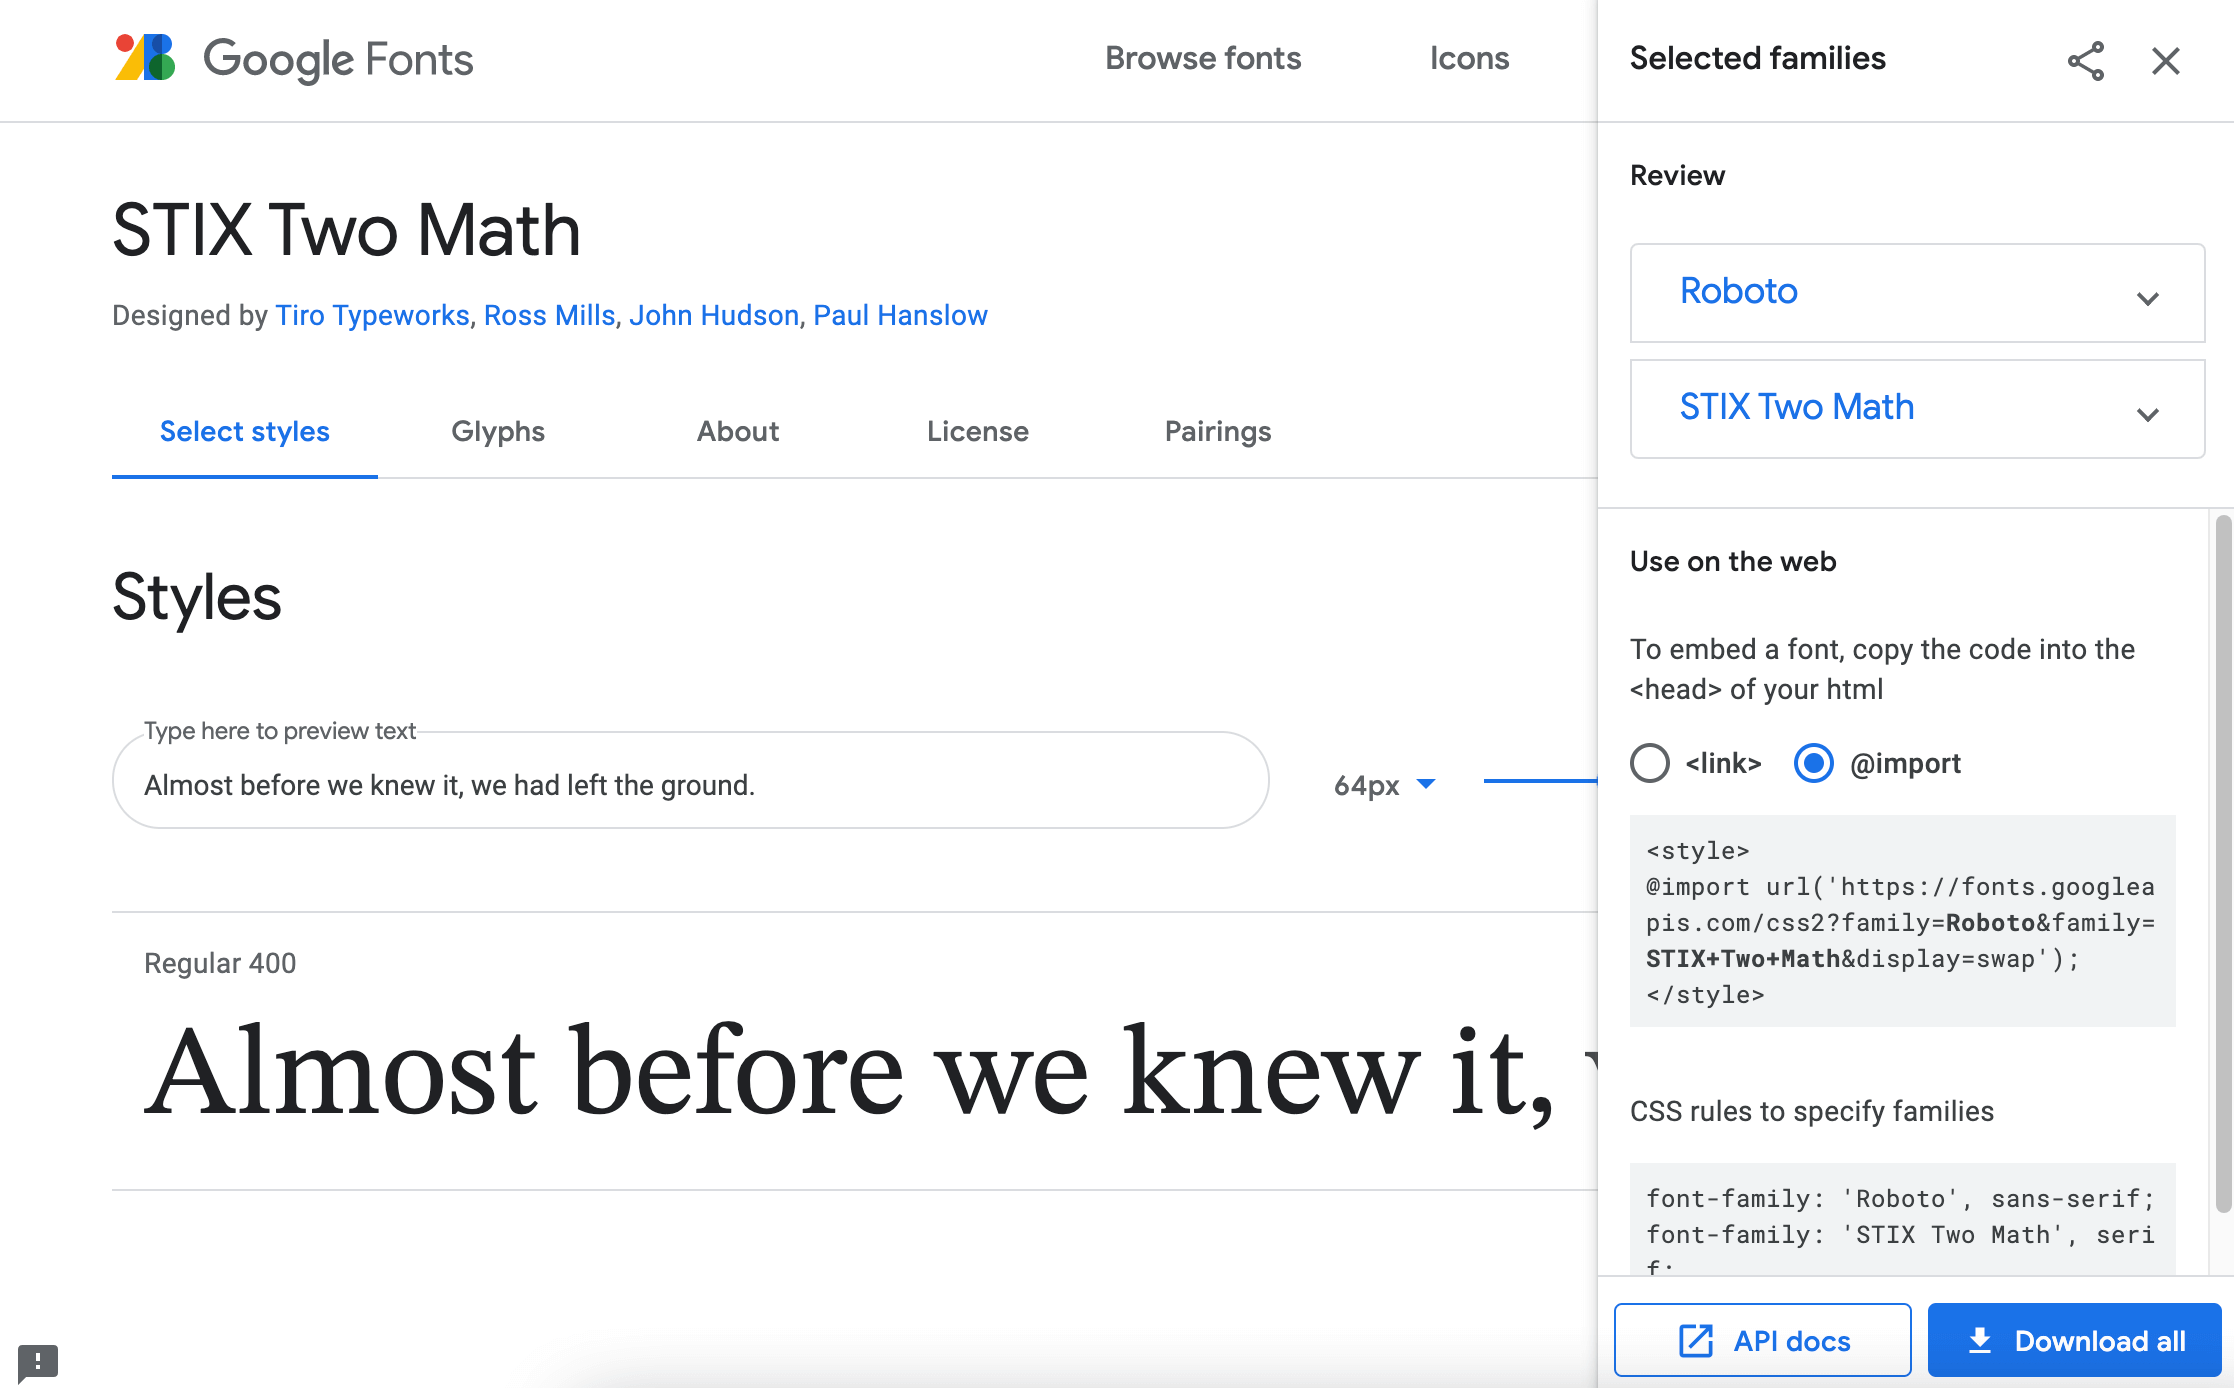
Use the font-family property the same way when applying the font to the text.
body font-family: 'Roboto', sans-serif; > Defining a font (font in a folder)
If you’re concerned about the page load time or the GDPR related issues, or if you have a custom font that’s not a Google Font, you can self-host a font.
In this case, you’ll need to have the font files stored in a separate folder of your project.
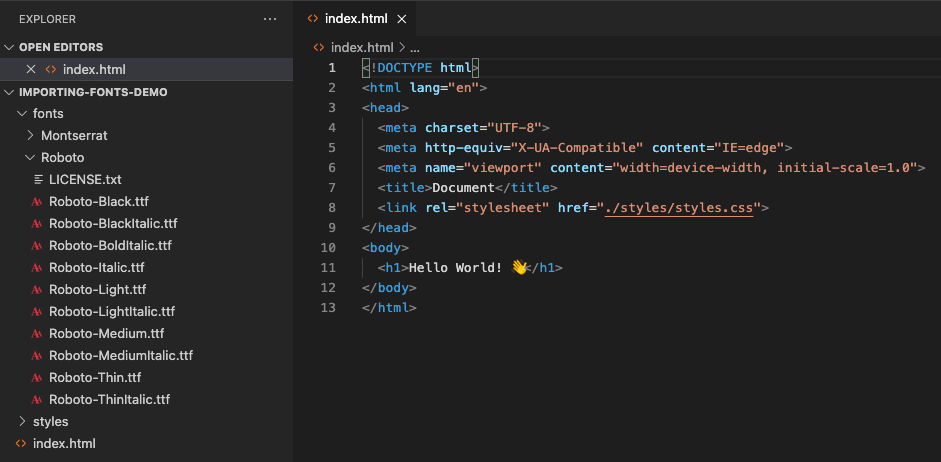
And then you’ll need to define your custom font in the CSS file using the @font-face rule by specifying the font name and providing the path to your font files.
@font-face font-family: "Roboto"; src: url("/fonts/Roboto-Medium.ttf") format("truetype"); font-weight: 400; > @font-face font-family: "Roboto"; src: url("/fonts/Roboto-Bold.ttf") format("truetype"); font-weight: 700; > To apply this font, again you’ll need to use font-family property:
body font-family: 'Roboto', sans-serif; font-weight: 400; > h1 font-family: inherit; font-weight: 700; > The Easy Way to Add Fonts to Your Website (Including Custom Fonts)
Adding a unique font to your website is a great way to make your design stand out online.
In this article, I will walk you through the step-by-step process for adding any font to your website.
Note: because websites are not all built and managed the same way, I will introduce the most universal approach for adding custom fonts and then explain how the most popular website building platforms support custom fonts.
Want an easy way to identify fonts on any webpage? Install Design Sidekick from the Chrome store to instantly find out what fonts are used on a website, and save those fonts for later!
What fonts can be used on the Web?
Technically speaking, you can add just about any font to any website.
However, when searching for a font online, you always want to keep in mind the price, the license agreement, and the installation method.
Without further ado, here are some of the most popular font libraries to help you find that perfect font:
Google Fonts (FREE)
Google fonts boast an impressive library of close to 1000 libre license fonts that can be browsed via their interactive web directory. Because of their Developer API, Google Fonts are arguably the easiest fonts to add to your site and where I would recommending starting your search.
Adobe Fonts (Premium)
Adobe Fonts, (previously Typekit) provides a collection of +14,000 stunning fonts. The new and improved service now provides Creative Cloud subscribers subscribers with easy access to their entire library of fonts through the click of a button. Unlike Typekit, Adobe Fonts has removed limits on page views and has made all their fonts accessible for both desktop and web use.
Note: Creative Cloud Subscriptions (with Adobe Fonts) start at $20,99 /month.
Custom Fonts (Font Squirrel)
On top of offering a selection of free fonts licensed for commercial work, Font Squirrel is well known for their Font Identifier and Font Generator.
The Webfont Generator allows you to convert any font that you legally own the rights to (.ttf or .otf file format) and convert it into a usable WebFont Kit that includes an easy-to-use Cascading Style Sheet (CSS).
Different Font Formats and Browser Support
Over the past few years, modern browsers have dramatically improved how they support custom fonts. However, even today, not all formats are supported on every browser.
Here are the most popular browsers and what font format they currently support:
I’d always recommend using TTF/OTF and WOFF to ensure that your fonts are supported across all browsers.
For more details on supported font formats, try Can I Use — A great tool for researching feature compatibility across different browser versions (FREE).
How to add custom fonts to your website using @font-face
The @font-face CSS rule explained below is the most common approach for adding custom fonts to a website.
Step 1: Download the font
Find the custom font you want to use on your website, and then download the TrueType Font file format (.ttf). You can also download the OpenType Font format (.otf)
Step 2: Create a WebFont Kit for cross-browsing
Upload your .ttf or .otf file to the Webfont Generator and then download your Web Font Kit.
Step 3: Upload the font files to your website
Using your FTP or file manager, upload all the font files found within your Web Font Kit to your website.* Typically this kit will include multiple file extensions such as (.eot), (.woff), (.woff2), (.ttf) and (.svg).
Your kit will also include a Cascading Style Sheet (.css) that you will need to update and upload in step 4.
*This step will vary greatly based upon how your website is built and hosted.
Step 4: Update and upload your CSS file
Open the CSS file in a text editor such as Textedit, NotePad or Sublime.
Replace the existing source URL with the new URL you created by uploading each file.
By default, the source URL location is set within the downloaded Web Font Kit. It needs to be replaced by the location on your server.
Before update:
@font-face font-family: «CustomFont»;
src: url(«CustomFont.eot»);
src: url(«CustomFont.woff») format(«woff»),
url(«CustomFont.otf») format(«opentype»),
url(«CustomFont.svg#filename») format(«svg»);
>
After update:
@font-face font-family: «CustomFont»;
src: url(«https://yoursite.com/css/fonts/CustomFont.eot»);
src: url(«https://yoursite.com/css/fonts/CustomFont.woff») format(«woff»),
url(«https://yoursite.com/css/fonts/CustomFont.otf») format(«opentype»),
url(«https://yoursite.com/css/fonts/CustomFont.svg#filename») format(«svg»);
>
Once you’ve updated the CSS file, you need to upload it to your website (server).
Step 5: Use the custom font in your CSS declarations
Now that your Cascading Style Sheet and font files are uploaded to your server, you can start using your custom font in your CSS declarations to help improve the look of the HTML.
This can be done in multiple ways, including adding site-wide declarations to your main CSS file.
Here is a quick example:
h1 font-family: ‘CustomFont’, Arial, sans-serif;
font-weight:normal;
font-style:normal;
>
How to add fonts in popular website building tools
Content Management Systems (WordPress, Drupal, Joomla, etc.)
There are a few different ways you can add custom fonts to a Content Management System (CMS) like WordPress (WP):
Adding custom fonts using @font-face CSSAdd fonts using a WordPress plugin Manually adding fonts from Google Fonts
Generally speaking, the 5 step process shown above will be the default approach when adding a custom font to a CMS. Although the process might seem pretty straightforward for people experienced with manipulating code, novice users will often look for an alternative.
If you are using WP and don’t have any experience editing the source code (theme files), you will most likely want to rely on a typography plugin. Plugins make it easier to add custom fonts without having to write any code yourself.
The only thing I caution about when using WP plugins is that they can cause a variety of issues on your website. It’s important to always research plugins before using them on your site.
Finally, because Google Fonts offers a developer API, you can also choose to “manually add” those fonts to your theme using the functions.php file.
Website Builders (Pagecloud, Squarespace, Wix, Weebly)
There are a ton of website builder options online that manage custom fonts in different ways.
Google Fonts
For the most part, the top website builders make it pretty easy to add fonts from popular sites like Google Fonts.
For example, with Pagecloud, adding a font from Google couldn’t be easier. All you need to do is copy and paste the font, and voila, your font is added to your page and ready to be styled in any way!
However, not all website builders make it this easy to add a Google Font.
For example, adding a Google Font in Weebly will require you to edit the source code (CSS) of your website. They explain the 8 step process in their knowledge base.
Here is a short list of the top website builders and how they manage Google Fonts:
As you can see, each website builder uses a different approach for adding fonts that can range from very easy to somewhat complicated.
Custom Fonts
In most cases, when looking to add a custom font that does not exist within Google Fonts, you will need to edit the CSS on your website. This process can be dramatically different based on the website builder you decide to use.
I’d recommend searching through their respective knowledge bases and community forums for more information.
For example, the process of adding a custom font with Pagecloud is very similar to the step-by-step guide provided above.
Summary
Regardless of your experience with CSS, following the instructions in this article will give you the ability to add any font to any website building platform.
However, once you’ve successfully added the font you wanted to your website, the questions you need to ask are:
Do you have the ability to customize the look of the font? (font weight, color, line-height, letter spacing, opacity, etc)Can you customize the layout of your site to make the font stand-out(position of text, images, videos, etc)
If you don’t have extensive experience with CSS, these customizations can be very challenging when using a CMS or a rigid template based website builder like SquareSpace.
This is why I’d recommend using a flexible website builder like Pagecloud that gives you unrivalled flexibility when looking to create a unique layout with virtually unlimited style and font options. Sign up today to try Pagecloud’s website builder and e-commerce platform!