- ::before (:before)
- Синтаксис
- Примеры
- Добавление кавычек
- HTML
- CSS
- Результат
- Пример оформления
- HTML
- CSS
- Результат
- Список дел
- HTML
- CSS
- JavaScript
- Результат
- Примечания
- HTML
- CSS
- Результат
- Спецификации
- Поддержка браузерами
- Смотрите также
- Found a content problem with this page?
- MDN
- Support
- Our communities
- Developers
- Use CSS ::before and ::after for simple, spicy image overlays
- Step 2: Add the overlay element dynamically with ::after
- Step 3: Fix z-index issues
- And with that we have a finished overlay.
- Bonus step: Advanced overlays with blend modes
- Bonus Step 2: Turn the overlay’s design to 11 with ::before and skew!
- A quick promo
- Live Pseudo Selector Workshop
- Related stuff
::before (:before)
В CSS, ::before создаёт псевдоэлемент,который является первым потомком выбранного элемента. Часто используется для добавления косметического содержимого в элемент с помощью свойства content . По умолчания является инлайновым.
/* Добавить сердце перед ссылками */ a::before content: "♥"; >
Примечание: Псведоэлементы, созданные с помощью ::before и ::after содержатся в блоке форматирования элемента, и поэтому не применяются к замещаемым элементам, таким как или .
Синтаксис
Примечание: В CSS3 появилась запись ::before (с двумя двоеточиями) для различения псевдоклассов и псевдоэлементов. Браузеры также поддерживают запись :before , введённую в CSS2.
Примеры
Добавление кавычек
Этот простой пример использования псевдоэлементов ::before позволяет добавлять кавычки. Здесь используется как псевдоэлемент ::before , так и ::after .
HTML
q>Немного кавычекq>, как он сказал, q>лучше чем ничего.q>
CSS
q::before content: "«"; color: blue; > q::after content: "»"; color: red; > Результат
Пример оформления
Можно стилизовать текст или изображения в свойстве content практически любым способом.
HTML
span class="ribbon">Посмотрите, где находится оранжевый прямоугольник.span>
CSS
.ribbon background-color: #5BC8F7; > .ribbon::before content: "Посмотрите на этот оранжевый прямоугольник."; background-color: #FFBA10; border-color: black; border-style: dotted; > Результат
Список дел
В этом примере мы создадим простой список дел,используя псевдоэлементы. Этот метод часто применяется для добавления небольших штрихов в пользовательский интерфейс и улучшения впечатления пользователей.
HTML
ul> li>Купить молокаli> li>Сходить на прогулку с собакойli> li>Тренироватьсяli> li>Написать кодli> li>Слушать музыкуli> li>Отдыхатьli> ul>
CSS
li list-style-type: none; position: relative; margin: 2px; padding: 0.5em 0.5em 0.5em 2em; background: lightgrey; font-family: sans-serif; > li.done background: #CCFF99; > li.done::before content: ''; position: absolute; border-color: #009933; border-style: solid; border-width: 0 0.3em 0.25em 0; height: 1em; top: 1.3em; left: 0.6em; margin-top: -1em; transform: rotate(45deg); width: 0.5em; > JavaScript
var list = document.querySelector('ul'); list.addEventListener('click', function(ev) if( ev.target.tagName === 'LI') ev.target.classList.toggle('done'); > >, false);
Вот живой пример приведённого выше кода. Заметим, что здесь не используются иконки, а зелёная галочка на самом деле является псевдоэлементом ::before , стилизованном с помощью CSS. Попробуйте выполнить некоторые вещи списка.
Результат
Примечания
Хотя исправления в Firefox 3.5 не позволяют созданному содержимому вести себя как отдельный предшествующий элемент (согласно спецификации CSS: «Псевдоэлементы :before и :after взаимодействуют с другими элементами. как если бы они были настоящими элементами, добавленными в соответствующий им элемент.»), они могут быть использованы для небольшого улучшения в разметке без таблиц (например для центрирования). В предположении, что содержимое, которое необходимо центрировать, уже обёрнуто в некоторый элемент, столбцы перед и после содержимого могут быть добавлены без добавления других элементов (например в данном случае вероятно является более корректным обернуть текст в элемент , как в примере ниже, вместо того чтобы добавлять два пустых элемента до и после текста). (И всегда устанавливайте ширину плавающего элемента, иначе он не будет плавающим!)
HTML
div class="example"> span id="floatme">"Плавающий перед" будет добавлен слева от текста и не позволит переполнению этой строки обтекать его снизу. Аналогично, "Плавающий после" будет добавлен справа от текста и не позволит переполнению этой строки обтекать его снизу.span> div>
CSS
#floatme float: left; width: 50%; > /* Чтобы получить пустой столбец достаточно указать шестнадцатеричный код неразрывного пробела \a0 в качестве содержимого (используйте \0000a0, если за этим пробелом следуют другие символы) */ .example::before content: "Плавающий перед"; float: left; width: 25% > .example::after content: "Плавающий после"; float: right; width:25% > /* Для стилизации */ .example::before, .example::after background: yellow; color: red; > Результат
Спецификации
Поддержка браузерами
BCD tables only load in the browser
Смотрите также
Found a content problem with this page?
This page was last modified on 7 нояб. 2022 г. by MDN contributors.
Your blueprint for a better internet.
MDN
Support
Our communities
Developers
Visit Mozilla Corporation’s not-for-profit parent, the Mozilla Foundation.
Portions of this content are ©1998– 2023 by individual mozilla.org contributors. Content available under a Creative Commons license.
Use CSS ::before and ::after for simple, spicy image overlays
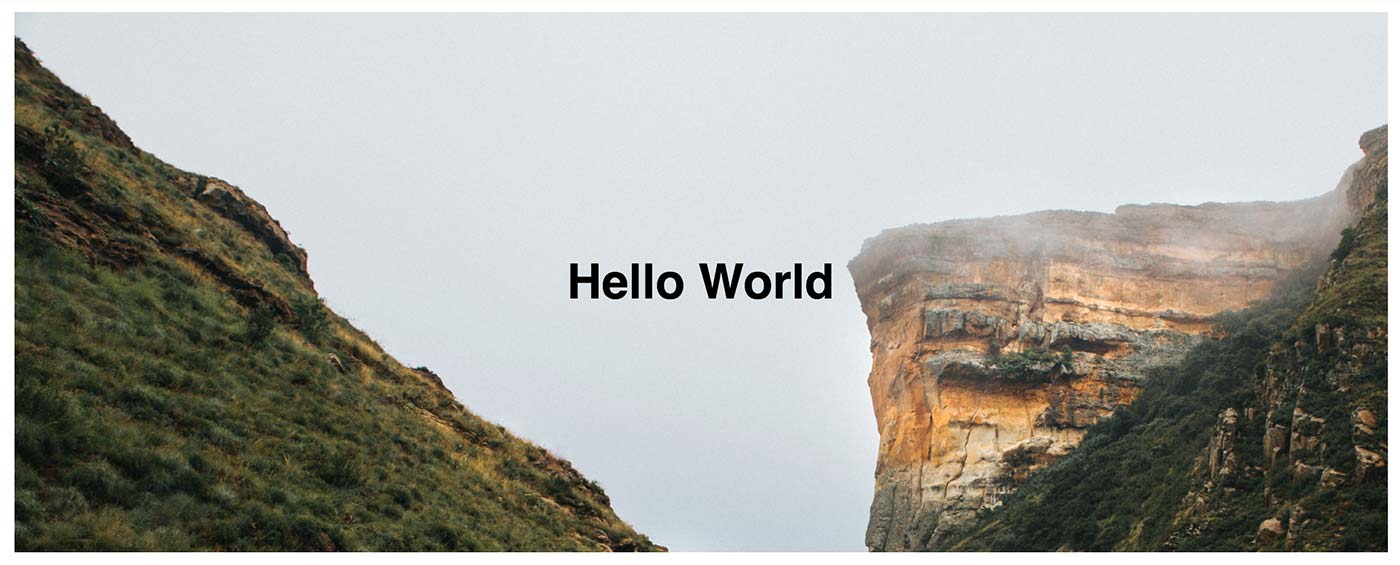
In a banner, all we really want is the banner’s container and any content that banner needs to contain.
section class="banner">
 h1>Hello Worldh1>
section>
In this example, we’ll just utilize a section container and an . If you added more content, it could be siblings to the or you could place all of your content in a content container of some sort to do any positioning.
A little CSS magic is happening here for the added height of the banner as well as the centering of the text. That’s not important for this demo, but if you’re curious, it exists in the CodePen.
Step 2: Add the overlay element dynamically with ::after
Natively, CSS gives us the powerful ::before and ::after elements for adding stylistic content to the page that shouldn’t affect markup.
By apply ::before or ::after to an element, you can insert a dynamic element into the DOM before or after the selected elements children.
One important note, all pseudo-elements require a content CSS property to display. In our case, this will just be a blank string.

.banner::after
 content: ""; // ::before and ::after both require content
 position: absolute;
 top: 0;
 left: 0;
 width: 100%;
 height: 100%;
 background-image: linear-gradient(120deg, #eaee44, #33d0ff);
 opacity: .7;
>
Now we have an element that is full-width and -height. To do this, we utilize absolute positioning, as we don’t want to affect the content flow of the document.
We make the overlay slightly transparent utilizing the opacity property.
In this example, I chose a fun gradient, but you could use a simple background color or even another image to overlay.
Step 3: Fix z-index issues
The keen-eyed observer would notice that something isn’t quite right in the example. Our friendly overlay is covering not just the background image, but also the text in the banner.
By using absolute positioning, we’ve actually put the overlay on top of the stacking context of our banner. To fix this, your overlay and your content will need to have a z-index applied to them. I usually give the overlay a 1 and my content 100.
.banner::after
 .
 z-index: 1;
>
.banner > *
 z-index: 100;
>
And with that we have a finished overlay.

Bonus step: Advanced overlays with blend modes
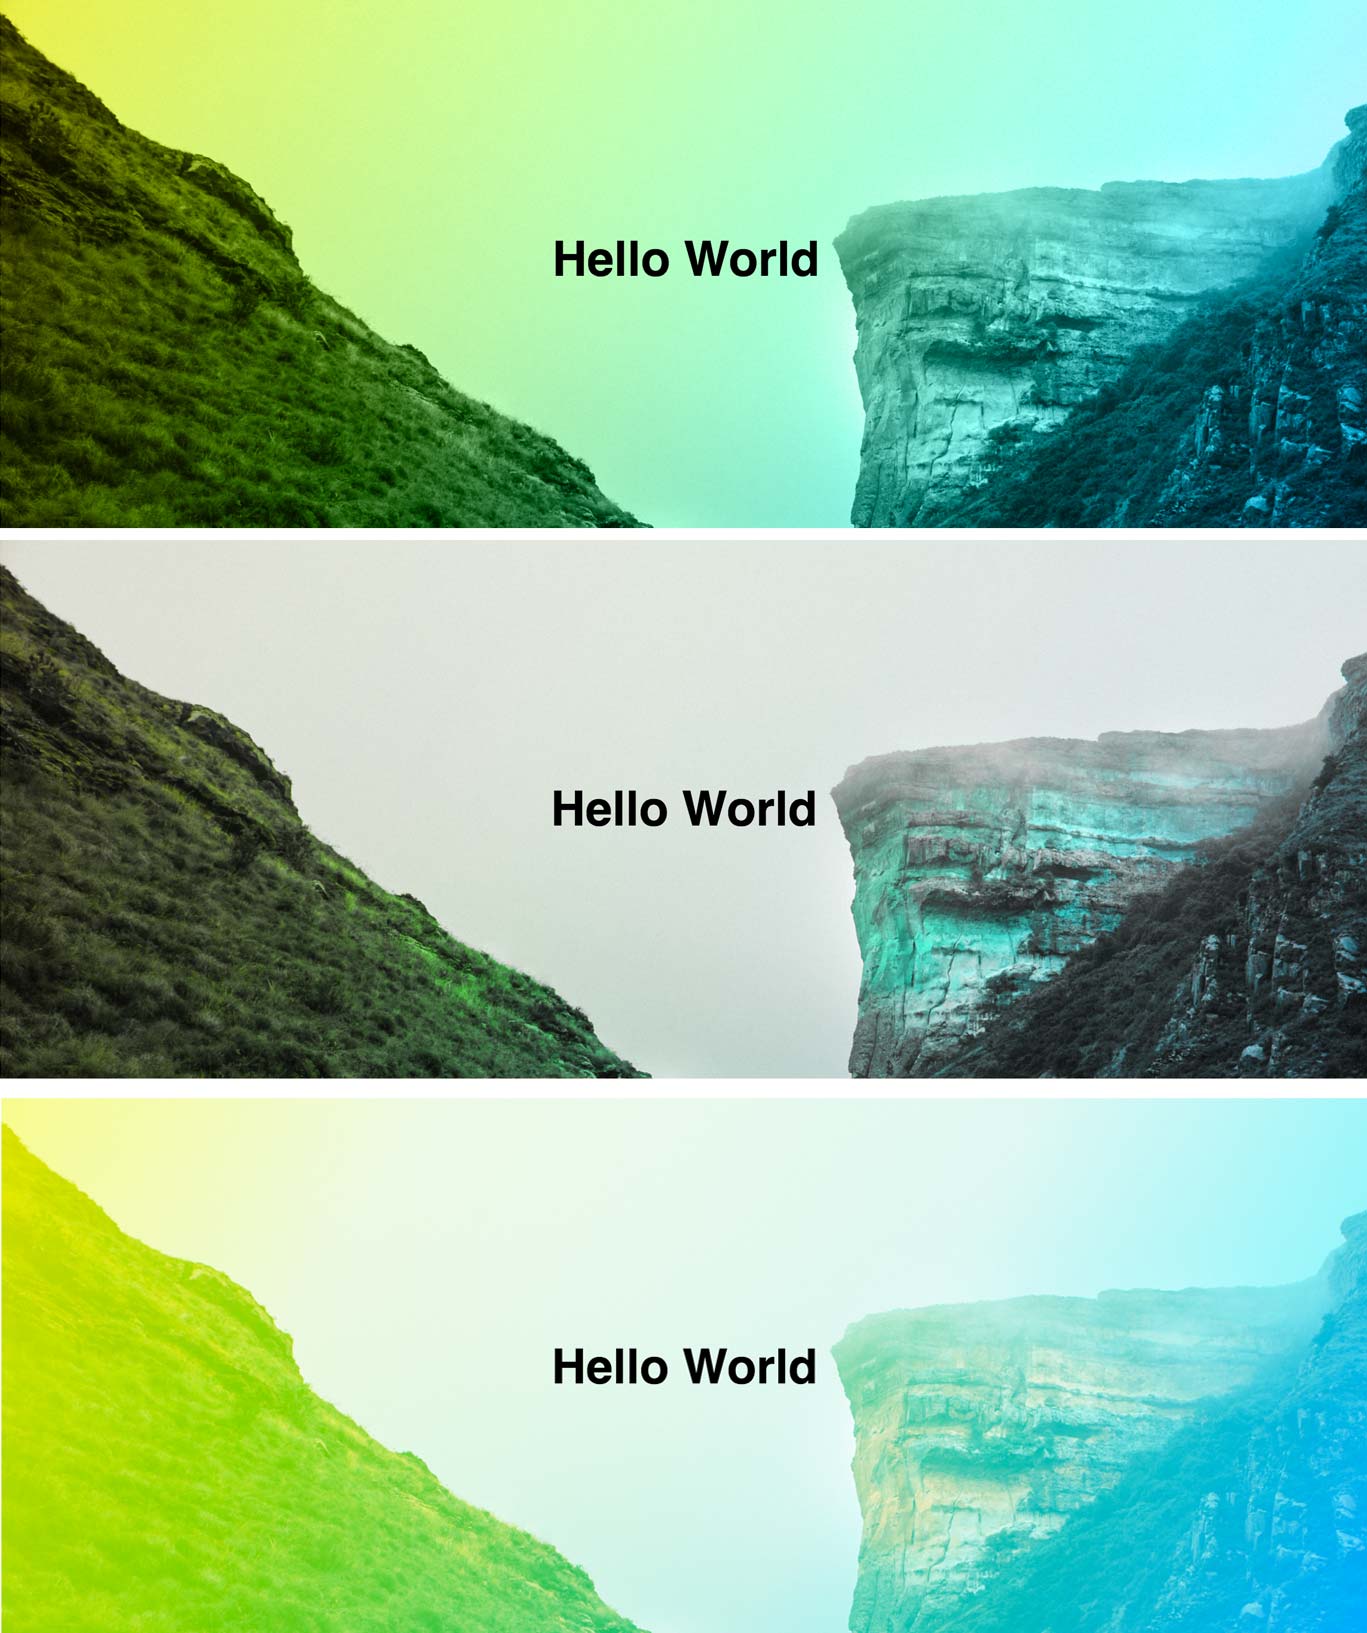
I’ve been toying with background blend modes for a little while now, but it blew me away when I discovered mix-blend-mode . This allows a developer to blend multiple elements together!
Use mix-blend-mode on your overlay and you’ve got some fun new combinations to try out.
.banner::after
 /* opacity: .7; */
 mix-blend-mode: color;
 mix-blend-mode: hue;
 mix-blend-mode: hard-light;
>
The support for various blend modes are pretty weak in the Microsoft browsers, but you can still use them today with clever progressive enhancement. If you want them to be built in Edge, you can let Microsoft know about your passion here.
Until that time, let’s use @supports queries to make sure our code still respects our friends using Edge and IE. The above code removes the transparency from our overlay and lets the blend mode do it for us. Instead of removing it, let’s negate it behind a support query.
.banner::after
 opacity: .7;

 @supports (mix-blend-mode: hue)
 opacity: 1;
 mix-blend-mode: color;
 mix-blend-mode: hard-light;
 mix-blend-mode: hue;
 >
>
This way in browsers that don’t support blend modes, we get our average, but nice overlay and in browsers that do, we get some really neat effects on our banner.
Bonus Step 2: Turn the overlay’s design to 11 with ::before and skew!
So, we have a full width overlay. Then, we took it even further with blend modes. Can we turn it all the way up to 11?
As it turns out, we can add a second overlay using a ::before pseudo element, as well.
Starting with the code we have before, we’re going to modify our original overlay to be skewed and centered.
Using a CSS transform, we can skew the element a number of degree or turns. In our example, we’ll skew it 15 degrees using transform: skew(15deg) . You’ll notice it now overflows the left and right sides of the container. To fix this, we’ll do two things.
First, we’ll apply overflow: hidden to our banner element. This will guarantee that we never have overflow from any transforms we do on our pseudo elements. Then, we’ll adjust the width from 100% down to 75% to contain the element a little better.

Those of you with a discerning eye will notice this is a little awkward still. The background isn’t centered! Since this is an absolutely positioned item, we’ll center it with a simple CSS trick.
Instead of a left value of 0 , we’ll use 50% . That pushes the element over to start it’s left edge from the 50% mark of the parent container. We can then use another transform value to pull the element back left: translateX(-50%) . When using the translate method, the percentages are based on the width of the element you’re applying it to. In this case, it’s 50% the width of the ::after element. This creates a perfectly centered element that is position: absolute; . Handy!
Your code should now look like this:
.banner
 overflow: hidden;
>

.banner::after
 content: ""; // :before and :after both require content
 position: absolute;
 width: 75%; // Makes the overlay smaller to accommodate the skew
 height: 100%;
 top: 0;
 left: 50%; // Push the element 50% of the container's width to the right
 transform: skew(15deg) // Puts the element on an angle
 translateX(-50%); // Moves the element 50% of its width back to the left
 background-image: linear-gradient(120deg,#eaee44,#33d0ff);
>
This itself is a fun take on this design pattern, but we’re going to move it one more step.
Let’s create an identical pseudo element using ::before . To do this, we’re going to add the selector to our ::after block.
Your selector should look like this:
This will handle the creation, positioning, and base styles for the element.
Then, we override the specific pieces we need to override. In this case, we’ll change our skew.
.banner::before
 transform: skew(-15deg)
 translateX(-50%);
>
When we do this, we also have to redeclare the translateX method. This is because we redeclared the whole transform property. If we didn’t, the browser would assume we don’t have a translateX for the ::before due to the cascade. This is fixed in the latest transform specification, giving CSS individual transform properties, but that’s not cross-browser compliant yet.

That’s it. We now have two overlays that are creating an interesting geometric view at their intersection!
.banner::after, .banner::before
 content: "";
 position: absolute;
 top: 0;
 left: 50%;
 transform: skew(15deg)
 translateX(-50%);
 width: 75%;
 height: 100%;
 background-image: linear-gradient(120deg,#eaee44,#33d0ff);
 background-color: #333;
 opacity: .7;
>

.banner::before
 transform: skew(-15deg)
 translateX(-50%);
>

.banner
 overflow: hidden;
>
Overlays should be simple and clean and never bloat your HTML with additional markup. This is one of my favorite uses of ::after elements. It just makes so much sense.
If you want to play with the code in this tutorial, the CodePens are embedded below:
A quick promo