- Быстрый старт Python, Быстрый старт Python
- Цели
- Предпосылки
- Настройте свою среду
- Включить API
- Настройка экрана согласия OAuth
- Авторизация учетных данных для настольного приложения
- Установите клиентскую библиотеку Google.
- Настроить образец
- Запустите образец
- Следующие шаги
- How to authenticate Python to access Google Sheets with Service Account JSON credentials
- Steps
- Create a new project
- Enable access to APIs in project
- Create Service Account credentials
- Create JSON file with credentials
- Authenticate in Python
- Remove the project
- Summary
Быстрый старт Python, Быстрый старт Python
Оптимизируйте свои подборки Сохраняйте и классифицируйте контент в соответствии со своими настройками.
В кратких руководствах объясняется, как настроить и запустить приложение, которое вызывает API Google Workspace.
В кратких руководствах по Google Workspace используются клиентские библиотеки API для обработки некоторых деталей процесса аутентификации и авторизации. Мы рекомендуем вам использовать клиентские библиотеки для ваших собственных приложений. В этом кратком руководстве используется упрощенный подход к проверке подлинности, подходящий для среды тестирования. Для рабочей среды мы рекомендуем изучить аутентификацию и авторизацию, прежде чем выбирать учетные данные для доступа , подходящие для вашего приложения.
Создайте приложение командной строки Python, которое отправляет запросы к API Google Таблиц.
Цели
- Настройте свою среду.
- Установите клиентскую библиотеку.
- Настройте образец.
- Запустите образец.
Предпосылки
Для запуска этого краткого руководства необходимы следующие предварительные условия:
- Python 3.10.7 или выше
- Инструмент управления пакетами pip
- Облачный проект Google .
- Аккаунт Google.
Настройте свою среду
Для завершения этого краткого руководства настройте свою среду.
Включить API
Настройка экрана согласия OAuth
Если вы используете новый проект Google Cloud для выполнения этого краткого руководства, настройте экран согласия OAuth и добавьте себя в качестве тестового пользователя. Если вы уже выполнили этот шаг для своего облачного проекта, перейдите к следующему разделу.
- В консоли Google Cloud выберите menu >API и службы >Экран согласия OAuth . Перейти к экрану согласия OAuth
- Выберите тип пользователя для своего приложения, затем нажмите «Создать» .
- Заполните регистрационную форму приложения, затем нажмите «Сохранить и продолжить» .
- На данный момент вы можете пропустить добавление областей и нажать «Сохранить и продолжить» . В будущем, когда вы будете создавать приложение для использования за пределами вашей организации Google Workspace, вы должны будете добавить и проверить области авторизации, необходимые вашему приложению.
- Если вы выбрали Внешний для типа пользователя, добавьте тестовых пользователей:
- В разделе «Проверить пользователей» нажмите «Добавить пользователей» .
- Введите свой адрес электронной почты и любых других авторизованных тестовых пользователей, затем нажмите «Сохранить и продолжить» .
Авторизация учетных данных для настольного приложения
- В консоли Google Cloud выберите menu >API и службы >Учетные данные . Перейти к учетным данным
- Нажмите «Создать учетные данные» >«Идентификатор клиента OAuth» .
- Нажмите Тип приложения >Приложение для ПК .
- В поле Имя введите имя учетных данных. Это имя отображается только в консоли Google Cloud.
- Щелкните Создать . Появится экран создания клиента OAuth, показывающий ваш новый идентификатор клиента и секрет клиента.
- Нажмите ОК . Вновь созданные учетные данные отображаются в разделе идентификаторов клиентов OAuth 2.0.
- Сохраните загруженный JSON-файл как credentials.json и переместите файл в свой рабочий каталог.
Установите клиентскую библиотеку Google.
pip install --upgrade google-api-python-client google-auth-httplib2 google-auth-oauthlibНастроить образец
- В рабочем каталоге создайте файл с именем quickstart.py .
- Включите следующий код в quickstart.py :
from __future__ import print_function import os.path from google.auth.transport.requests import Request from google.oauth2.credentials import Credentials from google_auth_oauthlib.flow import InstalledAppFlow from googleapiclient.discovery import build from googleapiclient.errors import HttpError # If modifying these scopes, delete the file token.json. SCOPES = ['https://www.googleapis.com/auth/spreadsheets.readonly'] # The ID and range of a sample spreadsheet. SAMPLE_SPREADSHEET_ID = '1BxiMVs0XRA5nFMdKvBdBZjgmUUqptlbs74OgvE2upms' SAMPLE_RANGE_NAME = 'Class Data!A2:E' def main(): """Shows basic usage of the Sheets API. Prints values from a sample spreadsheet. """ creds = None # The file token.json stores the user's access and refresh tokens, and is # created automatically when the authorization flow completes for the first # time. if os.path.exists('token.json'): creds = Credentials.from_authorized_user_file('token.json', SCOPES) # If there are no (valid) credentials available, let the user log in. if not creds or not creds.valid: if creds and creds.expired and creds.refresh_token: creds.refresh(Request()) else: flow = InstalledAppFlow.from_client_secrets_file( 'credentials.json', SCOPES) creds = flow.run_local_server(port=0) # Save the credentials for the next run with open('token.json', 'w') as token: token.write(creds.to_json()) try: service = build('sheets', 'v4', credentials=creds) # Call the Sheets API sheet = service.spreadsheets() result = sheet.values().get(spreadsheetId=SAMPLE_SPREADSHEET_ID, range=SAMPLE_RANGE_NAME).execute() values = result.get('values', []) if not values: print('No data found.') return print('Name, Major:') for row in values: # Print columns A and E, which correspond to indices 0 and 4. print('%s, %s' % (row[0], row[4])) except HttpError as err: print(err) if __name__ == '__main__': main()Запустите образец
- Если вы еще не вошли в свою учетную запись Google, вам будет предложено выполнить вход. Если вы вошли в несколько учетных записей, выберите одну учетную запись для авторизации.
- Нажмите Принять .
Информация об авторизации хранится в файловой системе, поэтому при следующем запуске примера кода авторизация не запрашивается.
Вы успешно создали свое первое приложение Python, которое отправляет запросы к API Google Таблиц.
Следующие шаги
Если не указано иное, контент на этой странице предоставляется по лицензии Creative Commons «С указанием авторства 4.0», а примеры кода – по лицензии Apache 2.0. Подробнее об этом написано в правилах сайта. Java – это зарегистрированный товарный знак корпорации Oracle и ее аффилированных лиц.
Последнее обновление: 2023-07-25 UTC.
How to authenticate Python to access Google Sheets with Service Account JSON credentials

When you need to access Google Sheets data from Python script you will need to prove that you have access to the resource. There are several options to authenticate to Google API, one of them is Service Account. We will show you how to get JSON file with credentials to access Google Sheets.
Steps
Creating JSON file with credentials to access Google Sheets API is fast and easy. It can be summarized with the following steps.
- Create a new project
- Enable Google Drive API and Google Sheets API
- Create Service Account credentials
- Download JSON file with credentials
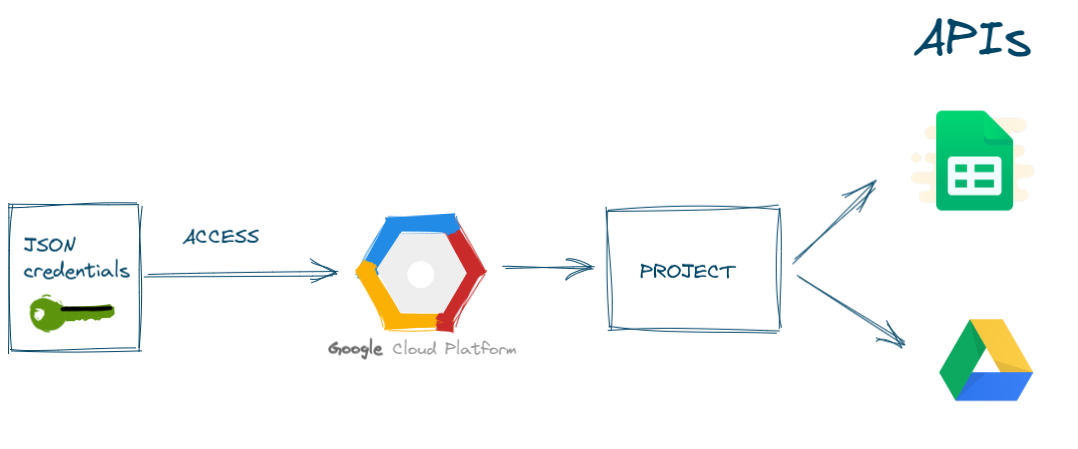
The schema showing the concept of how does it work.
Create a new project
Please open your Google Cloud console in your web browser. You can open it by navigating the https://console.cloud.google.com/.
In this example, we will create a new project. It will store all details about our connection to Google Sheets API. In my opinion, it is good to have a separate project for accessing a Sheets, because in the case of emergency it is easy to revoke the access.
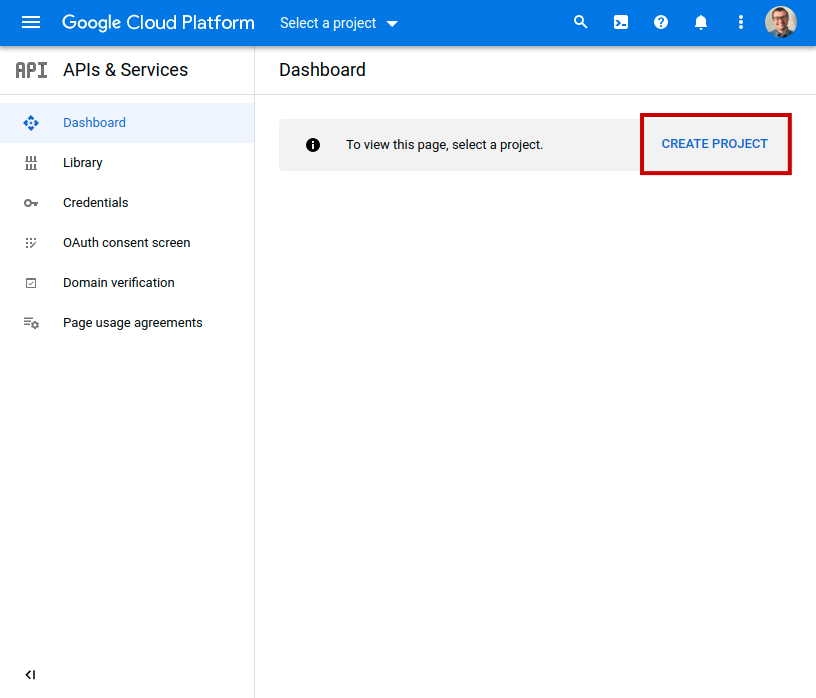
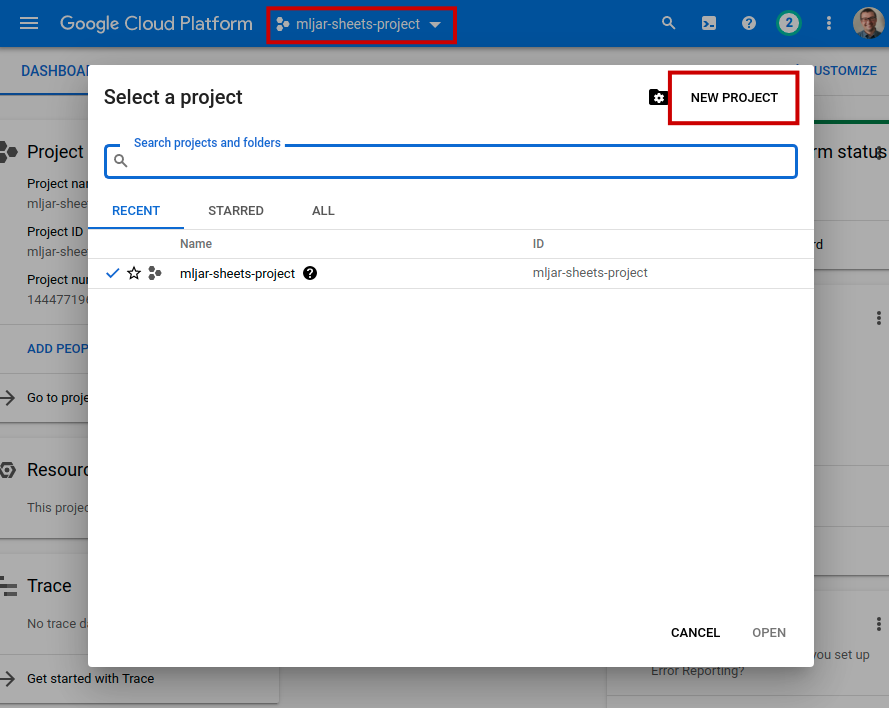
If it is your first project then you will see the view similar like in the image below:
If you already have some projects in your console, please click on project in the top menu bar, and you will have dialog window with NEW PROJECT button.
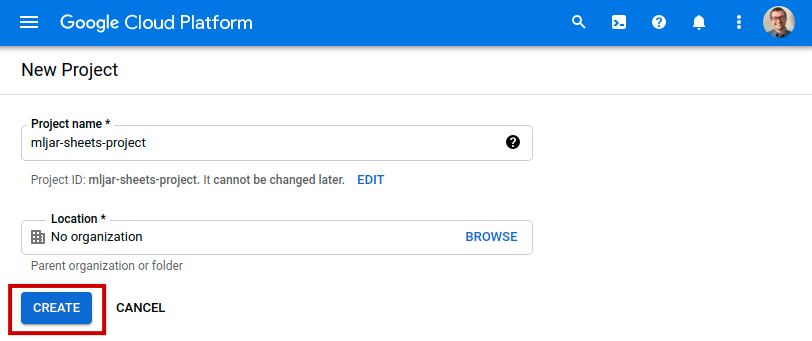
The form for project creation will be displayed. Just set the name and click CREATE . In this example, I’ve used mljar-sheets-project as a name. You can leave Location field empty.
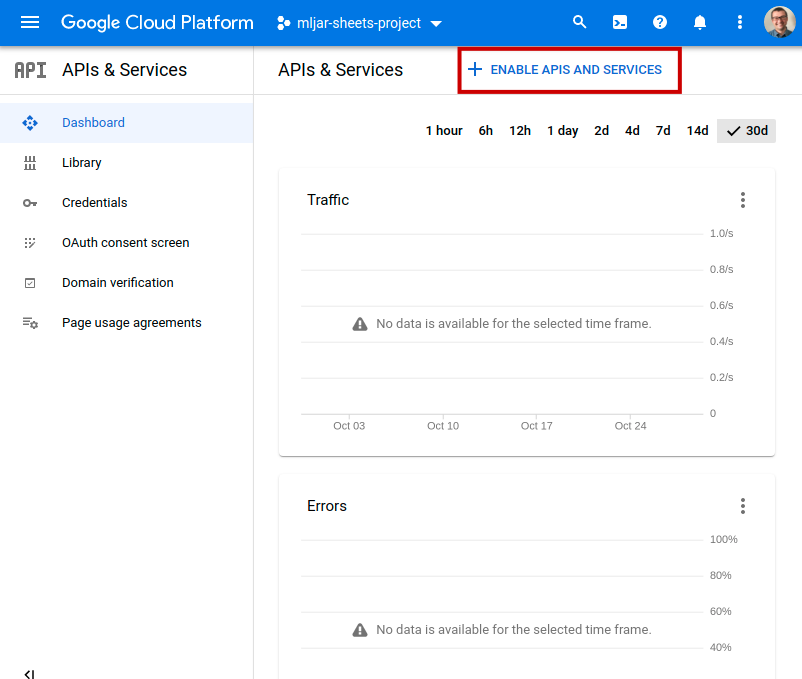
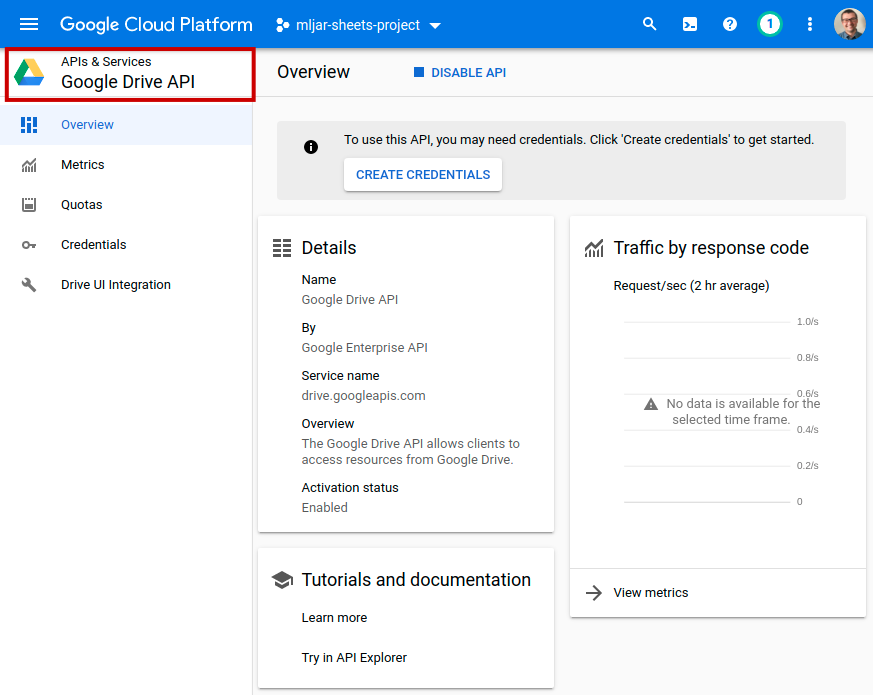
After Project creation, you should see view like in the image below. Please click ENABLE APIS AND SERVICES button to add access to selected APIs.
Enable access to APIs in project
In the next step, we will need to enable access to APIs for our project. The project will need to have access to:
Why do we need to give additional access to Google Drive API? It’s because Google Sheets are stored in Google Drive. Changes made on Sheets are also changes on files in the Google Drive.
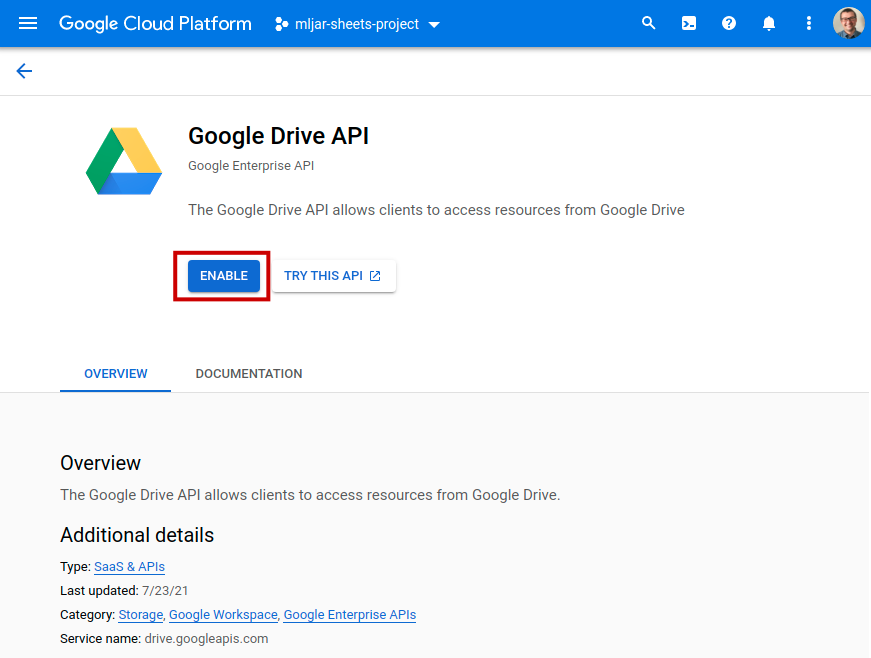
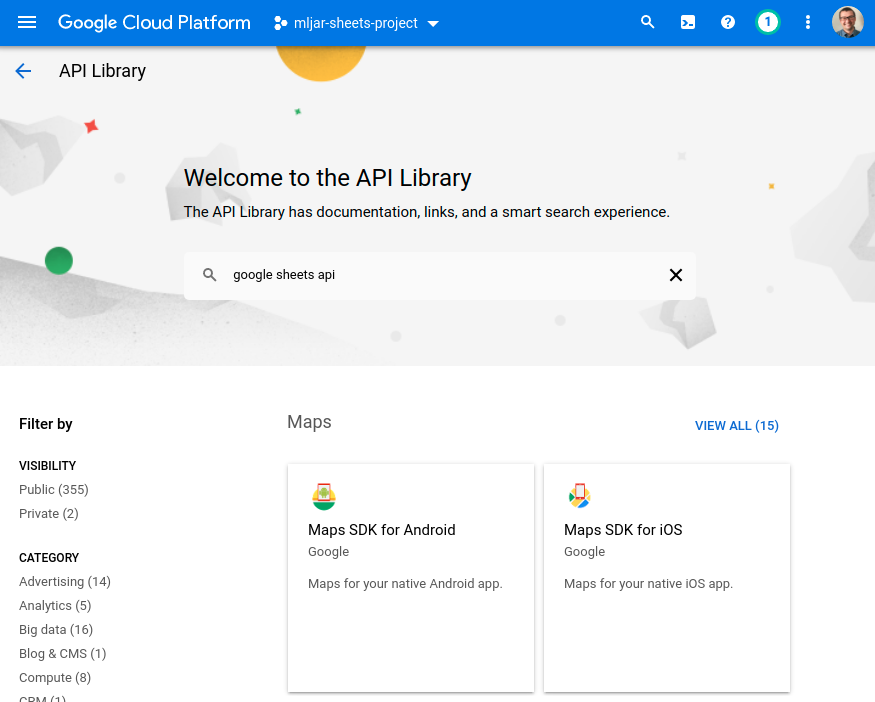
Let’s search for Google Drive API :
When you found it, just click ENABLE button:
After API is enabled, you will see the below view. Please click on APIs & Service in the left menu.
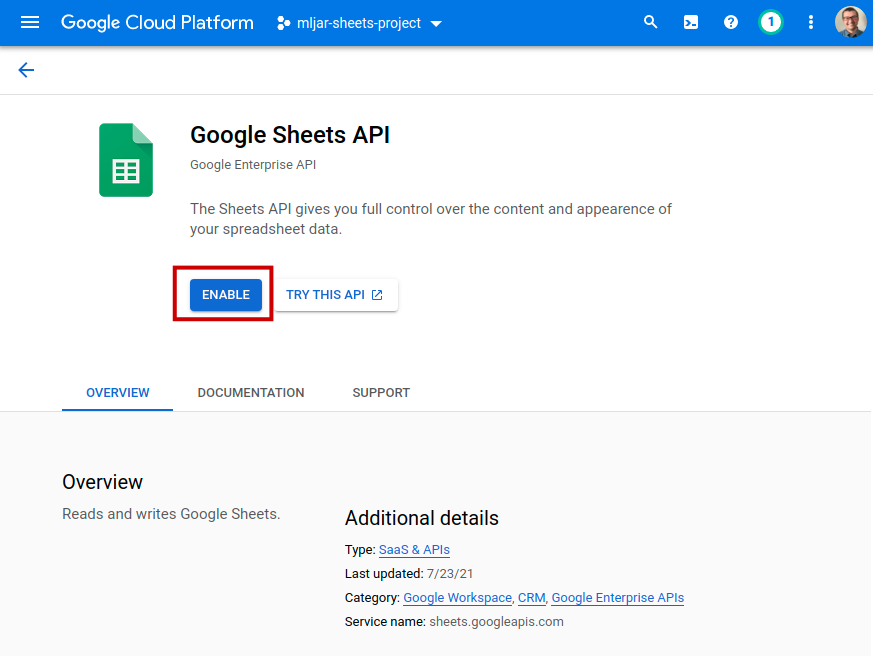
We need to search one more API. Please enter Google Sheets API in the search box:
Like before, please enable it with ENABLE button:
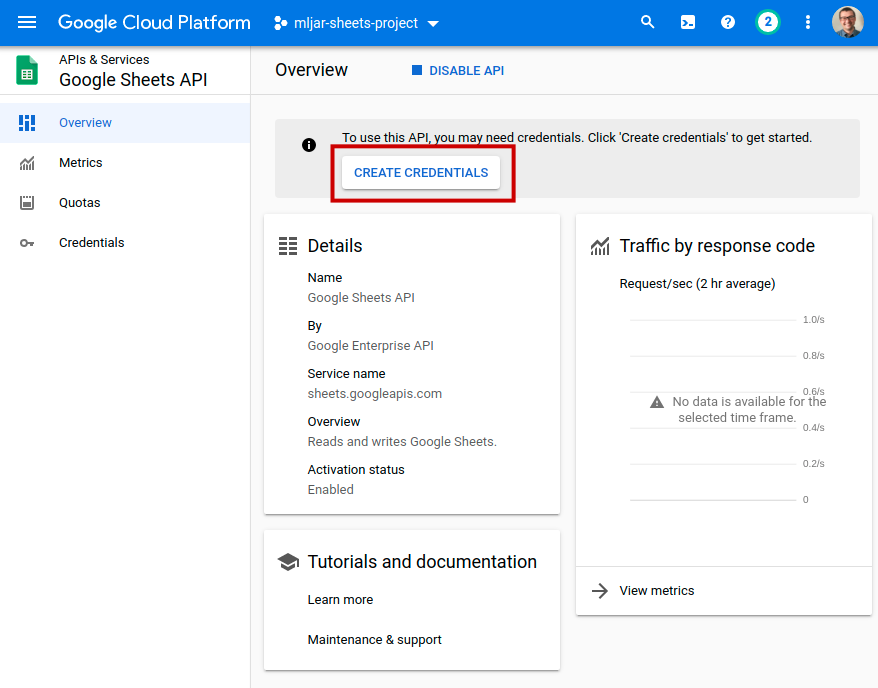
Create Service Account credentials
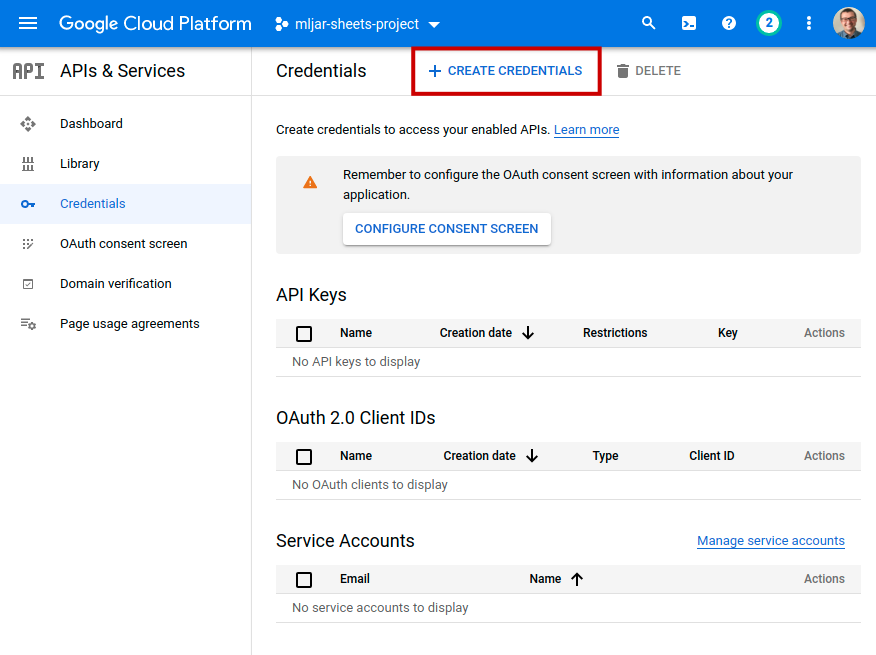
After enabling both (Drive and Sheets) APIs you will have the view like in the image below. You can click there CREATE CREDENTIALS button.
The other option for credentials creation is to go to the project dashboard and click CREATE CREDENTIALS button there:
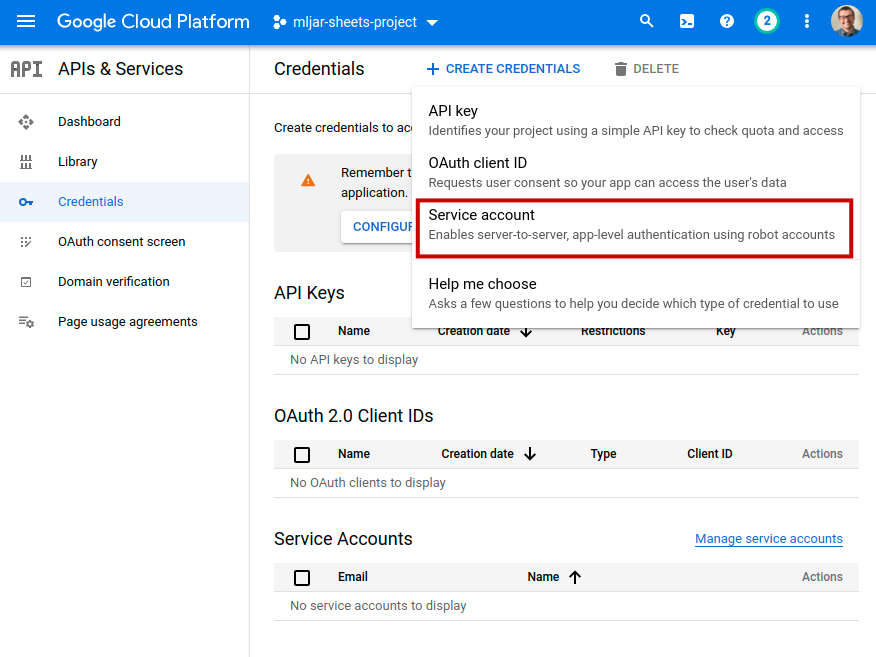
You will have a menu displayed with several options. Please select Service account .
Service Account option will create a new account that we will use only to access Google Sheets API. Google Cloud will create a new email associated with Service Account. We will share selected Spreadsheets with that email. Such solution is good and safe in my opinion. We have an option to set a granular access to the resources that we want to share with our script. In the case of stolen credentials, we simply remove the credentials or even a whole project.
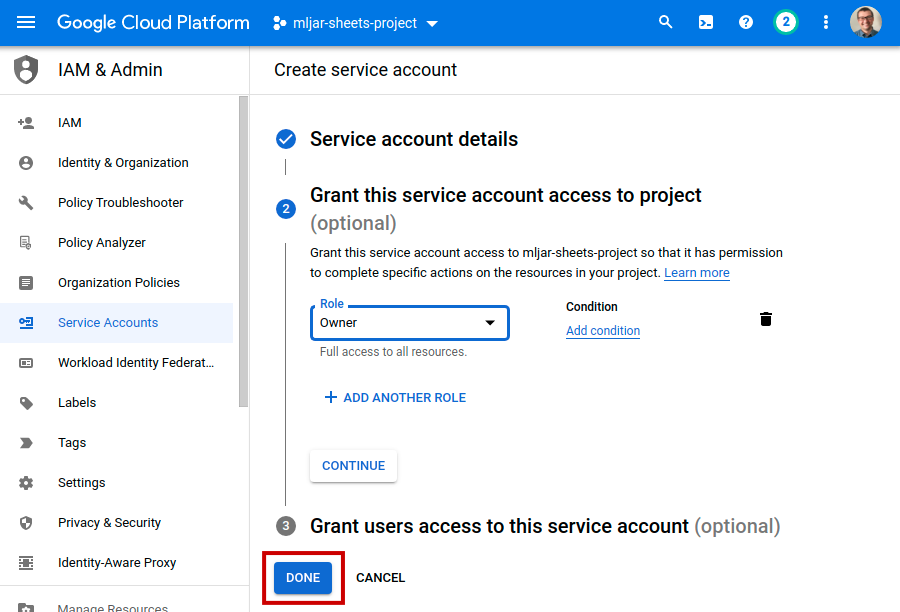
Please fill the Service account name and click CREATE AND CONTINE .
In the next step, set access to the project. In this example, I set the role to Owner . You can set more restrictive role if needed. Click DONE button.
Create JSON file with credentials
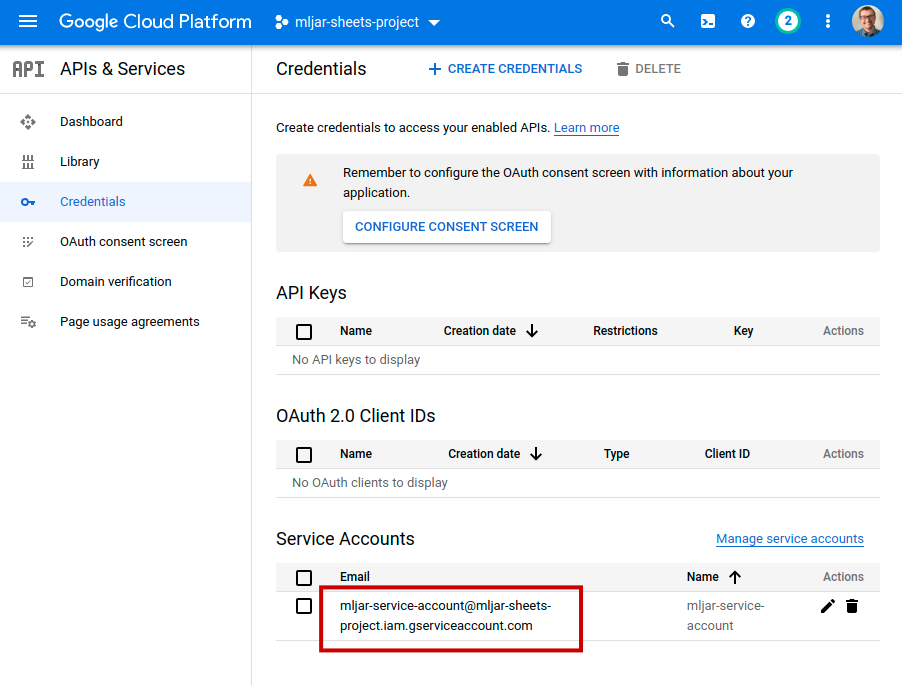
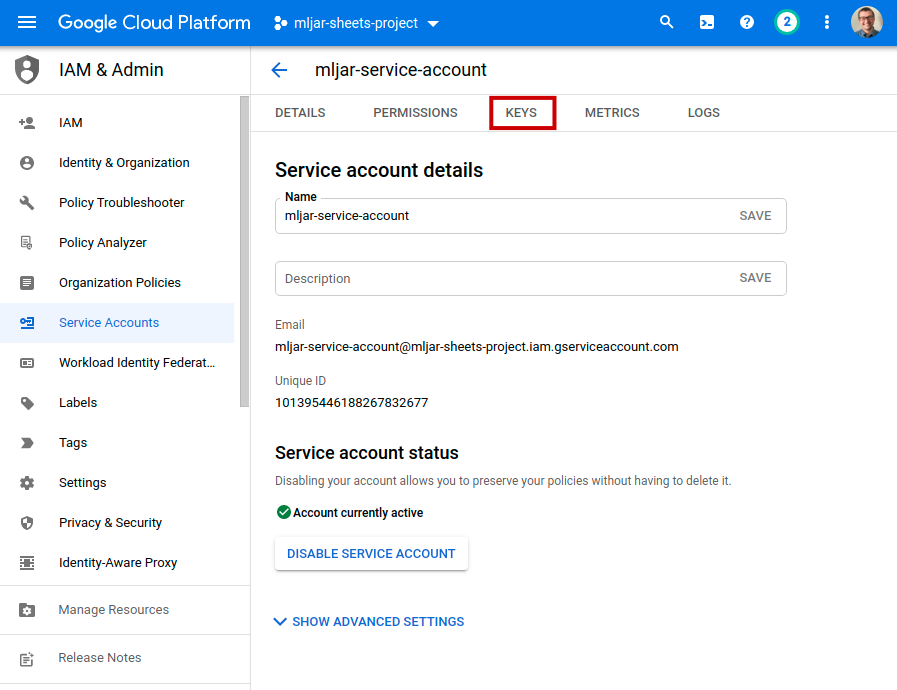
After creating the Service Account you will see a view with your credentials. Please click on your Service Account.
You will see its details. Please select KEYS tab.
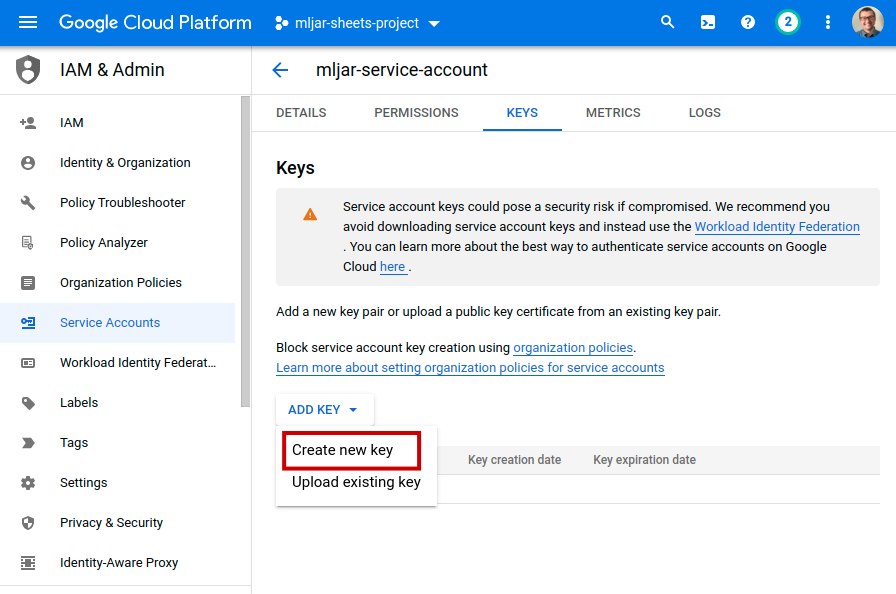
In the KEYS view, just click ADD KEY and Create new key :
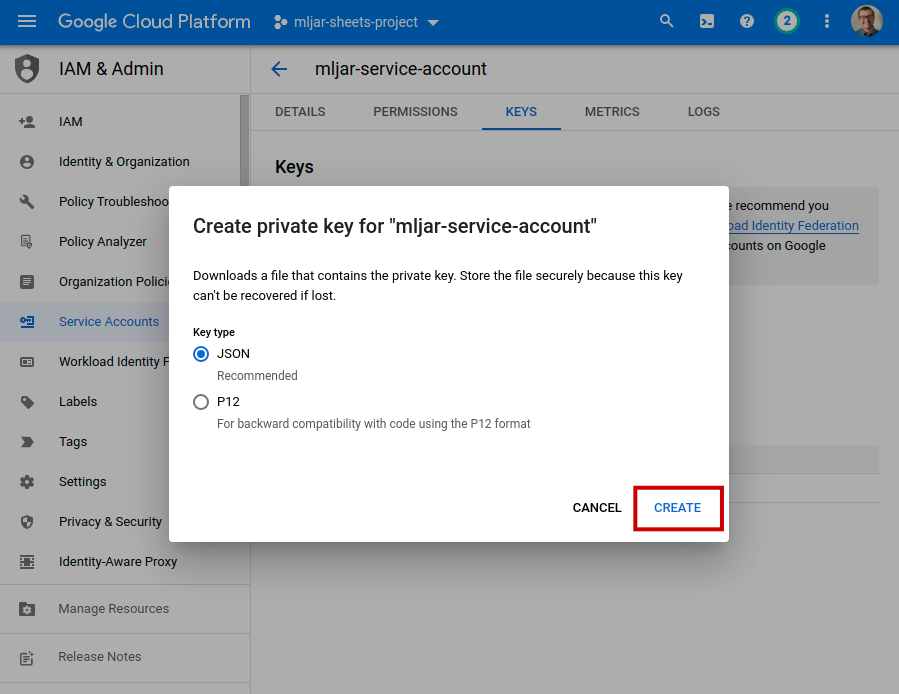
You will see a dialog where you can select the key format. Please select JSON (should be the default) and click CREATE . It should start download of your JSON file with credentials.
Congratulations! The JSON file is ready to use in your Python scripts. Let’s test it.
Authenticate in Python
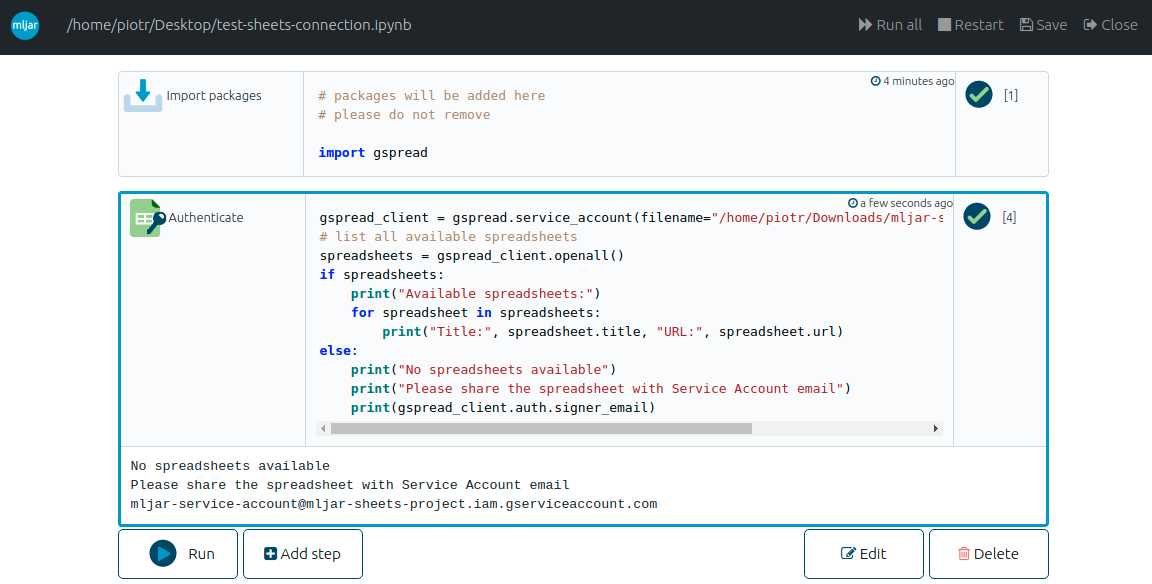
I will use Python code that is generated with MLJAR Studio notebook:
import gspread # connect got Google Sheets gspread_client = gspread.service_account(filename="/path/to/your/credentials.json") # list all available spreadsheets spreadsheets = gspread_client.openall() if spreadsheets: print("Available spreadsheets:") for spreadsheet in spreadsheets: print("Title:", spreadsheet.title, "URL:", spreadsheet.url) else: print("No spreadsheets available") print("Please share the spreadsheet with Service Account email") print(gspread_client.auth.signer_email)This is how it looks in the MLJAR Studio:
You should see the message that no spreadsheets are available. You will see also an email that is associated with Service account. You need to share Spreadsheets with that email.
The email can be also checked in Credentials view in Google Cloud Console:
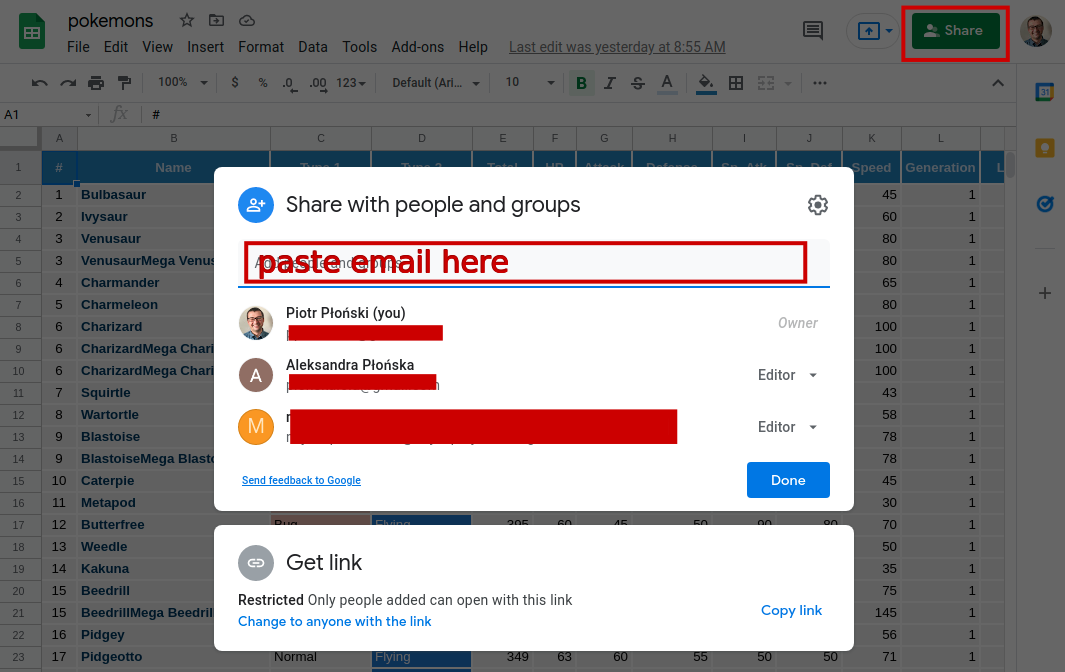
You share the Spreadsheet with Service Account email in the same way as you will share with a friend:
Remove the project
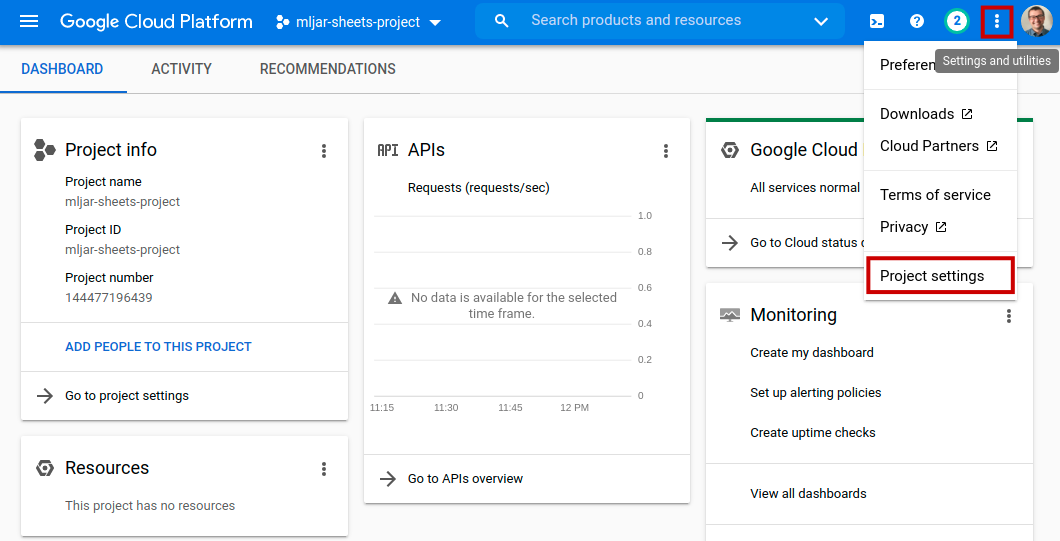
If you would like to remove the project, please click three dots near your profile picture in the top right corner and select Project settings .
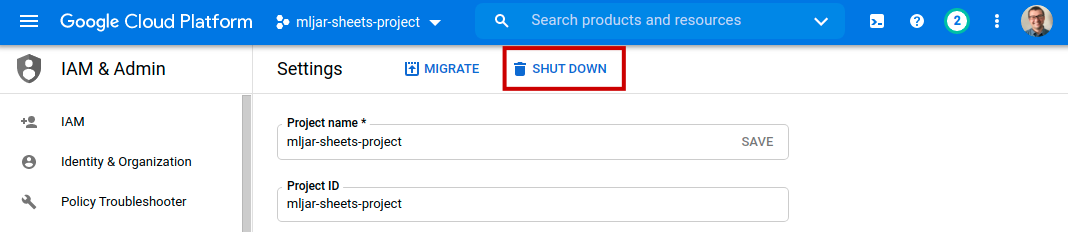
There, please click SHUT DOWN to delete the project.
That’all, project is scheduled for removal.
Summary
In this article you have created a JSON file with credentials to authenticate Python code to access Google Sheets data. We use Service Account credentials. To have access to the selected Spreadsheet, it needs to be shared with email associated with Service Account. It is much safer apporach than sharing all your Spreadsheets at once.
We are looking for feedback or comments from you. You can reach us by email to Ola.
We are working on MLJAR Studio desktop application. It is a no-code framework for creating Python scripts. The application is still under the development. If you would like to be informed about the release please fill the form.