- Шапка сайта в css – как ее сделать
- Шапка сайта – какой она бывает
- Как в CSS можно оформить шапку сайта?
- How to Create a Website Header Design In HTML and CSS Code
- Live Preview Of Header Design:-
- Header Design In CSS Code:-
- Final Output Of Website Header Design Html Css Code:-
- Video Output Of Header Design:
- How to use google Fonts?
- Which code editor do you use for this Header project coding?
- is this project responsive or not?
- How To Build the Header Section of Your Website With CSS (Section 1)
- Prerequisites
- Adding the Title and Subtitle To Your Webpage Header
- Adding and Styling a Small Profile Image To Your Webpage Header
- Styling and Positioning the Header Content With CSS
- Conclusion
- Tutorial Series: How To Build a Website With CSS
Шапка сайта в css – как ее сделать
От автора: приветствуем вас на нашем блоге о сайтостроении. У любого сайта есть то, чем он обычно запоминается и выделяется среди остальных. Обычно это именно шапка сайта. CSS позволяет сделать ее такой, как вам нужно.
Шапка сайта – какой она бывает
Поразительно, как много может зависеть сегодня от одного только дизайна веб-ресурса. Но что особенно сильно отделяет веб-ресурс от других? Как правило, это именно шапка сайта с фирменным логотипом и уникальным оформлением. Обычно именно по ней люди запоминают какой-то интернет-проект. Это очень хорошо запоминается в памяти людей.
Например, если вы видите белую букву “В” на синем фоне, то наверняка сразу делаете вывод – это иконка социальной сети Вконтакте. А изображение почтового голубя у всех сразу же ассоциируется с Twitter. Все это стало возможным потому, что в шапках у этих сайтов были именно такие изображения и они очень хорошо запомнились людям.
Так, это было немного размышлений, теперь давайте перейдем непосредственно к технической части.
Как в CSS можно оформить шапку сайта?
Вообще шапки бывают разными. По ширине их можно разделить на две группы: выровненные по центру и те, что на всю ширину веб-страницы.

Онлайн курс по JavaScript
Научитесь создавать приложения со сложными интерфейсами
Это основной язык для современной веб-разработки — почти 100% сайтов работает на JavaScript. Освойте его с нуля всего за 4 месяца, и вы сможете зарабатывать от 70 000 рублей.
Раньше шапку делали также, как и любой другой блок – обычному тегу div давали нужный идентификатор, после чего в него попадало все нужное содержимое, а потом все это оформлялось. Сегодня же уже принято верстать по-другому. Специально для создания шапки сайта в HTML5 появился парный тег – header. Его использование приветствуется, это позволяет браузерам понимать, что это за часть шаблона и за что она отвечает. Кстати, если вы хотите изучить основы HTML5, то вам прямая дорога в наш премиум-раздел, где вы можете посмотреть уроки по этой технологии.
Поэтому, для создания простейшей шапки достаточно написать в html вот такой код:
How to Create a Website Header Design In HTML and CSS Code
Hello, guys welcome to the Codewithrandom blog, In today’s article we learn How to create a Website Header Design using Html and Css with Code.
In this Header project, we learn topics like how to make a header design and create a responsive header, and also learn how to add a Google font to our website or in a project. and many more things about Header.
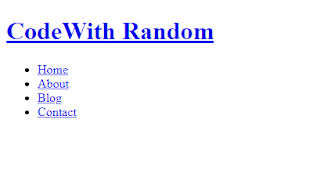
Live Preview Of Header Design:-

Do you want to learn HTML to JavaScript? 🔥
If yes, then here is our Master Frontend: Zero to Hero eBook! 📚 In this eBook, you’ll learn complete HTML, CSS, Bootstrap, and JavaScript from beginner to advance level. 💪 It includes 450 Projects with source code.
Header Design In CSS Code:-
@import url(«https://fonts.googleapis.com/css2?family=Open+Sans&display=swap»); body < font-family: "Open Sans", sans-serif; margin: 0; >a < text-decoration: none; color: #000; >a:hover < color: rgb(179, 179, 179); >.site-header < border-bottom: 1px solid #ccc; padding: 0.5em 1em; display: flex; justify-content: space-between; >.site-identity h1 < font-size: 1.5em; margin: 0.6em 0; display: inline-block; >.site-navigation ul, .site-navigation li < margin: 0; padding: 0; >.site-navigation li
this is all css for creating the header project and designing Header.
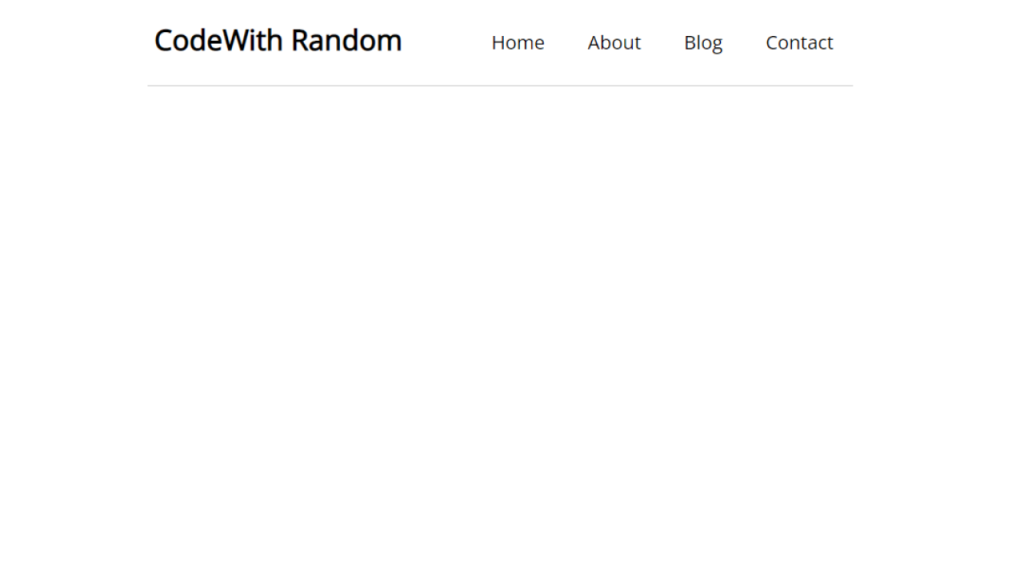
Final Output Of Website Header Design Html Css Code:-

This is the final output of our header using html css. In this article, we create this amazing header project and you absolutely love its design in less code.
Video Output Of Header Design:
How to use google Fonts?
we have too many pre-installed fonts but they are not sufficient so we use google font for a great look… and we use open sans in this project but we use open sans condensed for learning about google font.
Step 1 -> Search Google Font on Search Engine like Google, Bing, Safari, etc.
Step 2 -> Click on the first link Google Fonts
Step 3 -> When Google Font Site opens then search the font you want to work with in the above search box.
Step 4 -> Then click on the font and a sidebar appears giving the option to add a selected font to your site.
Options -> 1. Link the given cdn link to html file in the head tag
2. Import using URL to stylesheet than code in font-family property
Step 5 -> Select the class or id you want to add font style then save the code.
Output -> Fonts are changed
Hope you like this post and enjoy it. If we did any mistake please comment on it so this help full for also our users. Thank you for reading.
Written by Tushar Sharma
Team Codewith_Random
Which code editor do you use for this Header project coding?
I personally recommend using VS Code Studio, it’s very simple and easy to use.
is this project responsive or not?
Yes! this project is a responsive project.
How To Build the Header Section of Your Website With CSS (Section 1)
In this tutorial, you will recreate the top header section of the demonstration website using HTML and CSS. You can switch out Sammy’s information with your own if you wish to experiment or personalize the size. The methods that you use here can be applied to other CSS/HTML website projects.

Prerequisites
To follow this tutorial, make sure you have set up the necessary files and folders as instructed in a previous tutorial in this series How To Set Up You CSS and HTML Practice Project.
Adding the Title and Subtitle To Your Webpage Header
Our website header includes the title (“Sammy the Shark”), a subtitle (“SENIOR SELACHIMORPHA AT DIGITALOCEAN”), and a small profile image. These elements are wrapped inside a container that is styled with a class defined in the CSS stylesheet. You will recreate this section by adding the text and image content, creating a class for the container, and then wrapping the text and image content in a container that is assigned the newly-created class.
To add a title and subtitle to your site, add the following highlighted code snippet in between the opening and closing tags in the index.html file. Switch out Sammy’s information with your own if you would like to personalize your site:
. . . body> > h1>Sammy the Sharkh1> h5>SENIOR SELACHIMORPHA AT DIGITALOCEANh5> body> In this code snippet, you have added the title Sammy the Shark and assigned it the heading tag as it is the most important heading of this webpage. You have also added the subtitle SENIOR SELACHIMORPHA AT DIGITALOCEAN and assigned it the heading tag, as it is a less important heading.
Note that you have also added the comment just before the title. A comment is used to save explanatory notes on your code for future reference and is not displayed by the browser to site visitors (unless they view the source code of the webpage). In HTML, comments are written between as demonstrated in the code snippet above. Make sure to close your comment with the ending comment tag ( —> ) or all of your content will be commented out.
Adding and Styling a Small Profile Image To Your Webpage Header
Next, you’ll add a small profile image to the header section. Pick a profile photo that you want to include on your site. If you don’t have a profile photo, you can use any alternative image (such as the profile image of Sammy) or create an avatar through a site like Getavataaars.com.
Once you have selected an image, save it to your images folder as small-profile.jpeg .
Now add the profile image to the webpage by using an tag and the src attribute assigned the file path of your profile image. Add the following highlighted code snippet to your index.html file just after the line and before the Sammy the Shark line:
. . . body> img src="images/small-profile.jpeg" alt="Sammy the Shark, DigitalOcean’s mascot"> h1>Sammy the Sharkh1> h5>SENIOR SELACHIMORPHA AT DIGITALOCEANh5> body> html> Save the file and load it in the browser. Your webpage should now have a title, subtitle, profile image, and background image:

Notice that the image does not have the same styling as the profile image in the demonstration site. To recreate the shape, size, and border of the profile image in the demonstration site, add the following ruleset to your styles.css file:
. . . /*Top header profile image*/ .profile-small height:150px; border-radius: 50%; border: 10px solid #FEDE00; > Before moving on, let’s review each line of code you just added:
- /*Top header profile image*/ is a CSS comment for labeling the code.
- The text .profile-small refers to the name of the class we’re defining with the ruleset. This class will be applied to the profile image in the next step.
- The declaration height:150px; sets the height of the image to 150 pixels and automatically adjusts the width to maintain the image size proportions.
- The declaration border-radius: 50%; rounds the edges of the image into a circular shape.
- The declaration border: 10px solid #FEDE00; gives the image a solid border that is 10 pixels wide and has the HTML color code #FEDE00 .
Save the file and return to your index.html file to add the profile-small class to your tag like so:
. . . img src="images/small-profile.jpeg" class="profile-small" alt="Sammy the Shark, DigitalOcean’s mascot"> . . . Save the file and reload it in your browser. Your profile image should now have a height of 150 pixels, a circular shape, and a yellow border:

In the next step, you’ll apply additional styling to the title, subtitle, and profile image as a whole.
Styling and Positioning the Header Content With CSS
You will now define a class with CSS to style and position the header content. Return to the styles.css file and create the header class by adding the following CSS ruleset:
. . . /* Header Title */ .header padding: 40px; text-align: center; background: #f9f7f7; margin:30px; font-size:20px; > Let’s pause briefly to understand each line of the code that you just added:
- The /* Header Title */ is a comment, which is not displayed by the browser.
- The text .header is the name of the class selector we’re creating and defining with this ruleset.
- The padding: 40px; declaration creates 40 pixels of padding between the content and the border of the element.
- The text-align: center; declaration moves the content to the center of the element. You can also adjust the value to left or right to align the text accordingly.
- The background: #f9f7f7; declaration sets the color to the specific HTML color code used in the demonstration website. This tutorial will not cover HTML color codes in this tutorial series, but you can also use HTML color names ( black , white , gray , silver , purple , red , fuchsia , lime , olive , green , yellow , teal , navy , blue , maroon , and aqua ) to change the color value of this property.
- The margin:30px; declaration creates a margin of 30 pixels between the perimeter of the element and the perimeter of the viewport or any surrounding elements.
- The font-size:20px; declaration increases the size of both the title and subtitle.
Save your styles.css file. Next, you will apply this header class to your header content. Return to the index.html page and wrap the header content (that you already added to your file) in a tag that is assigned the header class:
. . . div class="header"> img src="images/small-profile.jpeg" class="small-profile.jpeg" alt="Sammy the Shark, DigitalOcean’s mascot"> h1>Sammy the Sharkh1> h5>SENIOR SELACHIMORPHA AT DIGITALOCEANh5> div> body> html> Save the index.html file and reload it in your browser. Your title, subtitle, and profile image should now be styled inside a container according to the rules you declared with the header class:

Conclusion
You have now recreated the header section of the demonstration website on your webpage using HTML and CSS. You added and styled a title, subtitle, and profile image using containers and CSS classes. If you are interested, you can continue to explore design possibilities by modifying your CSS rules for your header content.
When you are ready, you can continue to the next tutorial where you will recreate the second section of the demonstration site.
Thanks for learning with the DigitalOcean Community. Check out our offerings for compute, storage, networking, and managed databases.
Tutorial Series: How To Build a Website With CSS
This tutorial is part of a series on creating and customizing this website with CSS, a stylesheet language used to control the presentation of websites. You may follow the entire series to recreate the demonstration website and gain familiarity with CSS or use the methods described here for other CSS website projects.
Before proceeding, we recommend that you have some knowledge of HTML, the standard markup language used to display documents in a web browser. If you don’t have familiarity with HTML, you can follow the first ten tutorials of our series How To Build a Website With HTML before starting this series.