- Very Simple CMS In PHP MYSQL (Free Download)
- TLDR – QUICK SLIDES
- TABLE OF CONTENTS
- BAREBONES CMS
- STEP 1) CONTENT DATABASE TABLE
- STEP 2) CMS CONTENT LIBRARY
- STEP 3) UPDATE CONTENT PAGE
- STEP 4) DISPLAY CONTENT PAGE
- DOWNLOAD & NOTES
- SUPPORT
- EXAMPLE CODE DOWNLOAD
- EXTRA BITS & LINKS
- MORE IMPROVEMENT IDEAS
- HOW ABOUT MULTIPLE PAGES?
- LINKS & REFERENCES
- TUTORIAL VIDEO
- THE END
- Leave a Comment Cancel Reply
- Search
- Breakthrough Javascript
- Socials
- About Me
- Свой движок сайта на php в связке с MySql, для начинающих
Very Simple CMS In PHP MYSQL (Free Download)
Welcome to a quick tutorial on how to create a simple content management system (CMS) with PHP and MYSQL. Looking to challenge yourself or just want a really simple CMS for your current project? Well, an actual example will better explain things. Let us walk through one in this guide – Read on!
TLDR – QUICK SLIDES

TABLE OF CONTENTS
BAREBONES CMS
All right, let us now get started with the barebones CMS in PHP and MYSQL.
STEP 1) CONTENT DATABASE TABLE
CREATE TABLE `contents` ( `id` bigint(20) NOT NULL, `title` varchar(255) NOT NULL, `text` text NOT NULL ) ENGINE=InnoDB DEFAULT CHARSET=utf8mb4; ALTER TABLE `contents` ADD PRIMARY KEY (`id`), ADD KEY `title` (`title`), ADD FULLTEXT KEY `text` (`text`); ALTER TABLE `contents` MODIFY `id` bigint(20) NOT NULL AUTO_INCREMENT;Yep, this one should be very straightforward, we need a table to store the title and content of the pages. Just a small note here though, the title and text are indexed – ADD KEY `title` and ADD FULLTEXT KEY `text` . This indexing will take up a little more disk space but greatly improves the search performance.
STEP 2) CMS CONTENT LIBRARY
pdo = new PDO( "mysql:host=".DB_HOST.";dbname=".DB_NAME.";charset=".DB_CHARSET, DB_USER, DB_PASSWORD, [ PDO::ATTR_ERRMODE => PDO::ERRMODE_EXCEPTION, PDO::ATTR_DEFAULT_FETCH_MODE => PDO::FETCH_ASSOC ]); > // (B) DESTRUCTOR - CLOSE DATABASE CONNECTION function __destruct () < $this->pdo = null; $this->stmt = null; > // (C) HELPER - RUN SQL QUERY function query ($sql, $data=null) : void < $this->stmt = $this->pdo->prepare($sql); $this->stmt->execute($data); > // (D) SAVE CONTENT function save ($title, $text, $id=null) < if (is_numeric($id)) < $sql = "REPLACE INTO `contents` (`id`, `title`, `text`) VALUES (. )"; $data = [$id, $title, $text]; >else < $sql = "INSERT INTO `contents` (`title`, `text`) VALUES (. )"; $data = [$title, $text]; >$this->query($sql, $data); return true; > // (E) LOAD CONTENT function load ($id) < $this->query("SELECT * FROM `contents` WHERE `id`=?", [$id]); return $this->stmt->fetch(); > // (F) SEARCH CONTENT function search ($search) < $this->query("SELECT * FROM `contents` WHERE `title` LIKE ? OR `text` LIKE ?", ["%$search%", "%$search%"]); return $this->stmt->fetchAll(); > > // (G) DATABASE SETTINGS - CHANGE THESE TO YOUR OWN! define("DB_HOST", "localhost"); define("DB_NAME", "test"); define("DB_CHARSET", "utf8mb4"); define("DB_USER", "root"); define("DB_PASSWORD", ""); // (H) CREATE NEW CONTENT OBJECT $_CMS = new Content();The core library may look a little intimidating at first, but keep calm and look carefully.
- (A, B, G) On creating $_CMS = new Content() , the constructor will automatically connect to the database; The destructor closes the connection when the object is destroyed.
- (C) query() A helper function to run an SQL query.
- (D to F) There are only 3 “content functions” here.
- save() To save page contents.
- load() To get the page contents.
- search() Search page contents.
That’s all, feel free to expand and add more of your own functions – Delete content, advanced search, save to HTML file, etc…
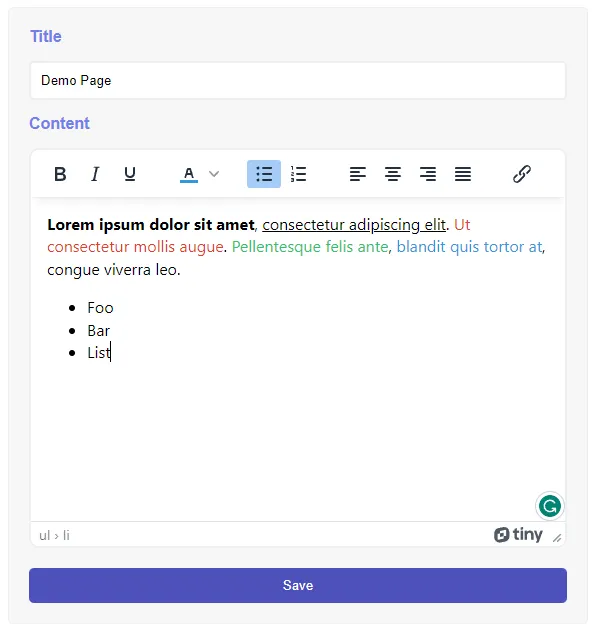
STEP 3) UPDATE CONTENT PAGE
save($_POST["title"], $_POST["text"], $id) ? "
" : "// (D) EDIT PAGE $content = $_CMS->load($id); ?> ">Right, this page is seemingly complicated again, but let’s walk through it:
- Load TinyMCE (a WYSIWYG editor) from the CDN.
- Self-explanatory. Load the PHP library, but we fix the content ID to $id = 1 in this demo to keep things simple.
- Save the content when the form is submitted.
- HTML form to update the content itself.
That’s all for the essentials behind this “one-page admin”.
STEP 4) DISPLAY CONTENT PAGE

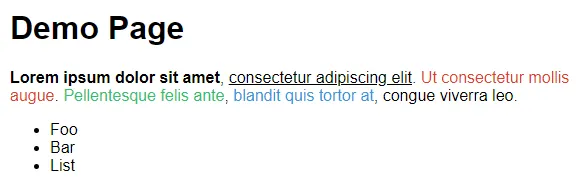
Now that we have some dummy contents in the database, the final step is to output it… This should not be a mystery anymore. We simply use $content = $_CORE->load($id) to fetch and output the contents.
DOWNLOAD & NOTES
Here is the download link to the example code, so you don’t have to copy-paste everything.
SUPPORT
600+ free tutorials & projects on Code Boxx and still growing. I insist on not turning Code Boxx into a «paid scripts and courses» business, so every little bit of support helps.
EXAMPLE CODE DOWNLOAD
Click here for the source code on GitHub gist, just click on “download zip” or do a git clone. I have released it under the MIT license, so feel free to build on top of it or use it in your own project.
EXTRA BITS & LINKS
That’s all for this guide, and here is a small section on some extras and links that may be useful to you.
MORE IMPROVEMENT IDEAS
- Protect 3-save.php . Create a user login system and admin panel – Check out the links below.
- Change 4-load.php to also load different pages, create your own HTML template.
- If you want a “pretty URL system” like WordPress or Drupal, feel free to add a “URL” field in the database. You will also need to work with htaccess , check out the pretty URL link below.
- Add a file manager to your CMS, do a search for “PHP file manager” on the Internet.
HOW ABOUT MULTIPLE PAGES?
- Add a getAll() function in 2-lib.php , SELECT `id`, `title` FROM `contents` .
- Use getAll() to build an admin page that lists all the available content.
- When the administrator clicks on a page in the list, redirect to 3-save.php?id=N .
- The rest should be straightforward. Modify 3-save.php and 4-load.php to load the content with $_GET[«id»] instead.
LINKS & REFERENCES
TUTORIAL VIDEO
THE END
Thank you for reading, and we have come to the end of this guide. I hope that it has helped you with your project, and if you want to share anything with this guide, please feel free to comment below. Good luck and happy coding!
Leave a Comment Cancel Reply
Search
Breakthrough Javascript
Take pictures with the webcam, voice commands, video calls, GPS, NFC. Yes, all possible with Javascript — Check out Breakthrough Javascript!
Socials
About Me
W.S. Toh is a senior web developer and SEO practitioner with over 20 years of experience. Graduated from the University of London. When not secretly being an evil tech ninja, he enjoys photography and working on DIY projects.
Code Boxx participates in the eBay Partner Network, an affiliate program designed for sites to earn commission fees by linking to ebay.com. We also participate in affiliate programs with Bluehost, ShareASale, Clickbank, and other sites. We are compensated for referring traffic.
Свой движок сайта на php в связке с MySql, для начинающих
Среди обычных пользователей различных CMS, есть те, у которых есть желание создать свою собственную CMS. Одним из таких пользователей был я.
В конце декабря я загорелся желанием сделать что то свое, при очень малом знании языков. И теперь, я хочу помочь рядовому пользователю несколько освоится в связке php и MySql, и в том, как можно написать свой сайт.Во первых, мы должны понять, что у нас будет за сайт, и какова будет его структура.
У меня была идея фикс — истории из игр, чтобы любой пользователь мог их добавлять и выводились они постранично из БД MySql.И так, сначала разметим структуру страницы. Для меня это было:
Header
Menu
Content
Sidebar
FooterHeader — шапка сайта;
Menu — соответственно меню;
Content — содержимое страниц в моем случае истории, но содержимым может быть все, что угодно;
Sidebar — боковая колонка, где находились новости и лучшие истории;
Footer — нижняя часть сайта (подвал) с копирайтом.Также, нельзя забывать о подключении к базе данных — ведь страницы у нас динамические, и всю информацию мы будем брать оттуда, поэтому нам понадобится еще пара вещей — файл с конфигом, а также файл, который будет подключать нас к базе данных.
После этого, я создал 6 пустых php: index.php, config.php, connect.php, header.php, menu.php, content.php, sidebar.php и footer.php.
Забыл отметить, что для удобства редактирование кода стоит скачать программу Notepad++ — русская версия в ней есть.
Итак, начнем с простого. Для начала, в файл index.php добавим вот этот код:
Тэгами и ?> мы открываем и закрываем наш код (вместо можно использовать просто ).
А конструкция include(‘ ‘); позволяет включать файлы в код PHP скрипта во время выполнения сценария. Т.Е. в код нашей главной страницы автоматически, и в заданном нами порядке будет включен код из всех файлов, которые мы «включили».Итак, сейчас в нашу главную страницу встраивается код из всех нужных нам элементов.
Это нужно прежде всего, для удобства, чтобы не было нагромождения кода, а также, если мы будем делать несколько страниц, в которых будут одинаковые элементы, нам проще создать отдельные файлы с ними, и потом выгружать.Наша следующая задача — создать в базе данных таблицы и заполнить их данными, касательно названия нашего сайта и тп.
Здесь мы можем пойти двумя путями:- Создать полноценный установщик сайта, и панель администратора.
- Либо просто создать страницу типа install.php, в которую мы внесем все нашы данные и один раз перейдем на нее, для выгрузки данных и создания таблиц.
Для начала, пройдем вторым путем — простым.
Для этого мы сначала внесем в наш файл config.php данный код:Помимо комментариев в самом коде, хочу добавить то, что $any_text — это переменные, которые мы задаем. Также, в php после любой функции, конструкции и тп. необходимо добавлять «;».
Итак, конфиг сайта мы создали, теперь перейдем к самому файлу установки.
"; //выводим текст о успешном подключении к бд //Подключаемся к бд, затем задаем переменной t_si_c функцию создания базы данных и исполняем ее mysql_select_db($database, $db); $t_si_c = "CREATE TABLE SiteConfig (option_id int(3), option_name varchar(50), option_value varchar(244) )"; mysql_query($t_si_c,$db); echo "Таблица SiteConfig успешна создана
"; $id_1 = "INSERT INTO SiteConfig (option_id, option_name, option_value) VALUES ('1', 'SiteTitle', '$sitetitle')"; $id_2 = "INSERT INTO SiteConfig (option_id, option_name, option_value) VALUES ('2', 'Title', '$title')"; $id_3 = "INSERT INTO SiteConfig (option_id, option_name, option_value) VALUES ('3', 'About', '$about')"; mysql_query($id_1,$db); mysql_query($id_2,$db); mysql_query($id_3,$db); echo "Данные Title, About и SiteTile успешни записаны
"; */ $t_content_c = "CREATE TABLE Content (id TEXT(1000), time DATETIME(), rating TEXT(10000), tags TEXT(500), name TEXT(300), story TEXT(1000000) )"; mysql_query($t_content_c,$db); mysql_query("CREATE TABLE Content( id INT NOT NULL AUTO_INCREMENT, PRIMARY KEY(id), time TIMESTAMP(14), rating TEXT(10000), tags TEXT(500), name TEXT(300), story TEXT(1000000) CHARACTER SET utf8 COLLATE utf8_general_ci ) DEFAULT CHARACTER SET utf8 COLLATE utf8_general_ci") or die(mysql_error()); echo "Content!"; include('close-connection.php'); echo "Подключение к MySql БД закрыто
"; echo "Установка успешно завершена";?>Данный файл установки очень примитивен. К примеру, если вы хотите, чтобы при любых ошибках вам выдавались сообщения, то вы можете использовать «or die«. Пример:
mysql_select_db($database,$db) or die ('
Выбор БД не произошел: ' .mysql_error()); echo "
Подключение к БД прошло успешно
";В данном случаем, при ошибке будет выводиться строка: «Выбор БД не произошел: и далее сама ошибка».
Подведем некоторые итоги: у нас есть пустая база сайта, как бы это ни было печально, и созданные в БД таблицы, которые были заполнены.