- Saved searches
- Use saved searches to filter your results more quickly
- License
- nabby27/CMS-Panel
- Name already in use
- Sign In Required
- Launching GitHub Desktop
- Launching GitHub Desktop
- Launching Xcode
- Launching Visual Studio Code
- Latest commit
- Git stats
- Files
- README.md
- About
- Very Simple CMS In PHP MYSQL (Free Download)
- TLDR – QUICK SLIDES
- TABLE OF CONTENTS
- BAREBONES CMS
- STEP 1) CONTENT DATABASE TABLE
- STEP 2) CMS CONTENT LIBRARY
- STEP 3) UPDATE CONTENT PAGE
- STEP 4) DISPLAY CONTENT PAGE
- DOWNLOAD & NOTES
- SUPPORT
- EXAMPLE CODE DOWNLOAD
- EXTRA BITS & LINKS
- MORE IMPROVEMENT IDEAS
- HOW ABOUT MULTIPLE PAGES?
- LINKS & REFERENCES
- TUTORIAL VIDEO
- THE END
- Leave a Comment Cancel Reply
- Search
- Breakthrough Javascript
- Socials
- About Me
Saved searches
Use saved searches to filter your results more quickly
You signed in with another tab or window. Reload to refresh your session. You signed out in another tab or window. Reload to refresh your session. You switched accounts on another tab or window. Reload to refresh your session.
CMS Panel created in PHP with OOP and architecture model, view, controller (MVC) using PDO, MySQL and Bootstrap
License
nabby27/CMS-Panel
This commit does not belong to any branch on this repository, and may belong to a fork outside of the repository.
Name already in use
A tag already exists with the provided branch name. Many Git commands accept both tag and branch names, so creating this branch may cause unexpected behavior. Are you sure you want to create this branch?
Sign In Required
Please sign in to use Codespaces.
Launching GitHub Desktop
If nothing happens, download GitHub Desktop and try again.
Launching GitHub Desktop
If nothing happens, download GitHub Desktop and try again.
Launching Xcode
If nothing happens, download Xcode and try again.
Launching Visual Studio Code
Your codespace will open once ready.
There was a problem preparing your codespace, please try again.
Latest commit
Git stats
Files
Failed to load latest commit information.
README.md
CMS Panel with MVC and PHP
This project consists of a CMS Panel (Content Management System) which only uses HTML, PHP, Bootstrap, Fontawesome icons and PDO statements to connect to the MySQL database.
- Encryption of passwords
- OOP (object-oriented programming)
- Sentences with PDO
- Architecture pattern MVC (Model, View, Controller)
- Upload and delete images
- URL friendly with .htacces
- 404 page not found implement
First of all create the database with the script that is in the database folder. Modify the app/core/settings.php file by putting your connection data to the database and the diferents paths and environment. Finally, copy the files in your public folder on the server.
Note 1: Make sure that the assets/images folder is created and there are write permissions for all (necessary when uploading the different images).
Note 2: Make sure that the rewrite module of Apache is installed (necessary for the .htacces file that makes the routes friendly).
Make sure that the apache server is started. Access to CMS Panel app in the URL of server. ex:
To testing the app, you have to execute the data script that is in the folder ./resources/test , also you have to copy the images of ./resources/test/images to ./assets/images
. +-- _app | +-- _controller | +-- _core | +-- _entity | +-- _model | +-- _styles | +-- _utils | +-- _view +-- _assets | +-- _images | +-- _plugins +-- _database +-- _resources +-- _images +-- _test This project is licensed under the MIT License — see the LICENSE file for details
About
CMS Panel created in PHP with OOP and architecture model, view, controller (MVC) using PDO, MySQL and Bootstrap
Very Simple CMS In PHP MYSQL (Free Download)
Welcome to a quick tutorial on how to create a simple content management system (CMS) with PHP and MYSQL. Looking to challenge yourself or just want a really simple CMS for your current project? Well, an actual example will better explain things. Let us walk through one in this guide – Read on!
TLDR – QUICK SLIDES

TABLE OF CONTENTS
BAREBONES CMS
All right, let us now get started with the barebones CMS in PHP and MYSQL.
STEP 1) CONTENT DATABASE TABLE
CREATE TABLE `contents` ( `id` bigint(20) NOT NULL, `title` varchar(255) NOT NULL, `text` text NOT NULL ) ENGINE=InnoDB DEFAULT CHARSET=utf8mb4; ALTER TABLE `contents` ADD PRIMARY KEY (`id`), ADD KEY `title` (`title`), ADD FULLTEXT KEY `text` (`text`); ALTER TABLE `contents` MODIFY `id` bigint(20) NOT NULL AUTO_INCREMENT;Yep, this one should be very straightforward, we need a table to store the title and content of the pages. Just a small note here though, the title and text are indexed – ADD KEY `title` and ADD FULLTEXT KEY `text` . This indexing will take up a little more disk space but greatly improves the search performance.
STEP 2) CMS CONTENT LIBRARY
pdo = new PDO( "mysql:host=".DB_HOST.";dbname=".DB_NAME.";charset=".DB_CHARSET, DB_USER, DB_PASSWORD, [ PDO::ATTR_ERRMODE => PDO::ERRMODE_EXCEPTION, PDO::ATTR_DEFAULT_FETCH_MODE => PDO::FETCH_ASSOC ]); > // (B) DESTRUCTOR - CLOSE DATABASE CONNECTION function __destruct () < $this->pdo = null; $this->stmt = null; > // (C) HELPER - RUN SQL QUERY function query ($sql, $data=null) : void < $this->stmt = $this->pdo->prepare($sql); $this->stmt->execute($data); > // (D) SAVE CONTENT function save ($title, $text, $id=null) < if (is_numeric($id)) < $sql = "REPLACE INTO `contents` (`id`, `title`, `text`) VALUES (. )"; $data = [$id, $title, $text]; >else < $sql = "INSERT INTO `contents` (`title`, `text`) VALUES (. )"; $data = [$title, $text]; >$this->query($sql, $data); return true; > // (E) LOAD CONTENT function load ($id) < $this->query("SELECT * FROM `contents` WHERE `id`=?", [$id]); return $this->stmt->fetch(); > // (F) SEARCH CONTENT function search ($search) < $this->query("SELECT * FROM `contents` WHERE `title` LIKE ? OR `text` LIKE ?", ["%$search%", "%$search%"]); return $this->stmt->fetchAll(); > > // (G) DATABASE SETTINGS - CHANGE THESE TO YOUR OWN! define("DB_HOST", "localhost"); define("DB_NAME", "test"); define("DB_CHARSET", "utf8mb4"); define("DB_USER", "root"); define("DB_PASSWORD", ""); // (H) CREATE NEW CONTENT OBJECT $_CMS = new Content();- (A, B, G) On creating $_CMS = new Content() , the constructor will automatically connect to the database; The destructor closes the connection when the object is destroyed.
- (C) query() A helper function to run an SQL query.
- (D to F) There are only 3 “content functions” here.
- save() To save page contents.
- load() To get the page contents.
- search() Search page contents.
That’s all, feel free to expand and add more of your own functions – Delete content, advanced search, save to HTML file, etc…
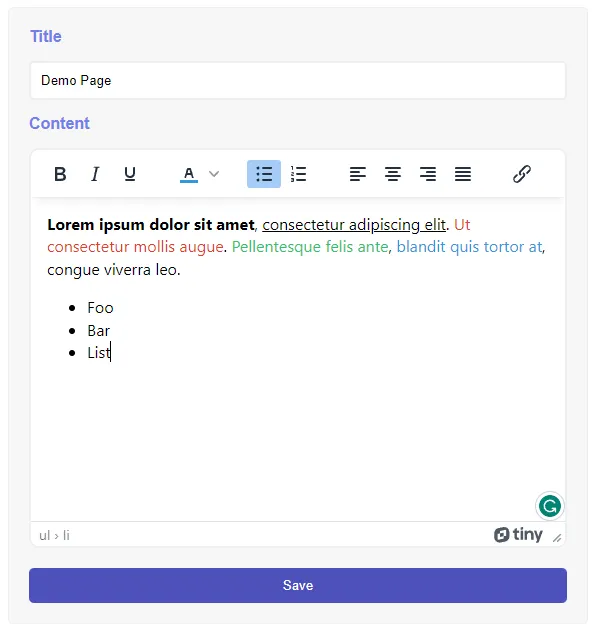
STEP 3) UPDATE CONTENT PAGE
save($_POST["title"], $_POST["text"], $id) ? "
" : "// (D) EDIT PAGE $content = $_CMS->load($id); ?> ">- Load TinyMCE (a WYSIWYG editor) from the CDN.
- Self-explanatory. Load the PHP library, but we fix the content ID to $id = 1 in this demo to keep things simple.
- Save the content when the form is submitted.
- HTML form to update the content itself.
That’s all for the essentials behind this “one-page admin”.
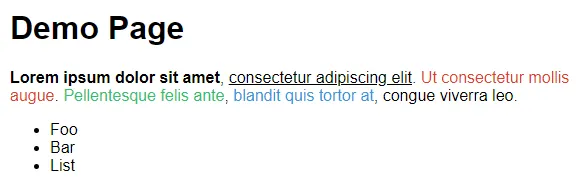
STEP 4) DISPLAY CONTENT PAGE

Now that we have some dummy contents in the database, the final step is to output it… This should not be a mystery anymore. We simply use $content = $_CORE->load($id) to fetch and output the contents.
DOWNLOAD & NOTES
Here is the download link to the example code, so you don’t have to copy-paste everything.
SUPPORT
600+ free tutorials & projects on Code Boxx and still growing. I insist on not turning Code Boxx into a «paid scripts and courses» business, so every little bit of support helps.
EXAMPLE CODE DOWNLOAD
Click here for the source code on GitHub gist, just click on “download zip” or do a git clone. I have released it under the MIT license, so feel free to build on top of it or use it in your own project.
EXTRA BITS & LINKS
That’s all for this guide, and here is a small section on some extras and links that may be useful to you.
MORE IMPROVEMENT IDEAS
- Protect 3-save.php . Create a user login system and admin panel – Check out the links below.
- Change 4-load.php to also load different pages, create your own HTML template.
- If you want a “pretty URL system” like WordPress or Drupal, feel free to add a “URL” field in the database. You will also need to work with htaccess , check out the pretty URL link below.
- Add a file manager to your CMS, do a search for “PHP file manager” on the Internet.
HOW ABOUT MULTIPLE PAGES?
- Add a getAll() function in 2-lib.php , SELECT `id`, `title` FROM `contents` .
- Use getAll() to build an admin page that lists all the available content.
- When the administrator clicks on a page in the list, redirect to 3-save.php?id=N .
- The rest should be straightforward. Modify 3-save.php and 4-load.php to load the content with $_GET[«id»] instead.
LINKS & REFERENCES
TUTORIAL VIDEO
THE END
Thank you for reading, and we have come to the end of this guide. I hope that it has helped you with your project, and if you want to share anything with this guide, please feel free to comment below. Good luck and happy coding!
Leave a Comment Cancel Reply
Search
Breakthrough Javascript
Take pictures with the webcam, voice commands, video calls, GPS, NFC. Yes, all possible with Javascript — Check out Breakthrough Javascript!
Socials
About Me
W.S. Toh is a senior web developer and SEO practitioner with over 20 years of experience. Graduated from the University of London. When not secretly being an evil tech ninja, he enjoys photography and working on DIY projects.
Code Boxx participates in the eBay Partner Network, an affiliate program designed for sites to earn commission fees by linking to ebay.com. We also participate in affiliate programs with Bluehost, ShareASale, Clickbank, and other sites. We are compensated for referring traffic.