- How to Install Java on Windows, Ubuntu, and macOS
- Java-specific Definitions
- Requirements
- How to Install Java on Windows 11
- Step 1: How to Download Java for Windows
- Step 2: Run the Executable
- Step 3: Complete the Java Install
- Step 4: Set the Environment Variables
- Step 5: Configure Environment Variables
- Step 6: Create a New System variable
- Step 7: Set the Java Installation Path
- Step 8: Open Windows Terminal
- Step 9: Test the JAVA_HOME Variable
- Step 10: Check the Java Install Version
- Install Java on macOS Monterey
- Step 1: How to Download Java for macOS Monterey
- Step 2: Open and Run the .dmg File
- Step 3: Complete the Java Install
- Step 4: Confirm the Java Installation
- Step 5: Configure Environment Variables
- How to Install Java on Ubuntu 20.04
- Step 1: Confirm an Existing Java Install
- Step 2: Update Packages and Install Dependencies
- Step 3: Download and Install the Java Package
- Step 4: Set the Java Install Location
- Step 5: Set Up Environment Variables
- Wrapping Up
- Related Articles:
- About the Author: Freddy Reese
- Java Downloads
- JDK Development Kit 20.0.2 downloads
- Release information
- JDK Development Kit 17.0.8 downloads
- Release information
- GraalVM for JDK 20.0.2 downloads
- Release information
- GraalVM for JDK 17.0.8 downloads
- Release information
- Protect your investment—and more
- Java SE subscribers have more choices
- Java SE Development Kit 8u381
- JRE 8
- Server JRE 8
- Which Java 8 package do I need?
- Release information
How to Install Java on Windows, Ubuntu, and macOS
Java is one of the world’s most popular and widely used languages, used to develop everything from mobile apps and enterprise software to scientific computing. One of the most significant advantages of Java is that it can run almost anywhere after being compiled. This article shows how to install Java on Windows, Ubuntu, and macOS.
Java-specific Definitions
Before starting the Java install, here are a few helpful definitions.
- JDK (Java Development Kit) is a software development environment allowing developers to code and run Java programs and applications. Java developers can use it on Windows, macOS, and Linux. Installing JDK will install both JRE and JVM.
- JRE (Java Runtime Environment) is needed to run Java applications. However, it can’t be used for development purposes and is installed along with JDK.
- JVM (Java Virtual Machine) is an essential piece of JDK and JRE. Java compiler produces code for a virtual machine called JVM, which interprets Java bytecode into machine language on another system.
Requirements
- Windows, macOS Monterey, or Ubuntu 20.04 operating system
- Admin or root-level access.
- Internet connection
- Some familiarity with command line or terminal
How to Install Java on Windows 11
Step 1: How to Download Java for Windows
Visit the Java download page to download the x64 Installer version of Java.

Those looking for the long-term support (LTS) version of JDK should install Java 17 as it is unavailable for Java 18.
Step 2: Run the Executable
Run the downloaded executable file from the browser or the file manager.
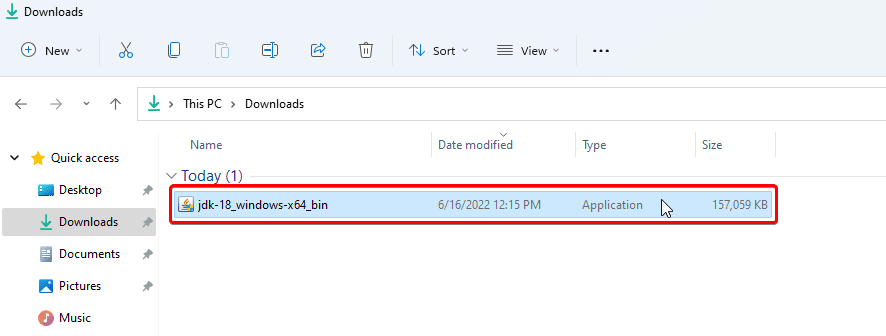
Step 3: Complete the Java Install
Take note of the installation path during this step. After this, you must set the JAVA_HOME variable to point to this path. This variable shows other software where Java is installed.
Click Next, follow the default installer prompts, and complete the installation.

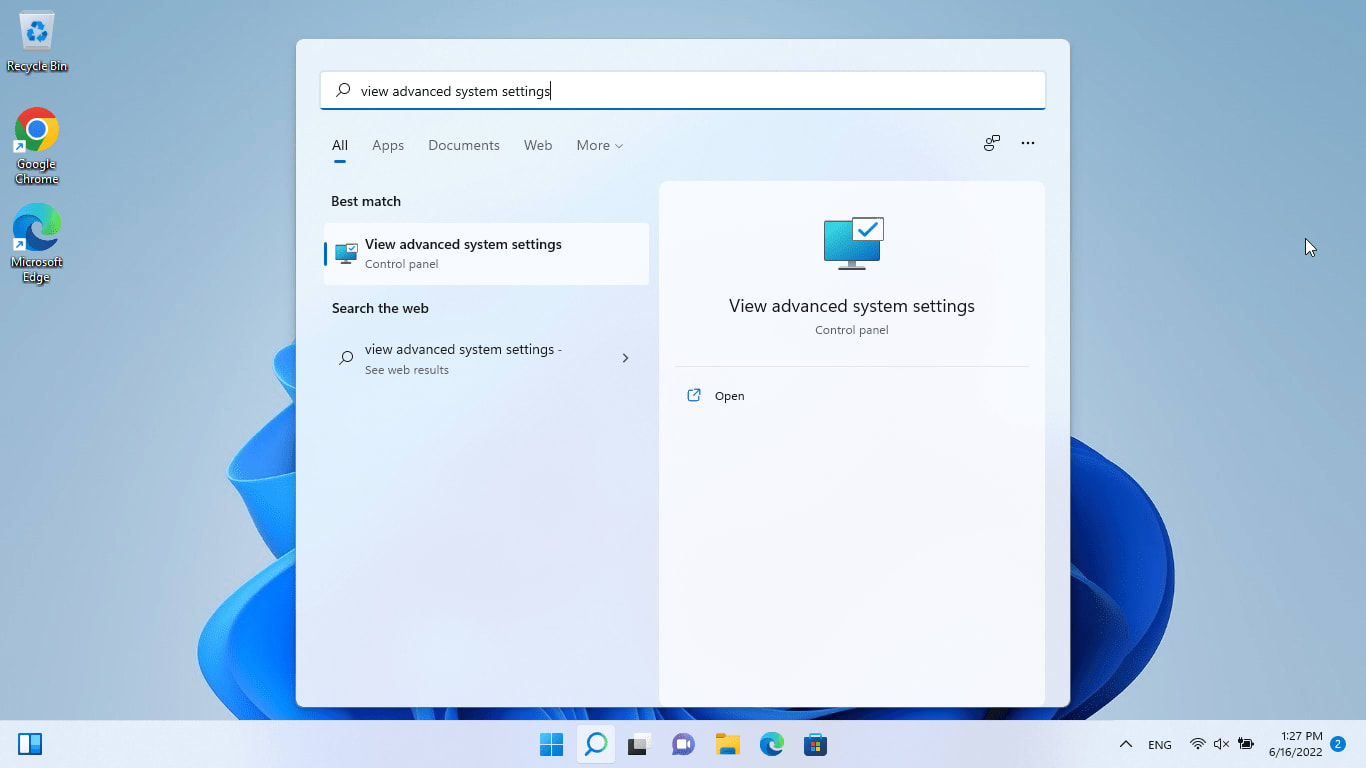
Step 4: Set the Environment Variables
To set environment variables, use Windows Search to find and open Advanced System Settings.
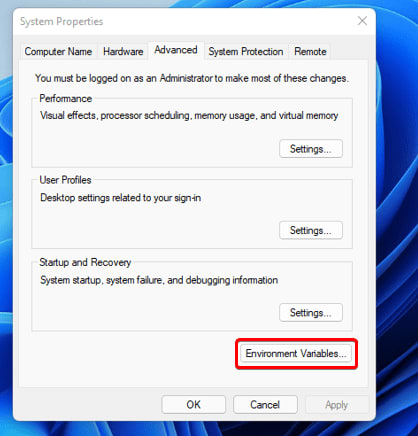
Step 5: Configure Environment Variables
Once you are in Advanced System Settings, click Environment Variables.
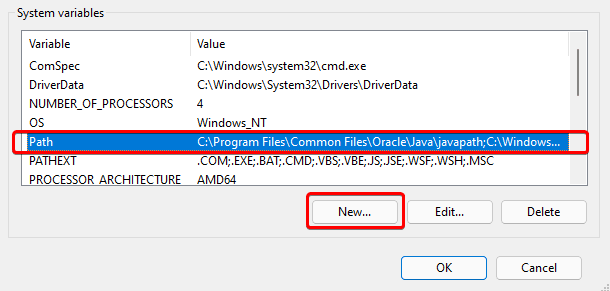
Step 6: Create a New System variable
Under System variables, select Path and click New.
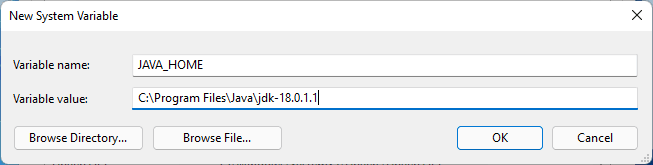
Step 7: Set the Java Installation Path
The New System Variable window appears. For the Variable name, input JAVA_HOME. For the Variable value, input the installation path noted in step 3. Click OK on this screen and the System variables screen to complete the setup.
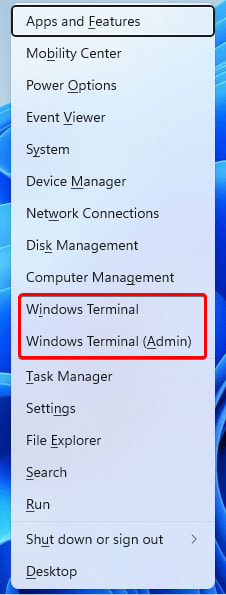
Step 8: Open Windows Terminal
To open the Windows terminal, press the Windows key + X. A small window will pop up. Next, click Windows Terminal. You may need to run the terminal as an administrator depending on your user permissions.
Step 9: Test the JAVA_HOME Variable
In the terminal, run the following command.
The command returns the Java installation path.

Step 10: Check the Java Install Version
To check the Java install version, run either of the following commands.
java -version javac -versionBoth commands return the version.

Install Java on macOS Monterey
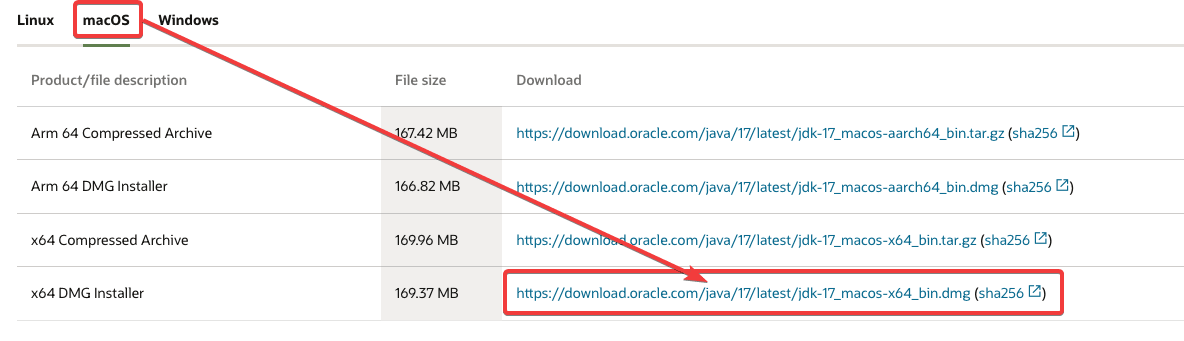
Step 1: How to Download Java for macOS Monterey
Visit the Java download page and download the Arm 64 DMG Installer if running the M1 CPU chip or x64 DMG on Intel-based CPUs.
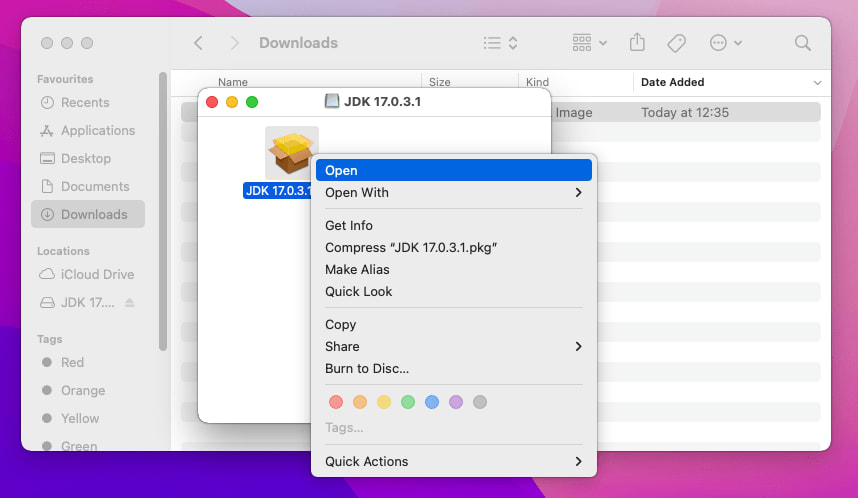
Step 2: Open and Run the .dmg File
Open the .dmg file we just downloaded. Run the JDK 17.0.3.1 package.
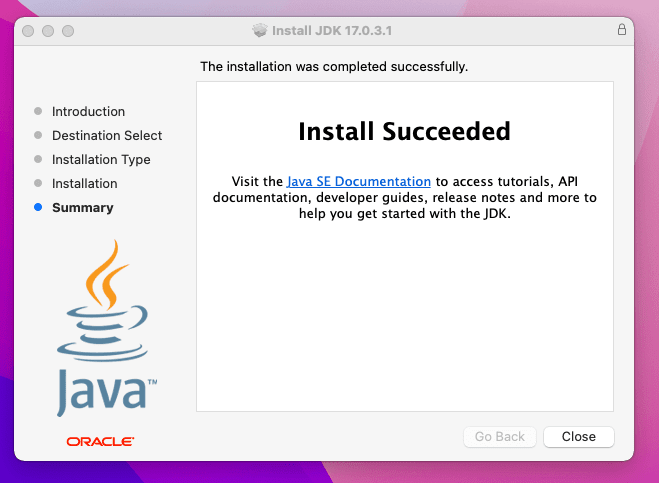
Step 3: Complete the Java Install
Complete the installation process based on your requirements. The system prompts you to enter your root password to continue the installation. Once entered, click Install Software.

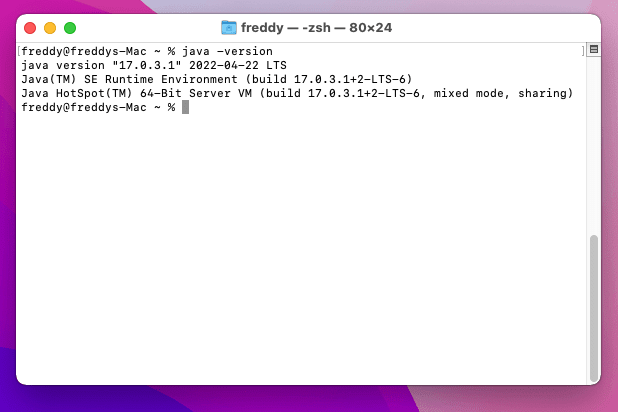
Step 4: Confirm the Java Installation
Run the following command from the terminal to check if Java is installed correctly.
The output shows the Java version information.
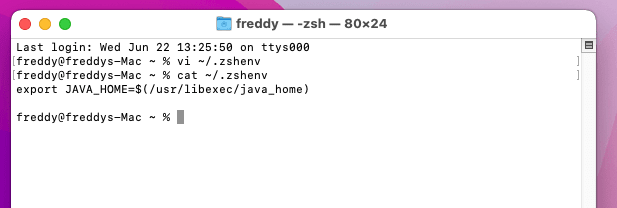
Step 5: Configure Environment Variables
To set up Environment Variables in macOS, place export JAVA_HOME=$(/usr/libexec/java_home) into the ~/.zshenv directory with the following sequence of commands.
% vi ~/.zshenv % cat ~/.zshenv export JAVA_HOME=$(/usr/libexec/java_home)Following the execution of the commands, the system takes you to the standard prompt.
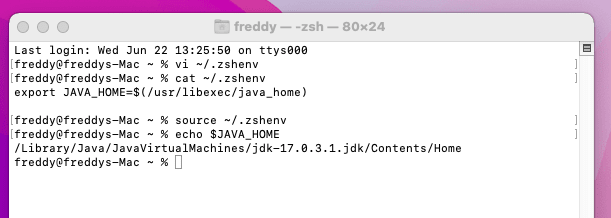
Apply the changes with the following command.
The system returns you to the prompt where you will run the next command to confirm the Environment Variable has been set. Once executed, the system returns you to the prompt, completing the installation of JavaJDK on macOS Monterey.
How to Install Java on Ubuntu 20.04
Step 1: Confirm an Existing Java Install
Ubuntu 20.04 comes with Open JDK 11 by default. Use the following command to confirm Java is already installed.
If Java is installed, the terminal outputs the version information. If not, the output states the java command is not found.
Step 2: Update Packages and Install Dependencies
This tutorial installs JavaJDK 17 on Ubuntu 20.04. Update the package index and any existing packages on the system. These commands must run with root privileges.
sudo apt update && sudo apt upgrade-yRun the following command to install the required dependencies before installing JavaJDK.
sudo apt install libc6-i386 libc6-x32 libxi6 libxtst6 -yStep 3: Download and Install the Java Package
Use the following commands to download and install the .deb package from the Oracle website. First, download the file.
sudo wget https://download.oracle.com/java/17/latest/jdk-17_linux-x64_bin.debsudo dpkg -i jdk-17_linux-x64_bin.debStep 4: Set the Java Install Location
Run the following commands to show the system where Java is installed.
sudo update-alternatives --install /usr/bin/java java /usr/lib/jvm/jdk-17/bin/java 1sudo update-alternatives --install /usr/bin/javac javac /usr/lib/jvm/jdk-17/bin/javac 1Step 5: Set Up Environment Variables
To set up the Environment Variables in Ubuntu 20.04, add JAVA_HOME=»/usr/lib/jvm/jdk-17/» to the last line in the /etc/environment file. This tutorial accomplishes this using the Vim text editor. Use the following command to open the file in the terminal.
At the prompt, press the i key and then Enter to enter insert mode in Vim. Once you have inserted JAVA_HOME=»/usr/lib/jvm/jdk-17/» into the last line of the file, use the :wq command to save and quit the file.
Apply the file changes with the source command.
To test that the Environment Variable is set correctly, use the following command.
The system returns the appropriate location if done properly.
Run the java -version command again to confirm Java is installed. The system outputs the appropriate version of Java.
java version "17.0.3.1" 2022-04-22 LTS Java(TM) SE Runtime Environment (build 17.0.3.1+2-LTS-6) Java HotSpot(TM) 64-Bit Server VM (build 17.0.3.1+2-LTS-6, mixed mode, sharing)Wrapping Up
Developers using Java tools, including JDK, JRE, and JVM, create many of the applications we use today. Knowing how to install Java on all three major platforms helps get your operating system and integrated development environment (IDE) of choice ready.
Once you are ready to host your Java application, look no further than Liquid Web. Our VPS Hosting, Cloud Dedicated Servers, and Dedicated Servers provide the perfect hosting environment for your project. Contact us today to choose the right fit.
Related Articles:
About the Author: Freddy Reese
Freddy works in the Liquid Web Managed Hosting Support team with a strong passion for all things related to Linux administration, cybersecurity, and aviation. In his free time, he likes to keep up with the latest news on topics ranging from fusion to space technologies. His hobbies include automating all kinds of stuff using Arduino/Raspberry Pi, learning and flying around in flight simulators, playing with his dog Chupko, swimming at nearby beaches, and staying physically and mentally healthy by going to the gym.

Join our mailing list to receive news, tips, strategies, and inspiration you need to grow your business
Java Downloads
JDK 20 is the latest release of Java SE Platform and JDK 17 LTS is the latest long-term support release for the Java SE platform.
JDK Development Kit 20.0.2 downloads
JDK 20 binaries are free to use in production and free to redistribute, at no cost, under the Oracle No-Fee Terms and Conditions.
JDK 20 will receive updates under these terms, until September 2023 when it will be superseded by JDK 21.
Release information
JDK Development Kit 17.0.8 downloads
JDK 17 binaries are free to use in production and free to redistribute, at no cost, under the Oracle No-Fee Terms and Conditions.
JDK 17 will receive updates under these terms, until September 2024, a year after the release of the next LTS.
Release information
GraalVM for JDK 20.0.2 downloads
GraalVM for JDK 20 binaries are free to use in production and free to redistribute, at no cost, under the GraalVM Free Terms and Conditions.
GraalVM for JDK 20 will receive updates under these terms, until September 2023 when it will be superseded by GraalVM for JDK 21.
Oracle GraalVM uses the Graal just-in-time compiler and includes the Native Image feature as optional early adopter technology.
Native Image is extensively tested and supported for use in production, but is not a conformant implementation of the Java Platform. GraalVM for JDK 20 without the Native Image feature included is available for customers at My Oracle Support.
Release information
GraalVM for JDK 17.0.8 downloads
GraalVM for JDK 17 binaries are free to use in production and free to redistribute, at no cost, under the GraalVM Free Terms and Conditions.
GraalVM for JDK 17 will receive updates under these terms, until September 2024, a year after the release of the next LTS.
Oracle GraalVM uses the Graal just-in-time compiler and includes the Native Image feature as optional early adopter technology.
Native Image is extensively tested and supported for use in production, but is not a conformant implementation of the Java Platform. GraalVM for JDK 17 without the Native Image feature included is available for customers at My Oracle Support.
Release information
Script-friendly Download URLs
The URLs listed above will remain the same for update releases to allow their use in scripts.
![]()
Protect your investment—and more
Java SE subscribers get support for JDK 17, receive updates until at least October 2029, are entitled to GraalVM Enterprise, Java Management Service, and bundled patch releases (BPRs) with fixes not yet available to nonsubscribers, and more.
Java SE subscribers have more choices
Also available for development, personal use, and to run other licensed Oracle products.
Java SE Development Kit 8u381
Java SE subscribers will receive JDK 8 updates until at least December 2030.
The Oracle JDK 8 license changed in April 2019
The Oracle Technology Network License Agreement for Oracle Java SE is substantially different from prior Oracle JDK 8 licenses. This license permits certain uses, such as personal use and development use, at no cost — but other uses authorized under prior Oracle JDK licenses may no longer be available. Please review the terms carefully before downloading and using this product. FAQs are available here.
Commercial license and support are available for a low cost with Java SE Universal Subscription.
Java SE 8u381 checksums and OL 8 GPG Keys for RPMs
JRE 8
Java SE Runtime Environment 8u381
Server JRE 8
Server JRE (Java SE Runtime Environment) 8u381
Which Java 8 package do I need?
Software developers: Java SE Development Kit (JDK) For Java developers. Includes a complete JRE plus tools for developing, debugging, and monitoring Java applications.
Running headless Linux workloads at or near your systems’ CPU or memory limits Enterprise Performance Pack brings significant memory and performance improvements including modern garbage collection algorithms, reduced memory usage and many other optimizations. Learn more
Administrators running applications on a server Server Java Runtime Environment (Server JRE). For deploying Java applications on servers. Includes tools for JVM monitoring and tools commonly required for server applications, but does not include browser integration (Java plug-in), auto-update, or an installer. Learn more
End user running Java on a desktop: Java Runtime Environment (JRE) Covers most end-users needs. Contains everything required to run Java applications on your system.