- How to create and use a HTML checkbox ?
- Base Demo
- Syntax
- Value
- Default
- If Set
- Visual / Styling
- Css
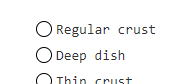
- Switch
- Button
- Keyboard Navigation
- How to
- How to change the state programmatically
- How to use a checkbox to enable or disable other Form elements
- Aria Role
- Documentation / Reference
- Html кнопка с галочкой
- Флажок
- Изучаемые технологии
- Переключатели
- Укажите пол
- Выберите технологию
- Как сделать чекбокс на HTML/CSS
- Демонстрация
- Чекбокс на HTML
- CSS для чекбокс
- Комментарии ( 0 ):
How to create and use a HTML checkbox ?
The HTML checkbox form control can only have two checked states (via its checked attribute):
If you want to get always a value for a property (ie false or true), you can:
Base Demo
This demo shows that if the checkbox is checked, the property given by the name attribute (with value property-name ) will be added to the data send by the form with the default value of on
Syntax
The syntax of a checkbox is:
checked is the optional checked attribute (default to false ) that sets the state of the checkbox (How to change it programmatically)
Value
If a checkbox is unchecked when its form is submitted, the field data is just not sent.
There is no not-checked value
Default
The default value is on and never changes.
document.querySelector("input").addEventListener("click", function()< console.log(`The checkbox is checked ? $`); console.log(`The value is $`); >); If Set
If the value attribute is set, this value will be send instead
document.querySelector("form").addEventListener("submit", function(event)< event.preventDefault(); let formData = new FormData(this); let i = 0; for (let entry of formData) < i++; console.log(`Entry $`); console.log(entry); > console.log(`Number of field sent: $`); >); Visual / Styling
Css
Switch
Button
Keyboard Navigation
You may navigate with the tab key because a input (and alos checkbox) is by default focusable. You still may change the order of navigation via the tabindex value.
the third tab will get you on the next interactive element in the iframe (ie a link) — the code is rendered in a iframe
How to
How to change the state programmatically
The checked attribute of the input checkbox element permits:
function toggleCheckBox(event) < event.preventDefault(); if (event.target.checkbox.checked)< event.target.checkbox.checked = false; event.target.button.innerHTML= "Check the checkbox"; >else < event.target.checkbox.checked = true; event.target.button.innerHTML= "Uncheck the checkbox"; >> How to use a checkbox to enable or disable other Form elements
Example of a legend with a checkbox that controls whether or not the fieldset is enabled
Aria Role
With aria role, you need to handle programmatically the state of each attribute as seen in this example 3)
[role='checkbox'][aria-checked='false']:before < content: '\00a0\00a0'; width: 14px; height: 14px; border: 1px solid hsl(0, 0%, 66%); border-radius: 0.2em; background-image: linear-gradient(to bottom, hsl(300, 3%, 93%), #fff 30%); >[role='checkbox'][aria-checked='true']:before < content: url('/_media/web/html/checkbox_checked.png'); >[role='checkbox'].focus
Sandwich Condiments Lettuce Tomato Mustard Sprouts Documentation / Reference
FormData is a web api object that represent the data of a form that should be send if the form is submited. Therefore if you have a checkbox that is not checked, formdata will not collect it. You can.
checked is an HTML attribute that indicates via its value (true or false — default to true) if the form control element is checked. It’s used: in a checkbox or radio button select optionselected.
control form elements are element that are used specifically inside a form. They are used: to specify a key and a value. to layout the form to submit or reset it field set [optional] that.
An inputinput element of a form control that permits to define a scalar value inputFull list Ref Doc The type attribute defined: the default behavior the design of the element. and the.
HTML The label html element represents a caption for a control item in a form (user interface). idfor A click on the label: will bring focus on the control element. propagates to the control.
legend is an element that represents a caption for the fieldset element. Example of a legend with a checkbox that controls whether or not the fieldset is enabled .
A radio represents a serie of mutually-exclusive choices in a form. It is an input element of type radio. A radio is round to distinguish from the square checkbox. As the checkbox, the state.
This page shows you how you can create a checkbox in React. This example is written in JSX and shows you a controlled component. The react forms components input accept a value attribute that is used.
Html кнопка с галочкой

Флажок
Флажок представляет элемент, который может находиться в двух состояниях: отмеченном и неотмеченном. Флажок создается с помощью элемента input с атрибутом type=»checkbox» :
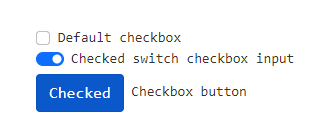
Изучаемые технологии
Атрибут checked позволяет установить флажок в отмеченное состояние.
Переключатели
Переключатели или радиокнопки похожи на флажки, они также могут находиться в отмеченном или неотмеченном состоянии. Только для переключателей можно создать одну группу, в которой одновременно можно выбрать только один переключатель. Например:
Для создания радиокнопки надо указать атрибут type=»radio» . И теперь другой атрибут name указывает не на имя элемента, а на имя группы, к которой принадлежит элемент-радиокнопка. В данном случае у нас две группы радиокнопок: gender и tech . Из каждой группы мы можем выбрать только один переключатель. Опять же чтобы отметить радиокнопку, у нее устанавливается атрибут checked :
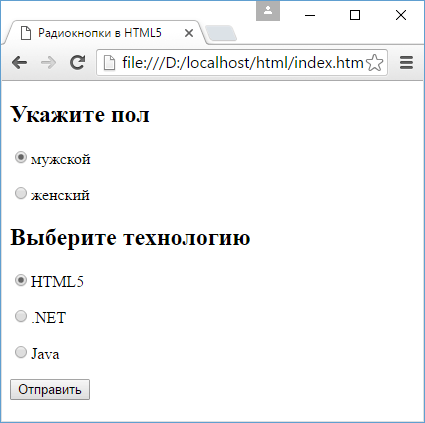
Важное значение играет атрибут value , который при отправке формы позволяет серверу определить, какой именно переключатель был отмечен:
Как сделать чекбокс на HTML/CSS
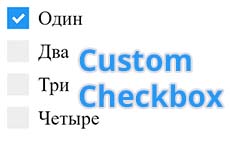
Сегодня вы узнаете как сделать чекбокс на HTML и добавить ему CSS стилей для лучшей совместимости с дизайном сайта.
Демонстрация
Чекбокс на HTML
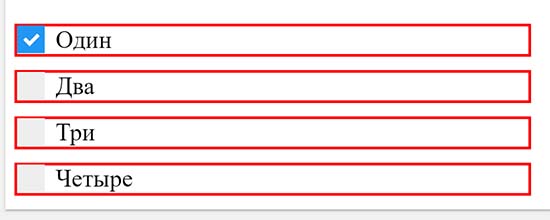
Создадим блок с четырьмя чекбоксами, первый будет отмечен – с галочкой. Каждый чекбокс будет заключен в тег label, внутри которого поле для ввода, текст и элемент span, который предстоит стилизовать.

Тег label служит контейнером для каждого чекбокса, для наглядности я временно задал красную рамку тегу label. Когда мало опыта, это хороший способ, увидеть границы любого тега, чтобы не действовать вслепую.
CSS для чекбокс
Строчный тег label, заменим на блочный (display: block), чтобы чекбоксы, встали друг под другом, user-select: none – запрещает пользователю выделять элемент.
.container display: block;
user-select: none;
>
Этот код прячет дефолтные браузерные стили для чекбокса. Мы делаем элемент полностью прозрачным за счет opacity, width и height с нулевым значением и на их месте, задаем кастомные стили для чекбокса.
.container input opacity: 0;
height: 0;
width: 0;
>
Создаем кастомные чекбоксы. Меняем размеры и цвет фона.
.checkmark height: 23px;
width: 22px;
background-color: #eec321;
>
При наведении курсора, делаем цвет фона немного темнее.
.container:hover input ~ .checkmark background-color: #ccc678;
>
Для отмеченного чекбокса, задаем другой цвет для фона.
.container input:checked ~ .checkmark background-color: #2196f3;
>
Прячем галочку для не отмеченных чекбоксов, применив псевдоэлемент after.
.checkmark:after content: «»;
position: absolute;
display: none;
>
Делаем видимой галочку, только для отмеченных чекбоксов.
.container input:checked ~ .checkmark:after display: block;
>
Рисуем и стилизуем галочку. Галочку мы рисуем на чистом CSS. Изобразим прямоугольник с белой рамкой, у двух сторон прямоугольника, рамки нет (нулевая ширина), получается прямоугольный угол, мы его поворачиваем на 45 градусов и получается галочка.
.container .checkmark:after left: 8px;
top: 6px;
width: 6px;
height: 11px;
border: solid #fff;
border-width: 0 2px 2px 0;
transform: rotate(45deg);
>
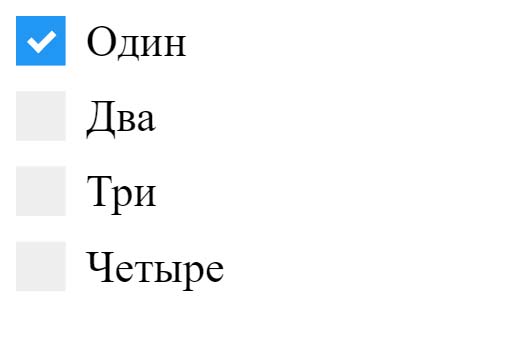
Посмотреть код целиком можно на Codepen

![]()
Создано 19.11.2018 10:19:41
Копирование материалов разрешается только с указанием автора (Михаил Русаков) и индексируемой прямой ссылкой на сайт (http://myrusakov.ru)!
Добавляйтесь ко мне в друзья ВКонтакте: http://vk.com/myrusakov.
Если Вы хотите дать оценку мне и моей работе, то напишите её в моей группе: http://vk.com/rusakovmy.
Если Вы не хотите пропустить новые материалы на сайте,
то Вы можете подписаться на обновления: Подписаться на обновления
Если у Вас остались какие-либо вопросы, либо у Вас есть желание высказаться по поводу этой статьи, то Вы можете оставить свой комментарий внизу страницы.
Порекомендуйте эту статью друзьям:
Если Вам понравился сайт, то разместите ссылку на него (у себя на сайте, на форуме, в контакте):
- Кнопка:
Она выглядит вот так: - Текстовая ссылка:
Она выглядит вот так: Как создать свой сайт - BB-код ссылки для форумов (например, можете поставить её в подписи):
Комментарии ( 0 ):
Для добавления комментариев надо войти в систему.
Если Вы ещё не зарегистрированы на сайте, то сначала зарегистрируйтесь.
Copyright © 2010-2023 Русаков Михаил Юрьевич. Все права защищены.