- How to Install Java on Arch Linux
- Step 1: Check If Java is Installed
- Step 2: Install JRE in Arch Linux
- Step 3: Install JDK in Arch Linux
- How to Check Java Version Installed on Linux
- Method 1: Check the Java Version On Linux
- Method 2: Find Version by Checking Path Where Java is Installed
- Method 3: Search for Java in the Installed Packages List
- Verify JAVA Installation on Ubuntu and Check the Installed version (if any)
- Method 1: Checking the Java version
- Method 2: By checking the path where Java is installed
- Method3: Search for Java in the Installed Packages list
- How to Check and Update Java Version on Ubuntu 22.04?
- How to check Java version on Ubuntu 22.04
- How to Update Java version on Ubuntu 22.04
- Conclusion
- About the author
- Anees Asghar
How to Install Java on Arch Linux
Java is undoubtedly one of the most popular programming languages ever to grace the face of the planet, powering millions of applications both on Linux and Windows platforms.
Java comprises of JRE (Java Runtime Environment) and JDK (Java Development Toolkit). JRE is a set of software applications that help in the deployment of Java applications. JDK is a development environment necessary for the building and compilation of Java applications.
In this tutorial, we are going to take you through a step by step of how you can install Java on Arch Linux.
Step 1: Check If Java is Installed
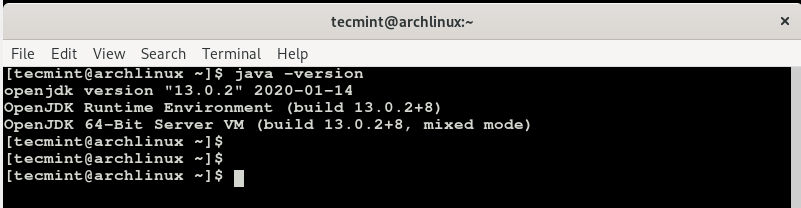
To begin with, let’s check if Java is installed in the Arch Linux using the following command.
$ java -version OR $ which java
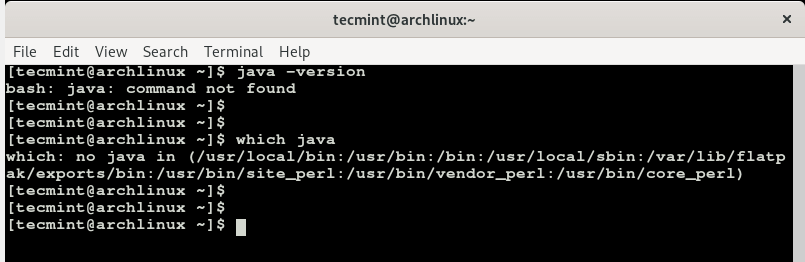
From the output above, it evident that Java is missing. Let’s now proceed and install both JRE and JDK which both constitute JAVA.
Step 2: Install JRE in Arch Linux
To install JRE (Java Runtime Environment), a first search which versions are available for download using the command.
$ sudo pacman -sS java | grep jre
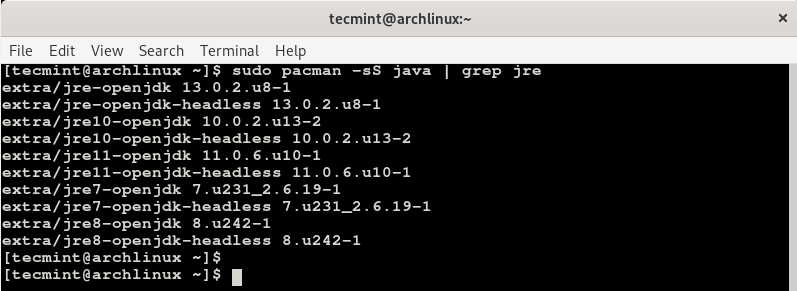
To install the latest version of JRE, run the command.

Press Y and hit ENTER to proceed with the installation of JRE and other dependencies.
Step 3: Install JDK in Arch Linux
With JRE installed, we can proceed to install JDK on our Arch Linux system. Once again, let’s search for the versions of JDK that are available for download.
$ sudo pacman -sS java | grep jdk
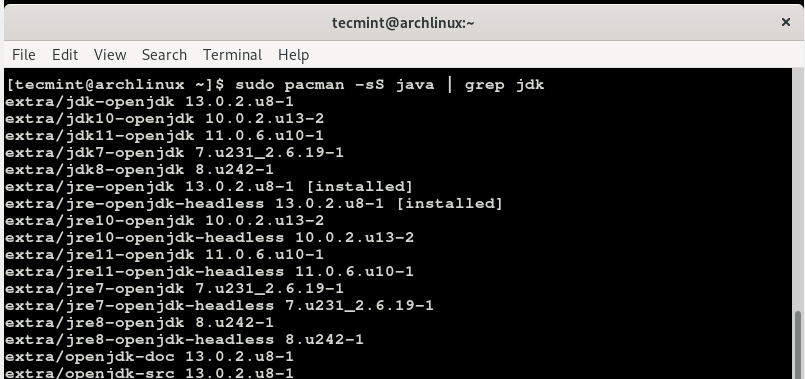
The first option is usually the latest version, so to install the latest JDK, run the command.
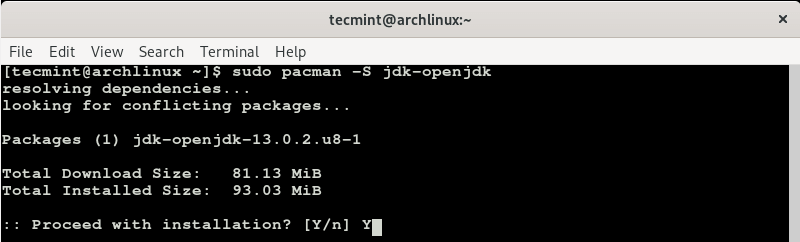
As shown before, press Y when prompted and hit ENTER to continue with the installation process. This will take a bit more of your time, so some patience will do.
At this point, we have successfully installed JAVA on our Arch Linux system.
To verify that JAVA has indeed been installed, run.

Conclusion
In this article, we demonstrated how you can install Java on Arch Linux. You can now proceed and install applications such as Apache Tomcat, Maven, Jenkins, and Gradle.
How to Check Java Version Installed on Linux
How do I check my current Java version? There are several ways to check if Java is installed and which version is running on your system.
In this tutorial, learn how to check the Java version installed on Linux distros, including Ubuntu, CentOS, and Debian.
- A user account with sudo privileges
- Access to the command-line/terminal window
- A version of Java
Method 1: Check the Java Version On Linux
To check the Java version on Linux Ubuntu/Debian/CentOS:
2. Run the following command:
3. The output should display the version of the Java package installed on your system. In the example below, OpenJDK version 11 is installed.

Note: If the output indicates there is no such package on the system, you can install it with the help of one of our guides – How to install Java on Ubuntu or How to Install Java on CentOS.
You can also check the version of the primary Java compiler – javac (pronounced “java-see”) with the command:
![]()
Method 2: Find Version by Checking Path Where Java is Installed
There are two ways to find the path of the Java directory.
The first option includes running a single command:
update-alternatives --list javaThe system should respond with the path where Java is installed.
![]()
Note: This option may not work on CentOS systems. If you have issues finding the path of the Java directory with the command above, use the alternative outlined below.
Alternatively, you can use the whereis command and follow the symbolic links to find the Java path.
![]()
The output tells you that Java is located in /usr/bin/java.
2. List the content of the /usr/bin/java directory:
![]()
Inspecting the directory shows that /usr/bin/java is only a symbolic link for /etc/alternatives/java.
3. Just like in the previous step, list the content of the provided path by running:

Finally, the output displays /etc/alternatives/java is another symbolic link and that the real path of the Java directory is /usr/lib/jvm/java-11-openjdk-amd64/bin/java.
Method 3: Search for Java in the Installed Packages List
You can also prompt the system to list installed packages and search for Java, with its version number.
Find Java by listing all installed packages.
1. To generate a list of all installed packages, use the command:
2. Scroll up/down until you find the Java packages as shown in this example.
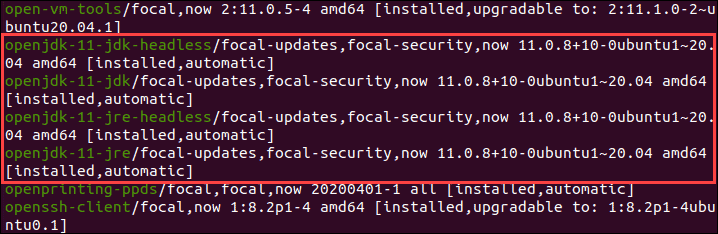
To avoid searching through all installed packages, list Java packages only. Prompt the system to list a specific software package. In this case, the package name is openjdk:
sudo apt list --installed | grep -i openjdk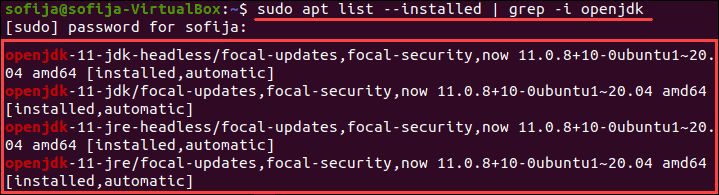
Note: CentOS users need to modify the commands for listing installed packages for their package manager. Use the commands: sudo yum list installed and sudo yum list installed | grep -i openjdk instead.
With this article, you have successfully checked the Java version installed on Linux. We also covered checking the Java path and searching for Java among the installed packages.
Once the Java version is confirmed, you can start developing anything from lightweight mobile to desktop applications.
Verify JAVA Installation on Ubuntu and Check the Installed version (if any)

Certain applications in Ubuntu require that Java Runtime Library is installed on your system. It does not come by default with most Ubuntu versions, as security is a concern when Java is installed on your system. Time and again, a regular Ubuntu user might need to verify if Java is installed on the system at the moment and also if it is installed, which version the system is currently using.
This article describes how you can quickly check your installed Java version on your Ubuntu system. We have tested the commands and procedures mentioned in this article on Ubuntu versions between 18.04 and 22.04.
We will use the Ubuntu command line, the Terminal, to run all the mentioned commands. You can open the Terminal application through Ubuntu Dash or the Ctrl+Alt+T shortcut.
Method 1: Checking the Java version
Once you have opened the Terminal, enter one of the following Java commands to check its version:
This will ensure whether Java Runtime Environment is already installed on your system. If yes, it will also let you know which version of Java you have on your system.
In my case, the output shows that I do not have Java currently installed on my system yet.

If you have any version of Java installed on your system, the output will display Java OpenJDK and JRE version information as follows:

Method 2: By checking the path where Java is installed
Enter the following command to check the directory in which Java is installed:
This command will print no output if Java is not installed on your system:

However, if Java is installed on your system, this command will show the exact path where Java is installed:
![]()
Method3: Search for Java in the Installed Packages list
You can check if a software package is installed on your system by using the following command syntax:
$ sudo aptitude search PackageName
We can use this command to see if any JDK package is installed on our system or not:
This command will list all the JDK packages available in the Ubuntu repositories.
Please note the prefix with each entry.
Only the packages with the ‘i’ prefix are installed on your system.

In the above output, you can see that Java OpenJDK 11 JRE is installed on my system. Java is not installed on your system if you do not see the ‘i’ prefix with any of the JDK entries. A more in-depth guide on finding installed packages can be found here.
Through these simple ways, you can verify whether Java is installed on your system. You can also view which Java installation you have on your system if it is indeed installed.
How to Check and Update Java Version on Ubuntu 22.04?
![]()
Java is a general-purpose client-side programming language that serves several functionalities like android application development, game development, web applications development, and many other software products. To build any application, first, we have to install Java on our computer systems. However, some applications are not capable to run on java’s outdated version. So, it’s essential to know which Java version is installed on our operating system and if our machine is running an outdated version of java, then how to update it.
This post will explain how to check and upgrade the Java version on Ubuntu 22.04. So, let’s begin!
How to check Java version on Ubuntu 22.04
Open the terminal on your ubuntu 22.04 operating system and type the below-mentioned command to check which Java version is installed on your machine:
Once you typed the above-given command on the terminal, it will produce the following outcome:
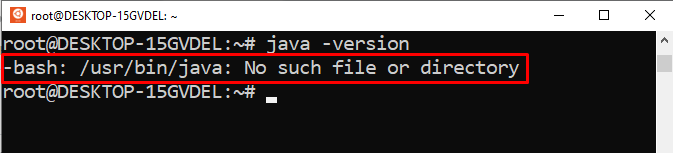
The above snippet shows that Java is not installed on our machine. Now, let’s move one step further to learn how to install/upgrade the Java version on Ubuntu 22.04.
How to Update Java version on Ubuntu 22.04
To update the java version or to install the latest java version, firstly you have to upgrade the apt repository. To do so, type the below-given command on the terminal:
Next, run the below-enlisted command to install the default Java Runtime Environment(JRE) on your operating system:
When you execute the above-given command, it will work like this:
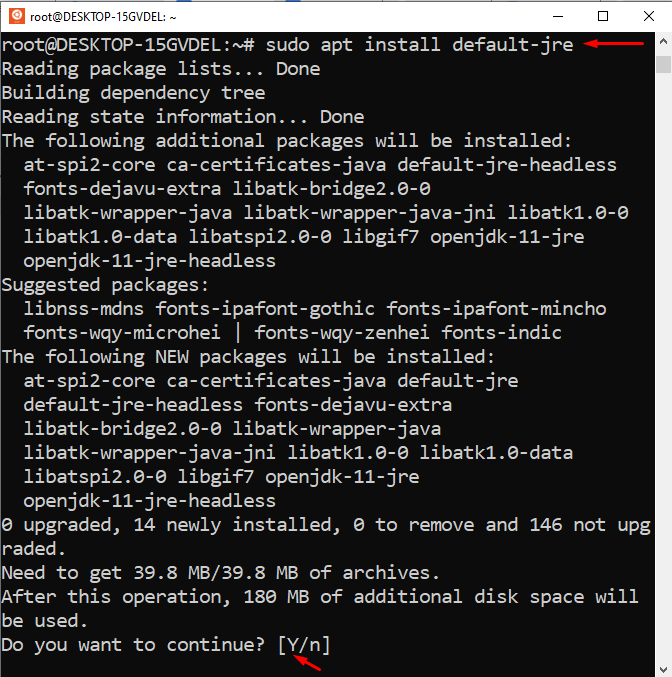
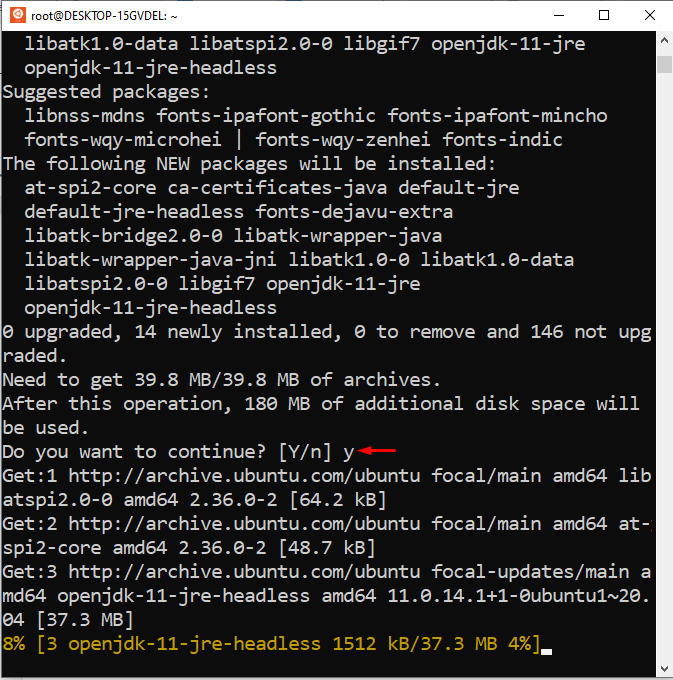
Type “Y” to continue the installation process:
The whole installation process will take a few minutes to install JRE on your system. You can verify the JRE’s installation by typing the following command:
If JRE is successfully installed on your Ubuntu 22.04, then you will witness the result something like this:
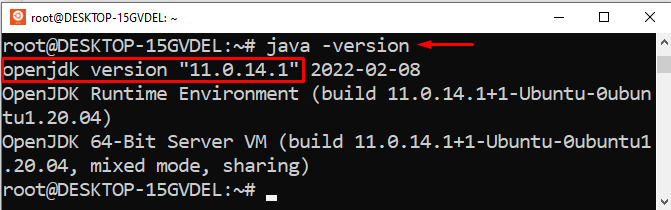
Congratulations! You have successfully installed the latest and updated version of Java on Ubuntu 22.04.
As the JRE’s installation is done, now you can run almost every java software on your machine. However, some java-oriented software may require the Java Development Kit(JDK) to compile/run some particular tasks. In such cases, you can install the JDK by typing the below-given command:
The above-given command will work something like this:
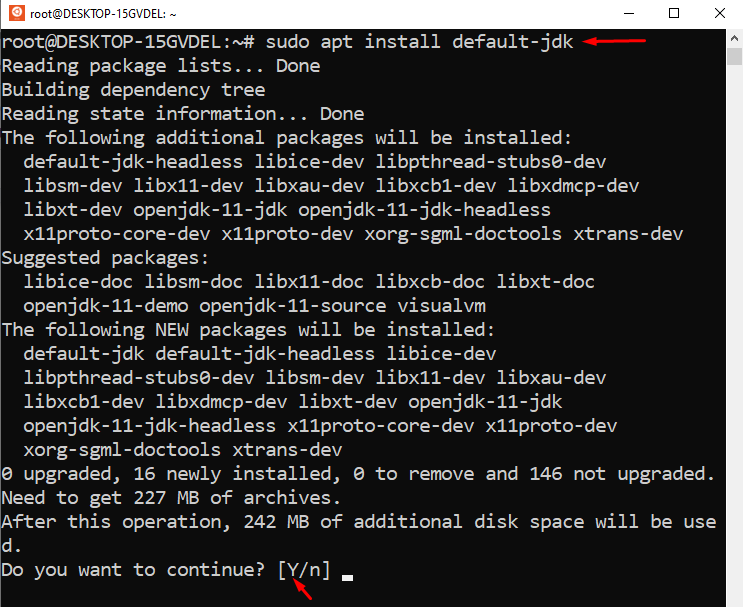
Type “Y” to continue the JDK’s installation process:
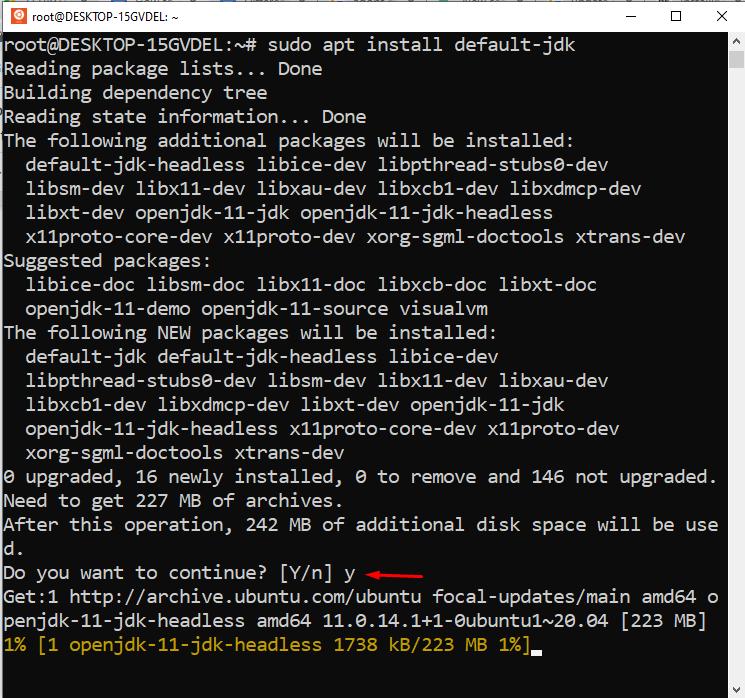
Type the below-given command on the terminal of ubuntu 22.04 to verify whether the updated JDK is installed on your machine or not:
You will witness the below-given output:

Congrats! You are running an updated Java version on your ubuntu 22.04.
Conclusion
Open the terminal and type “sudo apt install default-jre” to install JRE, and type “sudo apt install default-jdk” to install JDK on ubuntu 22.04. To check or verify the java version type “java -version” on the terminal of Ubuntu 22.04. This write-up provided a step-by-step guide on how to check, update, and verify the java version on ubuntu 22.04.
About the author
Anees Asghar
I am a self-motivated IT professional having more than one year of industry experience in technical writing. I am passionate about writing on the topics related to web development.