Передача данных при навигации
Реализация передачи данных между фрагментами
Переход с одного фрагмента на другой осуществляется средствами Navigation Component.
Отправка данных между фрагментами происходит во время перехода по графу навигации, например, с помощью метода navigate .
public void navigate(@IdRes int resId, @Nullable Bundle args) Разберем всю цепочку на примере перехода между двумя фрагментами, для активити принцип будет такой же.
Допустим, мы хотим перейти с FirstFragment на SecondFragment и передать userId . Поскольку Bundle — это key-value хранилище, нам нужен секретный ключ для userId , который бы знал только фрагмент-получатель ( SecondFragment ), но сохранить по этому ключу userId мог и фрагмент-отправитель ( FirstFragment ).
Для этого создадим companion object в SecondFragment
companion object private const val USER_ID_KEY = "userIdKey" fun createArguments(userIdKey: String): Bundle return bundleOf(USER_ID_KEY to userIdKey) > > Когда нужно будет перейти c FirstFragment на SecondFragment вызовем следующий метод:
fun routeToSecondFragment(userIdKey: String) findNavController().navigate( R.id.action_firstFragment_to_secondFragment, SecondFragment.createArguments(userIdKey = editText.text.toString()) ) > Получать данные из аргументов SecondFragment будет так:
private val userId: String get() = requireArguments().getString(USER_ID_KEY).let В случае отсутствии аргумента на инициализации фрагмента, произойдет ошибка: E/AndroidRuntime: FATAL EXCEPTION: main Process: com.example.testsharingdata, PID: 26781 java.lang.IllegalArgumentException: Required value was null.
Также, можно добавить сообщение, которое отобразится при ошибке:
private val userId: String get() = requireArguments().getString(USER_ID_KEY).let < requireNotNull(it) < "argument $USER_ID_KEY should be not null" >> В случае ошибки, увидим сообщение: E/AndroidRuntime: FATAL EXCEPTION: main Process: com.example.testsharingdata, PID: 26906 java.lang.IllegalArgumentException: argument userIdKey should be not null
Передача данных между активити
Для перехода между активити и отправки данных используется объект Intent.
Переходить будем с MainActivity на SecondActivity , будем также передавать userId
В SecondActivity создадим companion object :
companion object private const val USER_ID_KEY = "user id key" fun createIntent(context: Context, userId: String): Intent val intent = Intent(context, SecondActivity::class.java) intent.putExtra(USER_ID_KEY, userId) return intent > > Когда решим переходить на другую активити, вызовем метод
private fun routeToSecondActivity(userId: String) val intent = SecondActivity.createIntent(context = requireContext(), userId) startActivity(intent) > Получение аргументов на активити:
private val userId: String get() = requireNotNull(intent.getStringExtra(USER_ID_KEY)) Какие данные можно передавать?
Если данные, которые необходимы экрану, можно получить от какого-либо источника данных (база данных, сервер и пр.), то следует передавать идентификатор этих данных. Для использования такого подхода — передавать идентификатор данных, необходимо следующее требование к источнику данных: для каждого экрана приложения источник обязательно должен уметь получать все необходимые данные даже после полного пересоздания приложения.
Однако, бывают ситуации, когда какие-то простые данные уже появились, но их еще рано сохранять в базу данных или отправлять на сервер. В таком случае стоит передавать сами данные, потому что другой возможности получить их у нас не будет.
Например: текстовое поле на экране A , текст из которого отобразится в форме-заполнения на экране B . В этом случае нам нужно поддерживать следующее поведение:
- если приложение будет закрыто непосредственно юзером, то данные должны пропасть при следующем открытии экрана A
- если приложение закроется самостоятельно, например, из-за ошибки или отсутствия свободной памяти на устройстве, то введенные в поле данные пропасть не должны
Достигается такое поведение благодаря методам onSaveInstanceState и onRestoreInstanceState
Разберем ещё один пример: допустим, мы открыли экран — список книг. Загрузили все ссылки на книги из списка в оперативную память, хотим перейти на чтение конкретной — передали id этой книги при переходе на экран чтения. Внезапно, что-то пошло не так и наше приложение крашнулось. Приложение открывается заново, на детальном просмотре интересующей нас книги. Id нужной книги лежит у нас в аргументах, но в оперативной памяти нет никаких ссылок на книги, потому что это сохранение происходило на предыдущем экране. Об этом стоит помнить и учитывать это при проектировании репозитория. Данные можно хранить в оперативной памяти, однако нужно еще обрабатывать ситуации, когда этих данных там не будет — либо обращаться к серверу и получать то, что нас интересует, либо сохранять данные в локальную базу данных и работать уже с ней, а не оперативной памятью.
Таким образом, передача только идентификаторов и простых данных позволит вам:
- не поддерживать Parcelable у передаваемых данных
- не бояться превышения объема хранилища Bundle. При пересоздании фрагмента/активити переданные аргументы сохраняются в Bundle , но он вмещает всего 1 МБ данных и содержит не только наши данные, но и системные. При превышении объема хранилища произойдет ошибка TransactionTooLargeException
Выводы
Используя подход передачи идентификаторов данных и группировка всей логики передачи в получателе позволяет:
- не усложнять модели данных поддержкой Parcellable
- не вылезем за пределы размера Bundle
- скрыть детали перехода на экран от других классов
- избавиться от дублирования. Теперь, для перехода на фрагмент/активити со значениями не нужно самостоятельно создавать объект Bundle и заполнять его
- строгое API. Перейти на фрагмент/активити и передать туда данные, не используя дублирование и прочие костыли, можно только используя специальную функцию из компаньон объекта
[Tutorial ]Android Kotlin How To Pass Data Between Fragments
In this tutorial, I’m, going to write about how you can send data between one fragment to another in an easy and efficient way, by the end of this tutorial you will learn to pass data from fragment A to fragment B. If you wanted to learn how to pass data between activities read here: Android Kotlin Tutorial On How to Pass Data Between Activities So let’s get started, before we get into the tutorial make sure you know all the basics like how to create a fragment in android studio, for that you can refer the below tutorial
So, now that you have learned how to create a fragment, you might as well create more than one in some occasion for your requirement in a way that they both are connected also you might want to send data from one fragment to another, and the good example for that type of scenario is product and details page, let’s say you have a list of product and once you click on one product you might want to move to another page to show the details of the selected product, you can do it with Activities though but it is a good practice to use fragments in such scenarios as they both are under the same category.
This tutorial is based on the above scenario only, but it can cover most of the things you need to know, so make sure you have already read us how to create a fragment with the kotlin tutorial. That rests the case now lest start sharing data between fragment. After Creating two fragments, Name it as ProductListFragment and ProductDetailFragment, also another Tip: Name the file with a suffix of their content like Fragment, Activity, or Adapter, so that you’ll have an easy way to search and maintain the file.
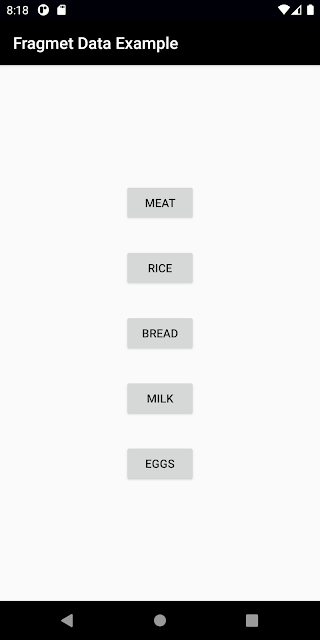
Open ProductListFragment and add the list of products of your choice, for now, I have chosen the day to day things from our kitchen, you know just being informative
Above is the code to add five buttons, but I’m not gonna recommend doing this, it is for this quick tutorial because we can use recyclerview instead of this types of hardcoding five buttons, let’s say you have a new requirement to add two more product then its a lot of work so Use recyclerview. Although my favorite is Constraint layout I have used LinearLayout here because its easy to do these kinds of view, so always know your requirement before choosing the layout of your choice, every layout has its own advantages.
So After creating no. of buttons we can add some data that we want to pass on to the second fragment in our case it is the product detail page fragment. For this, I would recommend using the string resource file because it comes in handy if you want to translate your application. Add a bunch of strings or you can use one that’s provided in the sample code of this post.
Now let’s go from the basic, so what we have so far is two fragments one with buttons and the second fragment with a simple text view to show a Heading and Description of the selected button, more like a details page
How to switch between fragments in Android:
This part actually I have covered in one of my previous tutorial where also I have shared the sample code, also to not get confused I’m using the same pattern here, with that I have also covered the basics of back stack handling when adding multiple fragments there
Now in our hand, we have two fragments, A) ProductFragment B) ProductDetailsFragment, we want to share data from A to B, so A being the source and B being the destination, we start from our destination. What we are going to do is that we send the data to the fragment before calling the onCreate of the fragment. So this is where the companion object comes in handy. You can learn more about companion objects here: Companion Objects in Kotlin. They help you to create Java equivalent static methods, those methods must be annotated with @JvmStatic. To create a static method in your destination fragment returning the instance of the same fragment itself like below
What the above method does is it will return a new instance of the ProductDetailFragment, In here we are going to pass the arguments that we required in the destination fragment from source fragment, In our case, it is heading and description, and once we supply those data as an argument to the function newInstance like this newInstance(heading: String, description: String) we might as well put those data into the fragments arguments, An argument to this fragment is a Bundle that is passed on to the fragment before it’s been created, which is before the onCreate method and the data will stay still in the argument until onDestroy is begin called. So we will pass those data as Bundle into those fragments as arguments like below
In the above code we used the apply scope function in kotlin to make the code a bit easier, so what it does is as mentioned above we are passing the data heading and description as Bundle to the fragments argument, Bundle is what we are using to pass data between fragment so the Bundle extends BaseBundle which has the function putString which accepts two parameters key and value, so the first one being the key and second is value. So now that we have passed the values to the fragment now we can instance it and pass the data. This Bundle allows you to send more than just string like you can send int, double, some examples were, putInt(key, value) and putDouble(key, value). Along with this, you can also send arrays for that you have to be more specific like IntArray, StringArray you can refer this android developers API reference for more details: Android Bundle
So we have five buttons, we need to set click listener onto every single one of them, (again Pro Tip: use RecyclerView. tutorial we will cover later) you can use our previous tutorial on how to add a click listener to a button in android here. So once you have added the click listener to the fragment, we can now use the fragment transaction to move from source to destination