- Teams Search Auth Config
- Included Features
- Interaction with app
- Try it yourself — experience the App in your Microsoft Teams client
- Prerequisites
- Setup
- Running the sample
- Deploy the bot to Azure
- Further reading
- Teams Auth Bot
- Included Features
- Interaction with app
- Try it yourself — experience the App in your Microsoft Teams client
- Prerequisites
- Setup
- Running the sample
- Deploy the bot to Azure
- Further reading
- pymsteams
- Installation
- Usage
- Creating ConnectorCard Messages
- Optional Formatting Methods for Cards
- Add a title
- Troubleshooting HTTP response
- Exceptions
- Testing
- Certificate Validation
Teams Search Auth Config
Messaging Extensions are a special kind of Microsoft Teams application that is support by the Bot Framework v4.
There are two basic types of Messaging Extension in Teams: Search-based and Action-based. This sample is built on sample 50.teams-messaging-extension-search, and illustrates how to build a Search-based Messaging Extension with a configuration page, as well as how to sign in from a search Messaging Extension.
Included Features
Interaction with app
Try it yourself — experience the App in your Microsoft Teams client
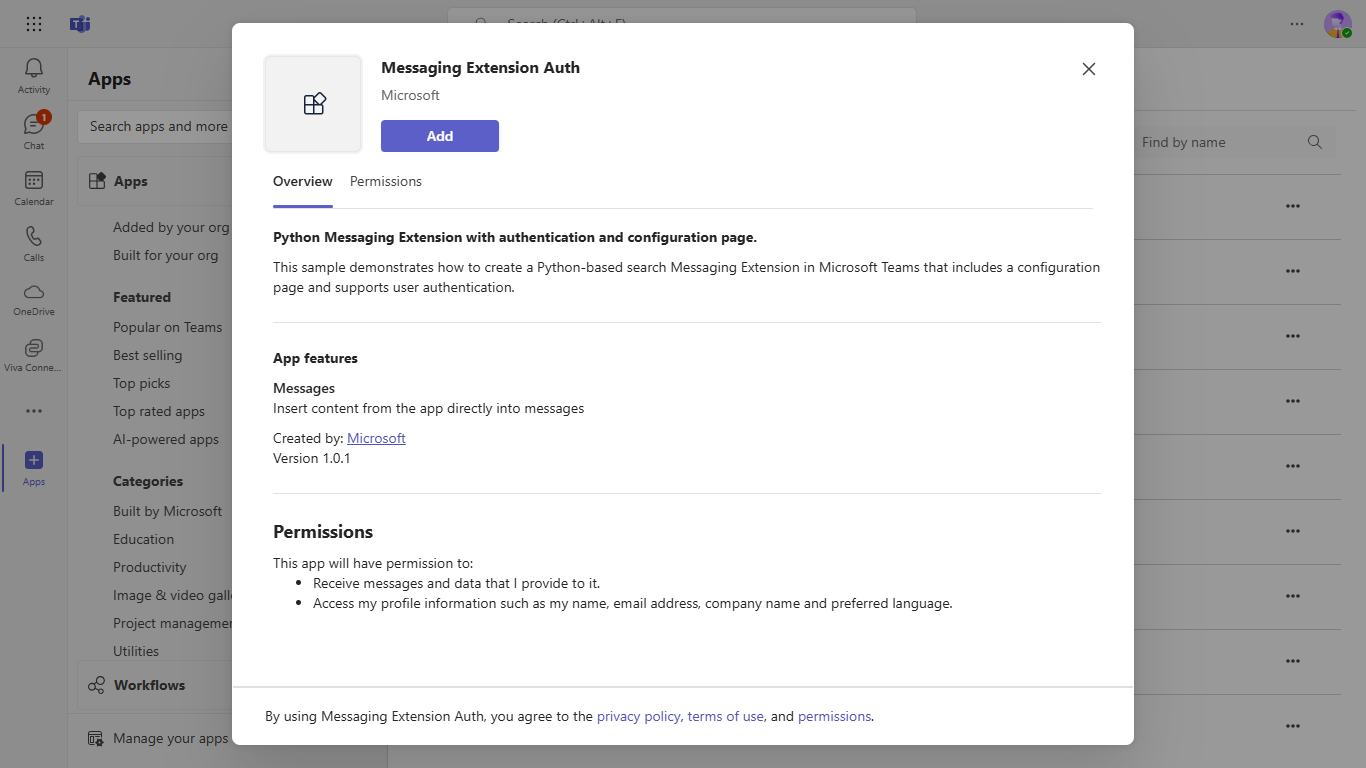
Please find below demo manifest which is deployed on Microsoft Azure and you can try it yourself by uploading the app package (.zip file link below) to your teams and/or as a personal app. (Sideloading must be enabled for your tenant, see steps here).
Messaging Extension Auth: Manifest
Prerequisites
- Microsoft Teams is installed and you have an account
- Python SDK version 3.7
- ngrok or equivalent tunnelling solution
Setup
Note these instructions are for running the sample on your local machine, the tunnelling solution is required because the Teams service needs to call into the bot.
- Register a new application in the Azure Active Directory – App Registrations portal.
- Create Bot Framework registration resource in Azure
- Use the current https URL you were given by running ngrok. Append with the path /api/messages used by this sample
- Ensure that you’ve enabled the Teams Channel
- If you don’t have an Azure account you can use this Bot Framework registration
- Add an AAD OAuth Connection Setting to the bot. Add authentication to your bot The name of this connection setting will be added to config.py as CONNECTION_NAME.
- Run ngrok — point to port 3978
ngrok http 3978 --host-header="localhost:3978" git clone https://github.com/OfficeDev/Microsoft-Teams-Samples.git - In a terminal, go to Microsoft-Teams-Samples\samples\msgext-search-auth-config\python folder
- Update the config.py configuration for the bot to use the Microsoft App Id and App Password from the Bot Framework registration. (Note the App Password is referred to as the «client secret» in the azure portal and you can always create a new client secret anytime.) Also add the OAuth Connection Setting name to config.py as CONNECTION_NAME and the ngrok endpoint url as SITE_URL.
- Setup Manifest for Teams
- This step is specific to Teams.
- Edit the manifest.json contained in the ./teams_app_manifest folder to replace your Microsoft App Id (that was created when you registered your app registration earlier) everywhere you see the place holder string > (depending on the scenario the Microsoft App Id may occur multiple times in the manifest.json )
- Edit the manifest.json for validDomains and replace > with base Url of your domain. E.g. if you are using ngrok it would be https://1234.ngrok-free.app then your domain-name will be 1234.ngrok-free.app .
- Zip up the contents of the teams_app_manifest folder to create a manifest.zip (Make sure that zip file does not contains any subfolder otherwise you will get error while uploading your .zip package)
- Go to Microsoft Teams. From the lower left corner, select Apps
- From the lower left corner, choose Upload a custom App
- Go to your project directory, the ./teams_app_manifest folder, select the zip folder, and choose Open.
- Select Add in the pop-up dialog box. Your app is uploaded to Teams.
Note this manifest.json specified that the feature will be available from both the compose , message and commandBox areas of Teams. Please refer to Teams documentation for more details.
Running the sample
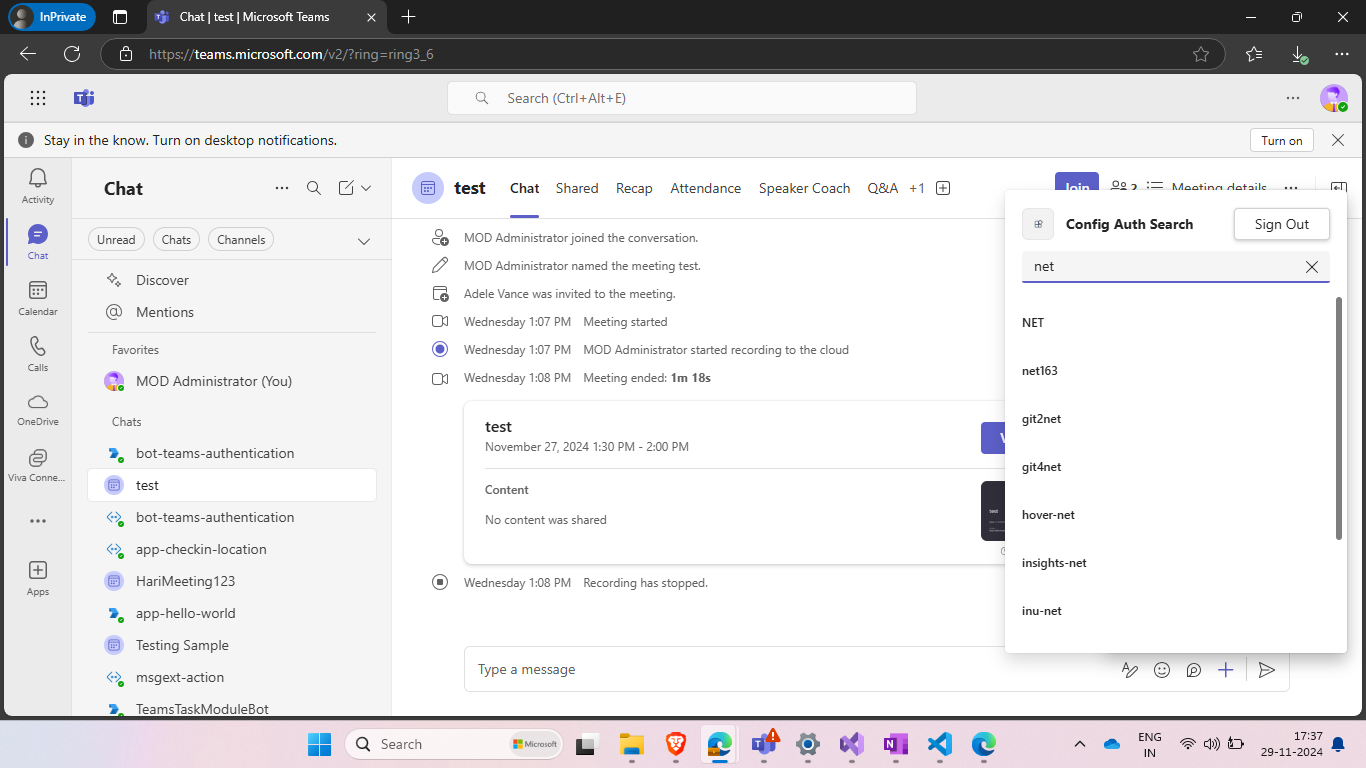
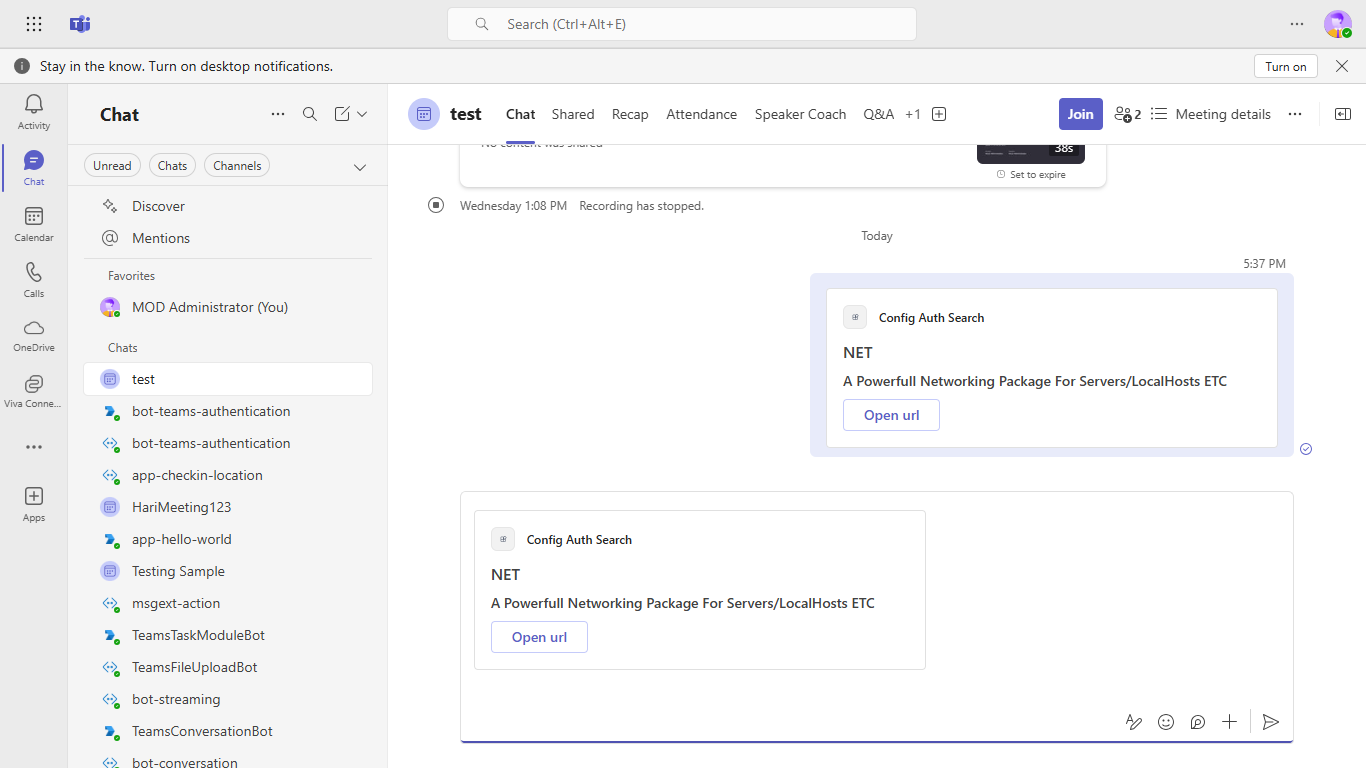
Once the Messaging Extension is installed, click the icon for Config Auth Search in the Compose Box’s Messaging Extension menu to display the search window. Right click to choose Settings and view the Config page. The default search is Pypi, and can be changed to Email from the Config page.

Adding bot UI:
Deploy the bot to Azure
To learn more about deploying a bot to Azure, see Deploy your bot to Azure for a complete list of deployment instructions.
Further reading
Teams Auth Bot
This bot has been created using Bot Framework, it shows how to get started with authentication in a bot for Microsoft Teams.
The focus of this sample is how to use the Bot Framework support for oauth in your bot. Teams behaves slightly differently than other channels in this regard. Specifically an Invoke Activity is sent to the bot rather than the Event Activity used by other channels. This Invoke Activity must be forwarded to the dialog if the OAuthPrompt is being used. This is done by subclassing the ActivityHandler and this sample includes a reusable TeamsActivityHandler. This class is a candidate for future inclusion in the Bot Framework SDK.
The sample uses the bot authentication capabilities in Azure Bot Service, providing features to make it easier to develop a bot that authenticates users to various identity providers such as Azure AD (Azure Active Directory), GitHub, Uber, etc. The OAuth token is then used to make basic Microsoft Graph queries.
IMPORTANT: The manifest file in this app adds «token.botframework.com» to the list of validDomains . This must be included in any bot that uses the Bot Framework OAuth flow.
Included Features
Interaction with app
Try it yourself — experience the App in your Microsoft Teams client
Please find below demo manifest which is deployed on Microsoft Azure and you can try it yourself by uploading the app package (.zip file link below) to your teams and/or as a personal app. (Sideloading must be enabled for your tenant, see steps here).
Teams Auth Bot: Manifest
Prerequisites
- Microsoft Teams is installed and you have an account (not a guest account)
- ngrok or equivalent tunnelling solution
Setup
Note these instructions are for running the sample on your local machine, the tunnelling solution is required because the Teams service needs to call into the bot.
- Register a new application in the Azure Active Directory – App Registrations portal.
- Setup for Bot Create Bot Framework registration resource in Azure
- Use the current https URL you were given by running ngrok. Append with the path /api/messages used by this sample
- Ensure that you’ve enabled the Teams Channel
- If you don’t have an Azure account you can use this Bot Framework registration
NOTE: When you create your app registration, you will create an App ID and App password — make sure you keep these for later.
# ngrok http 3978 --host-header="localhost:3978"git clone https://github.com/OfficeDev/Microsoft-Teams-Samples.gitngrok http 3978 --host-header="localhost:3978"- Setup Manifest for Teams
- This step is specific to Teams.
- Edit the manifest.json contained in the ./teams_app_manifest folder to replace your Microsoft App Id (that was created when you registered your app registration earlier) everywhere you see the place holder string > (depending on the scenario the Microsoft App Id may occur multiple times in the manifest.json )
- Edit the manifest.json for validDomains and replace > with base Url of your domain. E.g. if you are using ngrok it would be https://1234.ngrok-free.app then your domain-name will be 1234.ngrok-free.app .
- Zip up the contents of the teams_app_manifest folder to create a manifest.zip (Make sure that zip file does not contains any subfolder otherwise you will get error while uploading your .zip package)
- Go to Microsoft Teams. From the lower left corner, select Apps
- From the lower left corner, choose Upload a custom App
- Go to your project directory, the ./teams_app_manifest folder, select the zip folder, and choose Open.
- Select Add in the pop-up dialog box. Your app is uploaded to Teams.
Note this manifest.json specified that the bot will be installed in a «personal» scope only. Please refer to Teams documentation for more details.
Running the sample
You can interact with this bot by sending it a message. The bot will respond by requesting you to login to AAD, then making a call to the Graph API on your behalf and returning the results.
Deploy the bot to Azure
To learn more about deploying a bot to Azure, see Deploy your bot to Azure for a complete list of deployment instructions.
Further reading
pymsteams
Python Wrapper Library to send requests to Microsoft Teams Webhooks. Microsoft refers to these messages as Connector Cards. A message can be sent with only the main Connector Card, or additional sections can be included into the message.
This library uses Webhook Connectors for Microsoft Teams. Please visit the following Microsoft Documentation link for instructions on how to obtain the correct url for your Channel: https://dev.outlook.com/Connectors/GetStarted#creating-messages-through-office-365-connectors-in-microsoft-teams
Please refer to the Microsoft Documentation for the most up to date screenshots. https://dev.outlook.com/connectors/reference
Installation
Install with async capabilities (python 3.6+):
At time of writing, the latest release supported by Python 2 is Version 0.1.16
Usage
Creating ConnectorCard Messages
This is the simplest implementation of pymsteams. It will send a message to the teams webhook url with plain text in the message.
" Please visit the python asyncio documentation for more info on using asyncio and the event loop: https://docs.python.org/3/library/asyncio-eventloop.htmlOptional Formatting Methods for Cards
Add a title
This is useful in the event you need to post the same message to multiple rooms.
This sets the theme color of the card. The parameter is expected to be a hex color code without the hash or the string red.
This is a simple print command to view your connector card message object before sending.
To create a section and add various formatting elements
You may also add multiple sections to a connector card message as well.To create a actions on which the user can interect with in MS Teams To find out more information on what actions can be used, please visit https://docs.microsoft.com/en-us/microsoftteams/platform/concepts/connectors/connectors-using#setting-up-a-custom-incoming-webhook
Please use Github issues to report any bugs or request enhancements.
Troubleshooting HTTP response
This module is really just a nice wrapper pointed at the Microsoft API. To help troubleshoot missing messages, the requests response content is saved to the connectorcard class attribute last_http_response .
To get the last http status code:
"More info on the Response Content is available in the requests documentation, link.
Exceptions
If the call to the Microsoft Teams webhook service fails, a TeamsWebhookException will be thrown.
Testing
In order to test in your environment with pytest, set the environment variable MS_TEAMS_WEBHOOK to the Microsoft Teams Webhook url you would like to use.
Then, from the root of the repo, install the requirements and run pytest.
pip install -r dev-requirements.txt MS_TEAMS_WEBHOOK pytest --cov --cov-report --cov-branch
This will send two MS Teams messages describing how they are formatted. Manually validate that the message comes through as expected.
Certificate Validation
In some situations, a custom CA bundle must be used. This can be set on class initialization, by setting the verify parameter.
" "Set to either the path of a custom CA bundle or False to disable.