- Android manifest java class
- Определение версии
- Установка версии SDK
- Установка разрешений
- Поддержка разных разрешений
- Запрет на изменение ориентации
- Android Application Class Example
- Thank you!
- Table Of Contents
- 1. Introduction
- 2. Callback Methods
- 3. Creating the Application
- 3.1 The Activity File
- 3.2 The Layout File
- 4. Manifest
- 5. Running the Application
- 6. Limitations
- 7. Conclusion
- 8. Download the Source Code
Android manifest java class
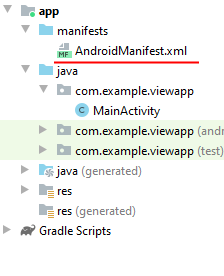
Каждое приложение содержит файл манифеста AndroidManifest.xml . Данный файл определяет важную информацию о приложении — название, версию, иконки, какие разрешения приложение использует, регистрирует все используемые классы activity, сервисы и т.д. Данный файл можно найти в проекте в папке manifests :
Файл манифеста может выглядеть так:
Элементом корневого уровня является узел manifest . В данном случае только определяется пакет приложения — package=»com.example.viewapp» . Собственно это определение файла манифеста по умолчанию. В каждом конкретном случае может отличаться пакет приложения, остальное содержимое при создании проекта с пустой activity будет аналогичным.
Большинство настроек уровня приложения определяются элементом application . Ряд настроек задаются с помощью атрибутов. По умолчанию применяются следующие атрибуты:
- android:allowBackup указывает, будет ли для приложения создаваться резервная копия. Значение android:allowBackup=»true» разрешает создание резервной копии.
- android:icon устанавливает иконку приложения. При значении android:icon=»@mipmap/ic_launcher» иконка приложения берется из каталога res/mipmap
- android:roundIcon устанавливает круглую иконку приложения. Также берется из каталога res/mipmap
- android:label задает название приложение, которое будет отображаться на мобильном устройстве в списке приложений и в заголовке. В данном случае оно хранится в строковых ресурсах — android:label=»@string/app_name» .
- android:supportsRtl указывает, могут ли использоваться различные RTL API — специальные API для работы с правосторонней ориентацией текста (например, для таких языков как арабский или фарси).
- android:theme устанавливает тему приложения. Подробно темы будут рассмотрены далее, а пока достаточно знать, что тема определяет общий стиль приложения. Значение @style/Theme.ViewApp» берет тему «Theme.ViewApp» из каталога res/values/themes
Вложенные элементы activity определяют все используемые в приложении activity. В данном случае видно, что в приложении есть только одна activity — MainActivity.
Элемент intent-filter в MainActivity указывает, как данная activity будет использоваться. В частности, с помощью узла action android:name=»android.intent.action.MAIN» , что данная activity будет входной точкой в приложение и не должна получать какие-либо данные извне.
Элемент category android:name=»android.intent.category.LAUNCHER» указывает, что MainActivity будет представлять стартовый экран, который отображается при запуске приложения.
Файл манифеста может содержать множество элементов, которые имеют множество атрибутов. И все возможные элементы и их атрибуты можно найти в документации. Здесь же рассмотрим некоторые примеры использования.
Определение версии
С помощью атрибутов элемента manifest можно определить версию приложения и его кода:
Атрибут android:versionName указывает на номер версии, который будет отображаться пользователю и на которую будут ориентироваться пользователи при работе с приложением.
Тогда как атрибут android:versionCode представляет номер версии для внутреннего использования. Этот номер только определяет, что одна версия приложения более новая, чем какая-то другая с меньшим номером номером версии. Этот номер не отображается пользователям.
При желании мы также можем определить версию в ресурсах, а здесь ссылаться на ресурс.
Установка версии SDK
Для управления версией android sdk в файле манифеста определяется элемент . Он может использовать следующие атрибуты:
- minSdkVersion : минимальная поддерживаемая версия SDK
- targetSdkVersion : оптимальная версия
- maxSdkVersion : максимальная версия
Версия определяется номером API, например, Jelly Beans 4.1 имеет версию 16, а Android 11 имеет версию 30:
Установка разрешений
Иногда приложению требуются разрешения на доступ к определенным ресурсам, например, к списку контактов, камере и т.д. Чтобы приложение могло работать с тем же списком контактов, в файле манифесте необходимо установить соответствующие разрешения. Для установки разрешений применяется элемент :
Атрибут android:name устанавливает название разрешения: в данном случае на чтение списка контактов и использование камеры. Опционально можно установить максимальную версию sdk посредством атрибута android:maxSdkVersion , который принимает номер API.
Поддержка разных разрешений
Мир устройств Android очень сильно фрагментирован, здесь встречаются как гаджеты с небольшим экраном, так и большие широкоэкранные телевизоры. И бывают случаи, когда надо ограничить использование приложения для определенных разрешений экранов. Для этого в файле манифеста определяется элемент :
Данный элемент принимает четыре атрибута:
- android:largeScreens — экраны с диагональю от 4.5 до 10″
- android:normalScreens — экраны с диагональю от 3 до 4.5″
- android:smallScreens — экраны с диагональю меньше 3″
- android:xlargeScreens — экраны с диагональю больше 10″
Если атрибут имеет значение true , то приложение будет поддерживаться соответствующим размером экрана
Запрет на изменение ориентации
Приложение в зависимости от положения гаджета может находиться в альбомной и портретной ориентации. Не всегда это бывает удобно. Мы можем сделать, чтобы приложение вне зависимости от поворота гаджета использовало только одну ориентацию. Для этого в файле манифеста у требуемой activity надо установить атрибут android:screenOrientation . Например, запретим альбомную ориентацию:
Значение android:screenOrientation=»portrait» указывает, что данная activity будет находиться только в портретной ориентации. Если же надо установить только альбомную ориентацию, тогда надо использовать значение android:screenOrientation=»landscape»
Android Application Class Example
We all know there is an Application class in the Android API, that is usually used for maintaining global application state but how does it work? In this article, let’s explore it with the help of examples and discuss its advantages & disadvantages.
With this book, you will delve into the fundamentals of Android programming. You will understand user input, views and layouts. Furthermore, you will learn how to communicate over Bluetooth and also leverage Google Maps into your application!

Thank you!
Table Of Contents
1. Introduction
Application class is a base class within an Android application, that comprises of different components such as Activity, Service, Broadcast Receivers & Content Providers. These components communicate with each other with the help of Intents, Callbacks & other methods. Often, components depend on other components, for eg: initiating an activity on a button click. In an application, there is often a need of making data available to all the components. For example, data entered by a user, needs to exist somewhere to let other components consume it. Now, where do we keep the data so that it’s globally available? One may use Intent to pass information between components, but it can’t be accessed by every component. Components go through a lifecycle, that means they are not always available to provide the data. We need something global, that can be accessed by any component at any time. The answer to the question is Application class , that serves the purpose of maintaining the global application state. You can also create a custom application class and add it to Android Manifest file, that will instantiate the class when the application process starts. Let’s discuss this later in the article. Now, its time to talk about the Callback methods available in the Application class.
2. Callback Methods
- onConfigurationChanged – void onConfigurationChanged(Configuration newConfig)
This method is called by the system when the device configuration changes, while running the application. When the configuration changes, only an Activity restarts ( OnCreate() is called, followed by OnStart() and OnResume() ), leaving the other components in the same state as they were before the configuration changed. The resource values are always up to date in this method, and can be retrieved by other components at any time. See an example below where we check the device orientation. onConfigurationChanged() example
@Override public void onConfigurationChanged (Configuration newConfig)< super.onConfigurationChanged(newConfig); if(newConfig.orientation == Configuration.ORIENTATION_LANDSCAPE)< Toast.makeTest(context, "Landscape", Toast.LENGTH_SHORT).show; >else if(newConfig.orientation == Configuration.ORIENTATION_PORTRAIT) < Toast.makeTest(context, "Portrait", Toast.LENGTH_SHORT).show; >>
@Override public void onCreate ()
@Override public void onLowMemory()
Signature of registerActivityLifecycleCallbacks
// set ActivityLifecycleCallbacks Application app = getApplication(); app.registerActivityLifecycleCallbacks(new Application.ActivityLifecycleCallbacks() < @Override public void onActivityCreated(Activity activity, Bundle bundle) <>@Override public void onActivityStarted(Activity activity) <> @Override public void onActivityResumed(Activity activity) <> @Override public void onActivityPaused(Activity activity) <> @Override public void onActivityStopped(Activity activity) <> @Override public void onActivitySaveInstanceState(Activity activity, Bundle bundle) <> @Override public void onActivityDestroyed(Activity activity) <> >);
// set ComponentCallbacks with out overriding app.registerComponentCallbacks(new ComponentCallbacks2() < @Override public void onConfigurationChanged(Configuration configuration) < //your code goes here >@Override public void onLowMemory() < // use it only for older API version >@Override public void onTrimMemory(int level) < //code >>);
In the example below, a music app provides structured data to describe the music album that the user is currently viewing. onProvideAssistContent Example
@Override public void onProvideAssistContent(AssistContent assistContent) < super.onProvideAssistContent(assistContent); String structuredJson = new JSONObject() .put("@type", "MusicRecording") .put("@id", "https://example.com/music/recording") .put("name", "Album Title") .toString(); assistContent.setStructuredData(structuredJson); > 3. Creating the Application
Consider a scenario, where you have two screens that display the Game score. Up to date score has to be available on all the screens. This requires the Game score to be globally stored & available. In this example screens are two different activities: FirstScreen & SecondScreen; and the Application class (Global State) provides the most up to date score.
To create a custom application class, Application class needs to be extended and must be declared in the Manifest.
Let’s start building the application and see how code handles the application state.
3.1 The Activity File
public class FirstGameScreenActivity extends Activity < Button score,upScore,downScore; GlobalState state; @Override public void onCreate(Bundle savedInstanceState) < super.onCreate(savedInstanceState); setContentView(R.layout.activity_first_game_screen); state = ((GlobalState) getApplicationContext()); score= (Button)findViewById(R.id.score_button); upScore= (Button)findViewById(R.id.up_button); downScore= (Button)findViewById(R.id.down_button); score.setText(String.valueOf(state.getGameScore())); >@Override protected void onResume() < super.onResume(); >public void incrementScore(View view) < state.incrementScore(); score.setText(String.valueOf(state.getGameScore())); >public void decrementScore(View view) < state.decrementScore(); score.setText(String.valueOf(state.getGameScore())); >public void nextScreen(View view) < Intent intent = new Intent(this, SecondGameScreenActivity.class); startActivity(intent); finish(); >>
This is the second screen.
public class SecondGameScreenActivity extends Activity < Button score,upScore,downScore; GlobalState state; @Override public void onCreate(Bundle savedInstanceState) < super.onCreate(savedInstanceState); setContentView(R.layout.activity_second_game_screen); state = ((GlobalState) getApplicationContext()); score= (Button)findViewById(R.id.score_button); upScore= (Button)findViewById(R.id.up_button); downScore= (Button)findViewById(R.id.down_button); score.setText(String.valueOf(state.getGameScore())); >@Override protected void onResume() < super.onResume(); >public void incrementScore(View view) < state.incrementScore(); score.setText(String.valueOf(state.getGameScore())); >public void decrementScore(View view) < state.decrementScore(); score.setText(String.valueOf(state.getGameScore())); >public void previousScreen(View view) < Intent intent = new Intent(this, FirstGameScreenActivity.class); startActivity(intent); finish(); >>
This is the Custom Application class that extends Application Class .
public class GlobalState extends Application < private int gameScore = 0; public int getGameScore() < return gameScore; >public void setGameScore(int gameScore) < this.gameScore = gameScore; >public void incrementScore() < gameScore++; >public void decrementScore() >
3.2 The Layout File
These are the two layout files. I have used the recently added Constraint Layout for convenience. It allows flexibility in positioning and sizing widgets. For more info refer Constraint Layout.
Here we have the second layout for second screen.
4. Manifest
The manifest file provides the most important information about the application to the Android system, before it runs. It defines the structure and metadata of an application and its components.
5. Running the Application

See screenshots here. First Screen and Second Screen are the two game screens.

Now incrementing the score from First Screen and moving on to the next screen by pressing Next Screen button, will update the score on Second Screen.
6. Limitations
As we have seen above, putting the data in the Application class saves the overhead of passing it between objects. Besides this, if you store mutable objects in Application class, data might disappear or become invalid at any time. Also, there might be a possibility where your app may crash with Null Pointer Exception . The application object is not guaranteed to stay in memory forever, at some point in time, it will get killed. When the application restarts, it never gets restarted from scratch. Instead, a new Application object is created and starts the Activity , user was on before. It is better to store any mutable shared data using persistence strategies such as files, SharedPreferences , SQLite and so on.
- Explicitly pass the data through Intents
- Store the global data in memory
- Perform Null check before retrieving the value of an object
7. Conclusion
We have now seen how to use global data in an application by using Application class. Despite of its usage, storing data in Application class is error prone and might crash your application, under certain circumstances.
8. Download the Source Code
This was an example of Application class.