- Совет: Работа с пользовательскими шрифтами в Android O
- Добавление пользовательских шрифтов в ваш проект
- Использование ваших пользовательских шрифтов
- Android и кастомные шрифты или «Да здравствует API 26»
- view.xml
- CustomFontTextView.class
- Но все изменилось в API 26
- How to add Custom Fonts in Android
- Method 1
- Method 2
- Method 3
- How to Add Custom Fonts in Android Studio?
- If you are using XML:
- If you are using Jetpack Compose:
Совет: Работа с пользовательскими шрифтами в Android O
В этой серии мы рассмотрим некоторые из перспективных функций пользовательского интерфейса, с которыми вы можете начать экспериментировать сегодня, через Android O Developer Preview.
В первом совете я показал вам, как настроить разработку для поддержки этого раннего предварительного просмотра O, и как создавать текст, который автоматически масштабируется и уменьшается в соответствии с текущей конфигурацией экрана. В этом совете мы рассмотрим, как Android O сделает работу с пользовательскими шрифтами без проблем.
Добавление пользовательских шрифтов в ваш проект
Вы когда-нибудь хотели выделить определенный фрагмент текста? Или, может быть, вы были уверены, что нестандартный шрифт будет идеальным способом добавить дополнительную индивидуальность в ваше приложение?
Хотя использование пользовательских шрифтов имеет много преимуществ, работа с ними в Android традиционно была болезненным процессом, требующим от вас использования библиотеки или создания собственного View .
К счастью, работа с пользовательскими шрифтами в Android станет намного проще, поскольку пользовательские шрифты станут полностью поддерживаемым типом ресурса в Android O. Это означает, что добавить пользовательский шрифт в ваше приложение будет так же просто, как и добавить любой другой ресурс. такие как изображения и текст.
Чтобы следовать этому уроку, вам понадобятся файлы шрифтов, которые вы можете добавить в проект Android O, который мы создали в первой части .
Android O поддерживает форматы .otf (OpenType) и .ttf (TrueType). Существует множество сайтов, предлагающих такие шрифты бесплатно, поэтому потратьте несколько минут на поиск в Google, пока не найдете нужный вам шрифт.
Поскольку мы просто экспериментируем с новыми функциями Android O, не имеет особого значения, какой шрифт вы используете, но когда вы ищете шрифты для использования в рабочих выпусках вашего приложения, вы всегда должны проверять положения и условия этого шрифта. Тот факт, что ресурс можно загрузить бесплатно, не означает, что нет никаких ограничений на использование и распространение этого ресурса, поэтому всегда проверяйте мелкий шрифт!
Вы также должны учитывать цель, содержание и целевую аудиторию вашего приложения, так как разные шрифты передают разные сообщения. Если вы разрабатываете приложение, чтобы помочь людям заполнить свои налоговые декларации, ваша аудитория может с трудом воспринимать финансовые и юридические рекомендации вашего приложения, если оно написано странным и причудливым шрифтом!
Найдя шрифт, с которым вы хотите работать, скачайте и распакуйте его. На этом этапе вы должны проверить имя файла шрифта на наличие недопустимых символов — по сути, всего, что не является строчными az, 0-9 или подчеркиванием. Попробуйте добавить любые другие символы, и Android Studio выдаст ошибку, как только вы попытаетесь сослаться на этот ресурс.
Когда у вас есть файлы шрифтов, вам нужно где-то их хранить:

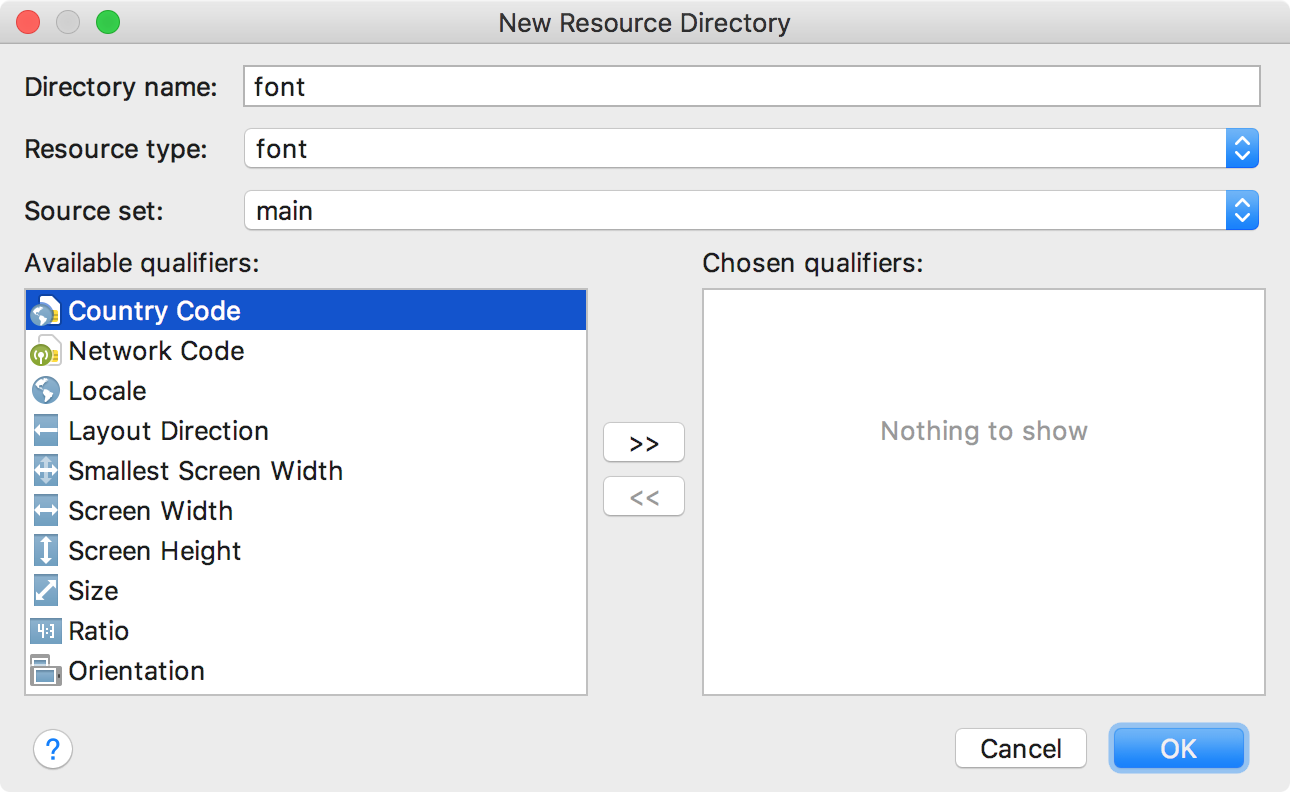
- Щелкните правой кнопкой мыши папку app / res вашего проекта и выберите « Создать»> «Каталог ресурсов Android» .
- Откройте выпадающее меню и выберите шрифт .
- Введите шрифт в качестве имени файла .
- Нажмите ОК .
- Перетащите файлы шрифтов в новую папку res / font .
Использование ваших пользовательских шрифтов
Вы можете применить собственный шрифт к своему тексту, используя новый атрибут android:fontFamily XML:
Android и кастомные шрифты или «Да здравствует API 26»
Если было много view где требовались нестандартные шрифты, то мы использовали что-то вроде такого:
view.xml
CustomFontTextView.class
Typeface myCustomFontBold = Typeface.createFromAsset(getAssets(), "fonts/myCustomFont-Bold.otf"); setTypeface(myCustomFontBold); И это я пропустил огромный кусок который отвечает за то, чтобы не писать каждый раз путь к шрифту, а указывать
app:my_typeface="myCustomFontBold" Ну, или шли на гитхаб и в результате находили Calligraphy (7000 звезд!)
Ни для кого не секрет что этот подход содержал много минусов как в огромном количестве boilerplate кода, так и в том, чтобы сделать это эффективно и где-нибудь не утечь по памяти запрашивая каждый раз Typeface.
Но все изменилось в API 26
Похоже, гугл наконец-то сдался и решил отказаться от навязывания Roboto и сделал удобное подключение сторонних шрифтов, за что ему огромное спасибо.
Линк для тех, кто любит читать в оригинале.
Теперь подключение состоит всего из нескольких несложных шагов:
1. Создаем папку font в res
Resource type выбираем font
2. Перетаскиваем в новую папку все нужные нам в проекте шрифты
3. Создаем файл для семейства шрифтов.
Обратите внимание: я сразу добавил в пример то как должен выглядеть файл, если вы хотите поддерживать и более старые версии Андроида. (Начиная с 14). Если вам повезло и у вас таргет только на супер-новые девайсы, то ваш файл сократится в 2 раза
Ну а дальше остается только наслаждаться сборкой
Использование в TextView
How to add Custom Fonts in Android
Google Fonts provide a wide variety of fonts that can be used to style the text in Android Studio. Appropriate fonts do not just enhance the user interface but they also signify and emphasize the purpose of the text. There are majorly three methods to add custom fonts to text in Android Studio. The first two methods involve the use of the Typeface class while the last method is quite direct and easy. Follow the entire article to explore all the methods.
Method 1
In this method, we’ll first download the font’s ttf file from the internet and then use them as an asset or a resource to set the Typeface. You may find the downloadable fonts here. Here Dancing Script font is used. Once you download the fonts of your choice, unzip the folder and copy the font file. By creating a new Android resource directory:

- Step 1: In the project’s resource folder, create a new Android Resource Directory of Resource type: font and paste this ‘ttf’ file here. Note that while pasting it, keep in mind that a resource file’s name can consist of lower-case letters and underscores only, so refactor the file accordingly.
- Step 2: Create the layout in the XML files.
- Step 3: Now in the MainActivity(necessarily the Activity corresponding to the layout file where the TextView to be customised lies), set the typeface for that TextView.
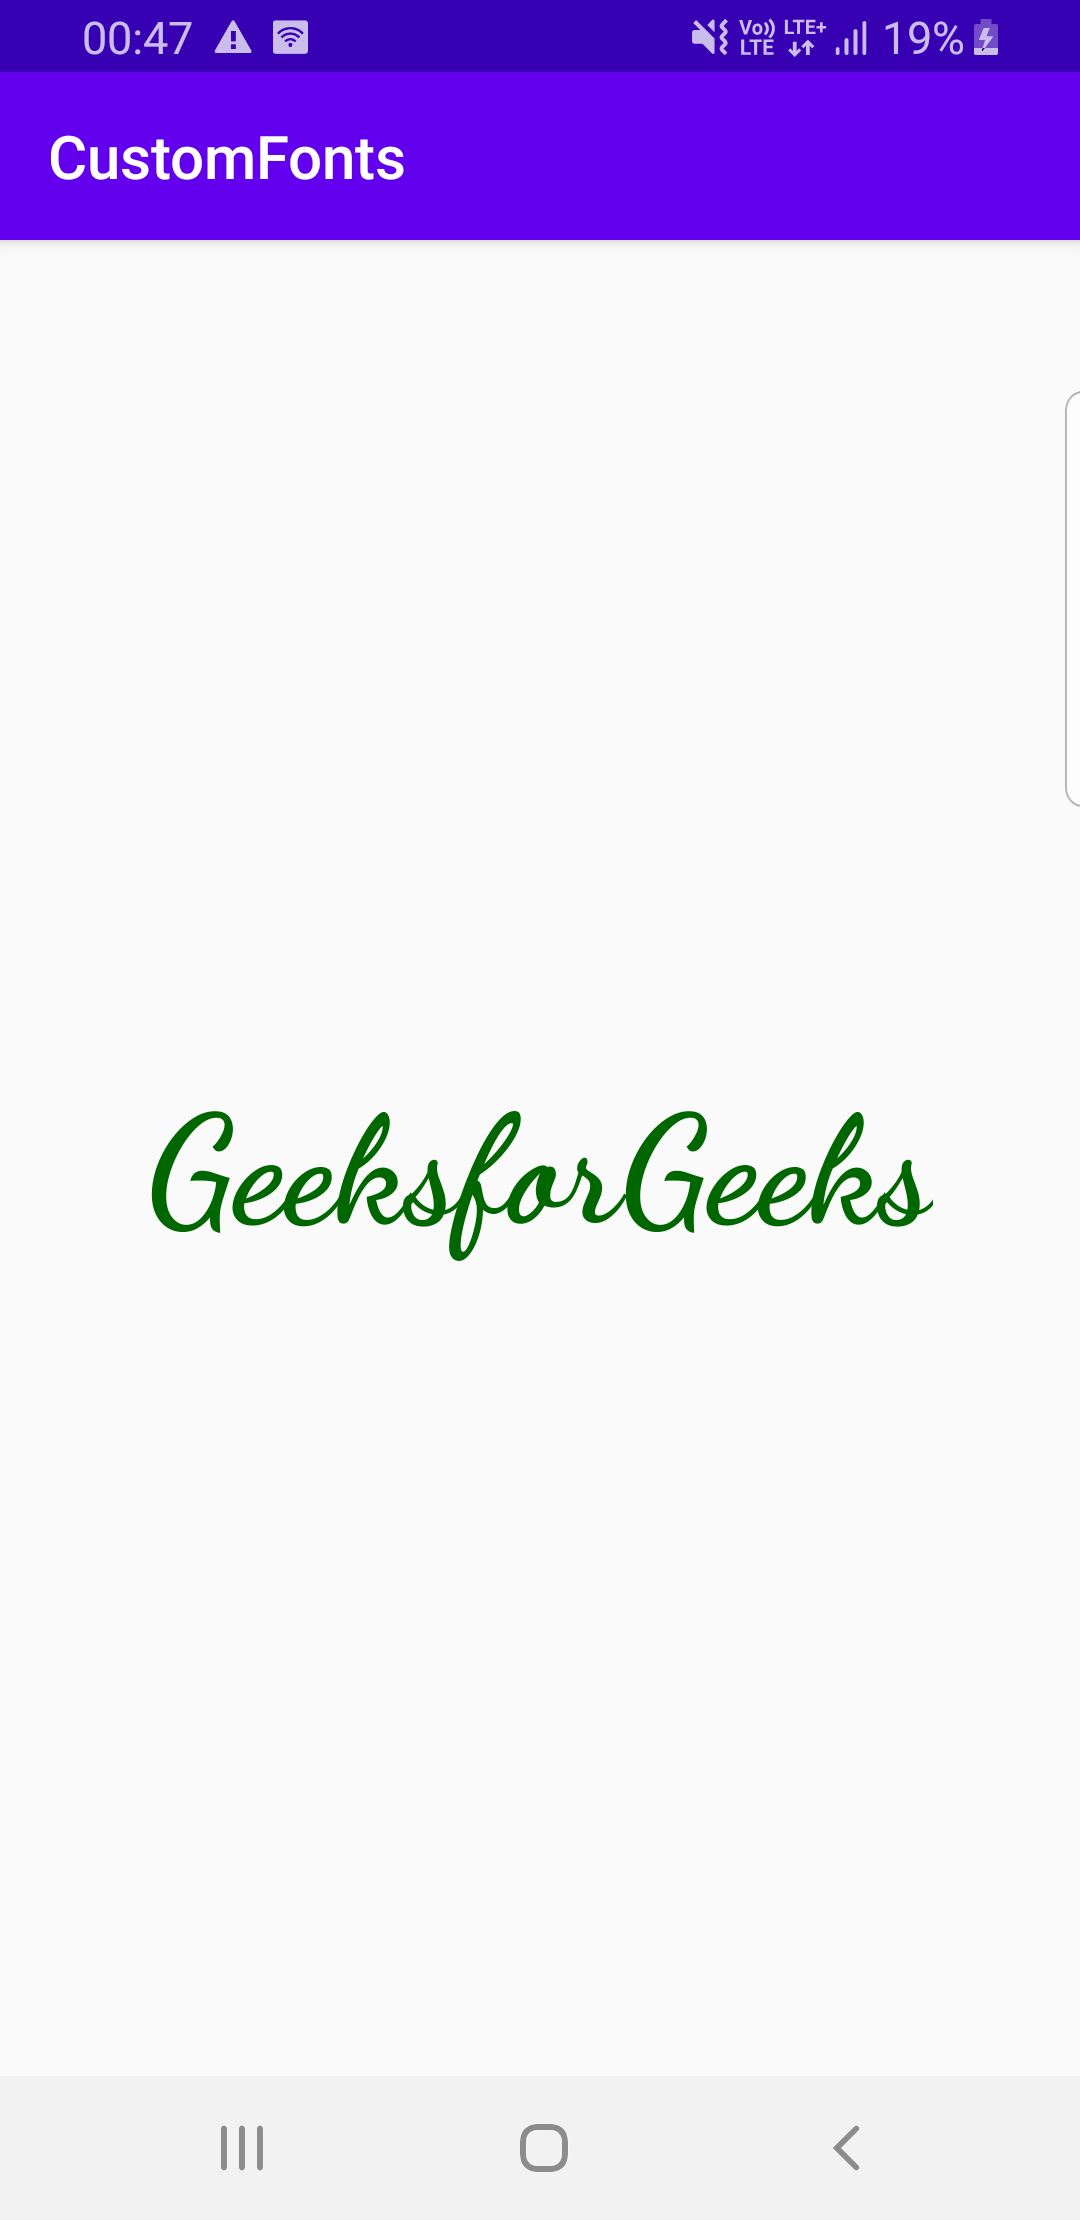
- Output:
By creating a new asset folder:

- Step 1: Create a new asset folder(app/New/Folder/Asset folder) in Android Studio and paste the ‘ttf’ file of the font here. The picture on the left shows how to add the assets folder to the project whereas the picture on the right shows the added ‘ttf’ file to it.
- Step 2: While we keep the XML layout to be same as earlier, the Java code of the MainActivity is modified this way.
- Output:
Method 2
In this method we’ll create a separate java class dedicated to a particular font and use this class instead of the conventional TextView tag in the XML file.
- Step 1: Download the font of your choice and use either of the above two approaches to store it in the project. I have pasted my file in the assets folder.
- Step 2: Create a new Java file in the package. Preferably name it according to the font that you want to implement. Here we have created a file named CalligraffittiRegular.
- Step 3: Extend the following class in this Java file:
- Step 4: Complete the Java code by adding the required constructors.
- Step 5: Create a method in the class wherein the typeface for the font is set.
- Step 6: Call this method in each constructor. Refer to the following code for a better understanding.
- Step 7: Now in your XML layout file, use this font class instead of the conventional TextView tag.
- Output:
Method 3
With Android 8.0 (API Level 26) a simpler method was introduced for using fonts as a resource in Android Studio. The android:fontFamily attribute of the TextView class is used to specify the font.
- Step 1: Go to the XML file and go to the Design view.
- Step 2: Click the TextView you want to change the font of.
- Step 3: In the search bar, search for fontFamily.

- Step 4: In the dropdown menu, you can check out the fonts available. In case you want to explore more, scroll down and click ‘More Fonts…‘.
- Step 5: A dialog box pops up. Choose a font of your choice, choose the style you like in the preview, and click OK.
- Step 6: This would create a downloadable font and add it automatically to your project. The following files automatically get added to your project:
- Step 7: Now the XML file will be look like:

 The following files automatically get added to your project:
- Output:
How to Add Custom Fonts in Android Studio?

It’s easy to add custom fonts in the Android Studio project. First, visit the Google Fonts website. It is a library of 1504 open-source font families and beautiful icons. For this article, I’m using Poppins font. Open the fonts page and click on the “Download family” button.

You will get a zip file with all the font styles. Extract it. Next, open Android Studio, right-click on the res folder, and select New > Android Resource Directory .

From the “Resource type” menu, select font and click on the OK button.

Now, font folder is added to the res directory. Open the Poppins folder (that you extracted). You will find .ttf files.

Copy the .ttf files and paste them into our new font folder (right-click on the folder and select paste). Now, expand the folder. You may see errors.

This is because the name of the resources should be written in small characters. Also, we should only use the underscore to separate the words. To change their name, right-click on the font and select Refactor > Rename .

Use small letters and add the underscore between the words.

Now, you have successfully added the fonts to your project. Let’s see how to use them in the code.
If you are using XML:
You can use android:fontFamily tag to add fonts:
android:fontFamily="@font/poppins_bold"If you are using Jetpack Compose:
There are different ways to use custom fonts. Follow this article on Jetpack Compose Themes.
This is how you add custom fonts in Android Studio. If you have any doubts, comment below.