Android Blog
Step 1 Including MySQL Connector
Add this jar to the classpath. In Eclipse Right Click in the Project>BuildPath>Configure Build Path. Then a window should popup, click the libraries tab at the top, click add external jar and navigate to File System/usr/share/java/mysql-connector-java.jar
JDBC, simply allows you to connect to your server from java.
1: import java.sql.Connection; 2: import java.sql.DriverManager; 3: import java.sql.ResultSet; 4: import java.sql.Statement; 5: public class DB < 6: private static final String url = “jdbc:mysql://localhost/android”; 7: private static final String user = “root”; 8: private static final String password = “MySql Password”; 9: public static void main(String args[]) < 10: try < 11: Class.forName(“com.mysql.jdbc.Driver”); 12: Connection con = DriverManager.getConnection(url, user, password); 13: Statement st = con.createStatement(); 14: ResultSet rs = st.executeQuery(“select * from User”); 15: while(rs.next()) < 16: Log.v("DB", rs.getString(2) ) 17: >18: > catch (Exception e) < 19: >20: > 21: > 115 comments:
Hi thanks for nicegoogle android application development information and i like it can we use it in asp.net ? Reply Delete
I haven’t used mysql connector to connect asp.net and mysql but according to my knowledge its possible to do this Delete
i tried to connect with the jdbc but i have some error.
I used Eclipse Helios v2 with Android SDK, emulator 2.3.1 and MySql Connector/J 5.1.18. The project is compiled with no errors but on the emulator appeare the message
«java.lang.ClassNotFoundException: com.mysql.jdbc.driver» and i tried to change the name with others but is the same.
I add the jar in project with right click on project -> build path -> configure builde path -> library, add library, connectivity driver definition, specify driver name MySQL JDBC
Driver (for example), add the jar of connector 5.1.18 located in C:\Users\user\Downloads\mysql-connector-java-5.1.18\mysql-connector-java-5.1.18.jar; in the properties specify
param connectiot and others (mysql have the user and permission for the user with that password and database test exist):
Connection Urls: jdbc:mysql://localhost:3306/
Database Name: test
Driver Class: com.mysql.jdbc.Driver
user: root
pass: root
java code:
package test.mysql;
import android.app.Activity;
import android.os.Bundle;
import java.sql.DriverManager;
import com.mysql.jdbc.Connection;
import android.app.Activity;
import android.app.AlertDialog;
import android.content.DialogInterface;
public class Main extends Activity /** Called when the activity is first created. */
@Override
public void onCreate(Bundle savedInstanceState) super.onCreate(savedInstanceState);
setContentView(R.layout.main);
/**Alert*/
AlertDialog ad = new AlertDialog.Builder(this).create();
ad.setCancelable(false); // This blocks the ‘BACK’ button
ad.setButton(«OK», new DialogInterface.OnClickListener() <
@Override
public void onClick(DialogInterface dialog, int which) <
dialog.dismiss();
>
>);
Connection conn = null;
String url = «jdbc:mysql://localhost:3306/»;
String dbName = «test»;
//String driver = «com.mysql.jdbc.Driver»;
String driver = «MySQLJDBCDriver41»; //with this is the same
//String driver = «com.mysql.jdbc.driver»; //with this is the same
String userName = «root»;
String password = «daniele»;
try Class.forName(driver).newInstance();
conn = (Connection) DriverManager.getConnection(url+dbName,userName,password);
ad.setMessage(«Connected to the db»);
ad.show();
conn.close();
ad.setMessage(«Disconnect to db»);
ad.show();
> catch (Exception e) ad.setMessage(e.toString());
ad.show();
e.printStackTrace();
>
Android Connect MySQL Database Programmatically
You can always name your Package and Application name according to your requirements.
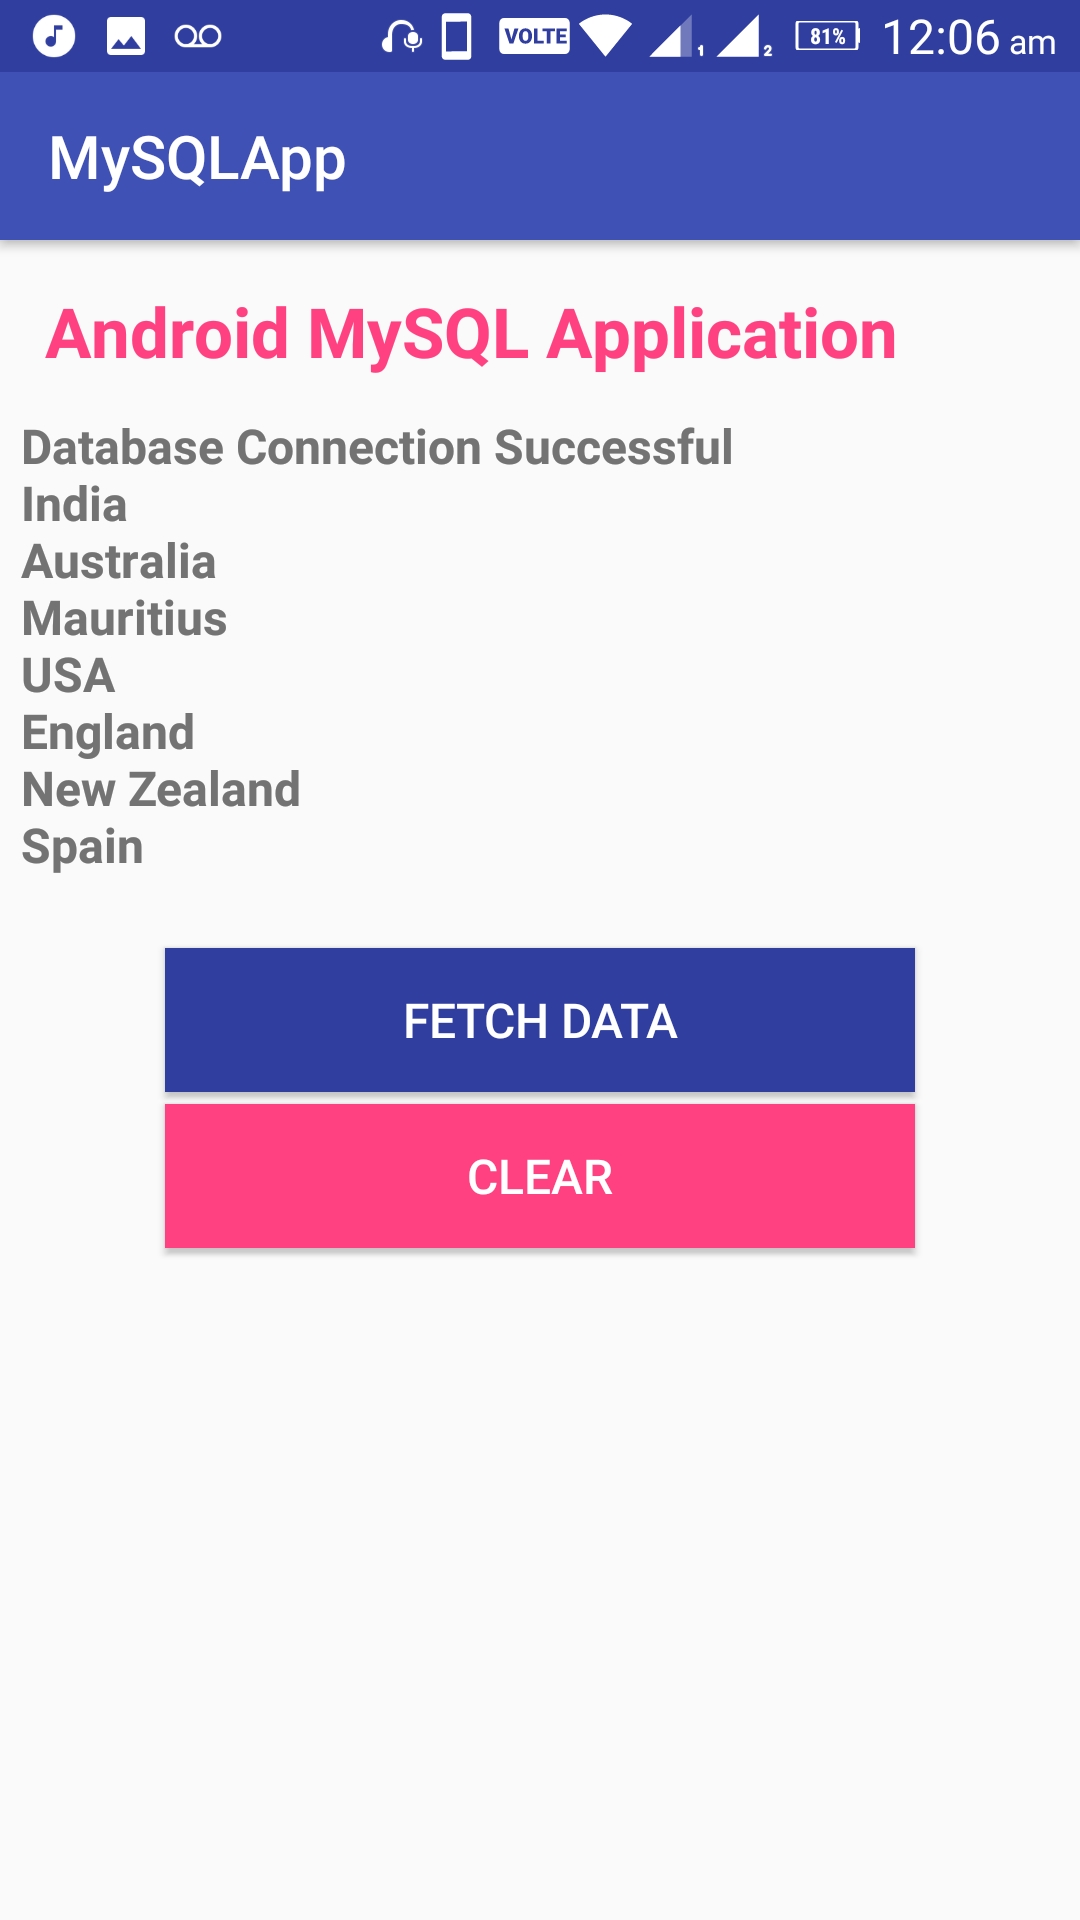
Application Working :
Application will first try to connect with the MySQL Database and on successful Database connection, android application will display data from a table on a Android TextView. It will connect via IP address of the Database with a correct Database Credentials.
Download Source code.
MySQL Database Script :
create schema myDB use myDB create table tblCountries ( ID int NOT NULL AUTO_INCREMENT primary key, Country varchar(255) NOT NULL ) Insert into tblCountries (Country) values ('India') Insert into tblCountries (Country) values ('Australia') Insert into tblCountries (Country) values ('Mauritius') Insert into tblCountries (Country) values ('USA') Insert into tblCountries (Country) values ('England') Insert into tblCountries (Country) values ('New Zealand') Insert into tblCountries (Country) values ('Spain') Select * from tblCountries select distinct Country from tblCountries Now, open your activity_main.xml file and edit it as below :
activity_main.xml:
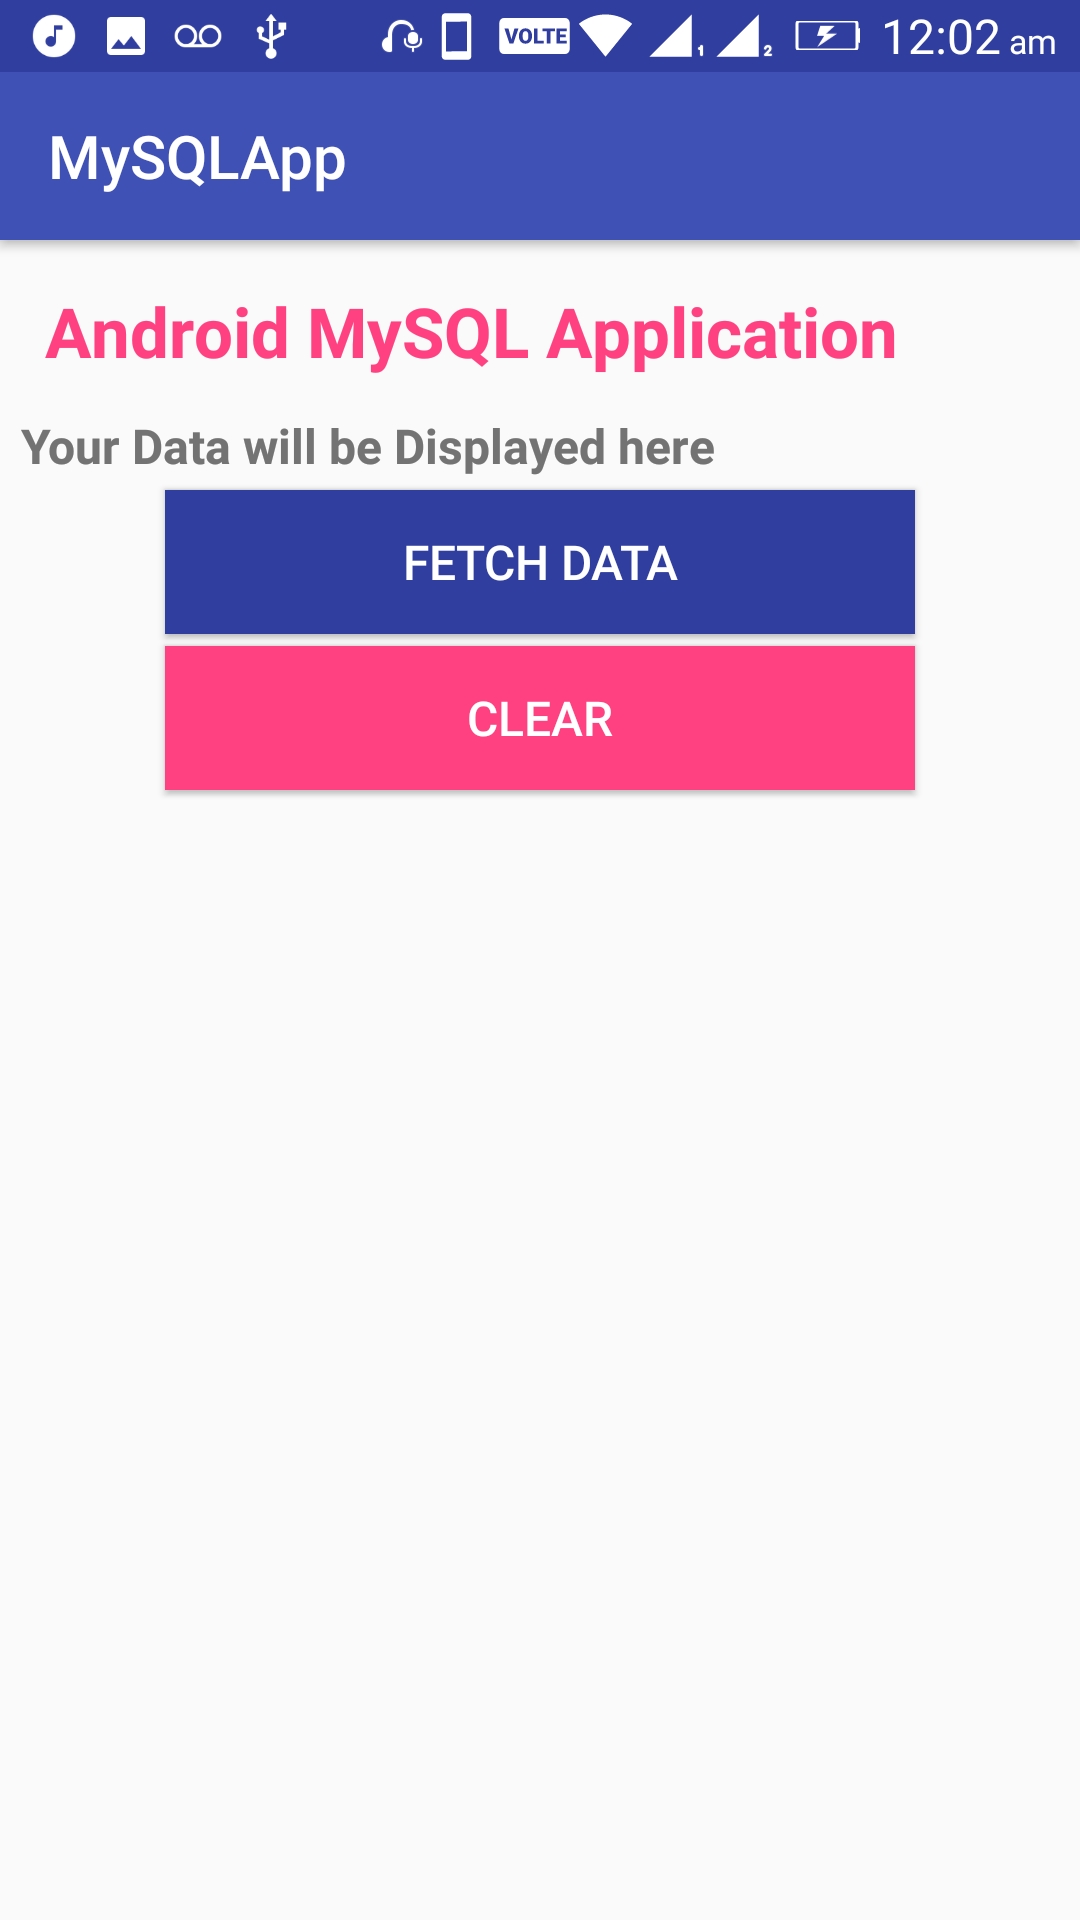
The layout contains a Android TextView to show our Table data from MySQL Database and two buttons, one for connecting to Database and other for clearing the TextView content.
MainActivity.java:
Declare this variables in your Java class
private static final String url = "jdbc:mysql://192.168.0.192:3306/myDB"; private static final String user = "hitesh"; private static final String pass = "1234"; Button btnFetch,btnClear; TextView txtData;
And initialize them onCreate method :
txtData = (TextView) this.findViewById(R.id.txtData); btnFetch = (Button) findViewById(R.id.btnFetch); btnClear = (Button) findViewById(R.id.btnClear);
url,user,pass must be valid and correct credentials of your mySql database for a successful Android-MySQL Connection.
192.168.0.192 is my Laptop’s IP Address and 3306 is my Port number to connect on.
Make an Android ASyncTask. This will accept the command and try to connect with your Database and on successful connection with MySQL assign a String variable with the table data.
private class ConnectMySql extends AsyncTask < String res = ""; @Override protected void onPreExecute() < super.onPreExecute(); Toast.makeText(MainActivity.this, "Please wait. ", Toast.LENGTH_SHORT) .show(); >@Override protected String doInBackground(String. params) < try < Class.forName("com.mysql.jdbc.Driver"); Connection con = DriverManager.getConnection(url, user, pass); System.out.println("Databaseection success"); String result = "Database Connection Successful\n"; Statement st = con.createStatement(); ResultSet rs = st.executeQuery("select distinct Country from tblCountries"); ResultSetMetaData rsmd = rs.getMetaData(); while (rs.next()) < result += rs.getString(1).toString() + "\n"; >res = result; > catch (Exception e) < e.printStackTrace(); res = e.toString(); >return res; > @Override protected void onPostExecute(String result) < txtData.setText(result); >> Full Code of MainActivity.java file
MainActivity.java:
package parallelcodes.mysqlapp; import android.os.AsyncTask; import android.os.Bundle; import android.support.v7.app.AppCompatActivity; import android.view.View; import android.widget.Button; import android.widget.TextView; import android.widget.Toast; import java.sql.Connection; import java.sql.DriverManager; import java.sql.ResultSet; import java.sql.ResultSetMetaData; import java.sql.Statement; public class MainActivity extends AppCompatActivity < private static final String url = "jdbc:mysql://192.168.0.192:3306/myDB"; private static final String user = "hitesh"; private static final String pass = "1234"; Button btnFetch,btnClear; TextView txtData; @Override protected void onCreate(Bundle savedInstanceState) < super.onCreate(savedInstanceState); setContentView(R.layout.activity_main); txtData = (TextView) this.findViewById(R.id.txtData); btnFetch = (Button) findViewById(R.id.btnFetch); btnClear = (Button) findViewById(R.id.btnClear); btnFetch.setOnClickListener(new View.OnClickListener() < @Override public void onClick(View v) < // TODO Auto-generated method stub ConnectMySql connectMySql = new ConnectMySql(); connectMySql.execute(""); >>); btnClear.setOnClickListener(new View.OnClickListener() < @Override public void onClick(View view) < txtData.setText(""); >>); > private class ConnectMySql extends AsyncTask < String res = ""; @Override protected void onPreExecute() < super.onPreExecute(); Toast.makeText(MainActivity.this, "Please wait. ", Toast.LENGTH_SHORT) .show(); >@Override protected String doInBackground(String. params) < try < Class.forName("com.mysql.jdbc.Driver"); Connection con = DriverManager.getConnection(url, user, pass); System.out.println("Databaseection success"); String result = "Database Connection Successful\n"; Statement st = con.createStatement(); ResultSet rs = st.executeQuery("select distinct Country from tblCountries"); ResultSetMetaData rsmd = rs.getMetaData(); while (rs.next()) < result += rs.getString(1).toString() + "\n"; >res = result; > catch (Exception e) < e.printStackTrace(); res = e.toString(); >return res; > @Override protected void onPostExecute(String result) < txtData.setText(result); >> > And now run your application. On Pressing on the “Fetch Data” button it will fetch Data from MySQL Database table.

Note : If you are on personal Laptop or PC with WiFi router connected to it and your Android Device connected to the same router, it will work, i.e. It must be same network to work in. If your Database is out your Device’s network, it will not work. Also, if you are using Cellular Data network, your Database must be on Internet and it should be able to be connected remotely.
Download Source code.
How do I read MySQL data from Android using JDBC?
This example show you how to connect and read data from MySQL database directly from Android. The following steps and code snippet will show you how to do it.
Add the MySQL JDBC driver into your project dependencies. Open the app/build.gradle file and add the dependency.
If you want to connect to MariaDB you can change the JDBC driver dependency using ‘org.mariadb.jdbc:mariadb-java-client:1.8.0’ , also update the JDBC url in the code snippet by replacing mysql with mariadb .
Next, add internet permission to our application in AndroidManifest.xml file.
Let’s connect, read data from the database and display the information on the screen. In the code snippet we create an AsyncTask to read the information from the database. In the doInBackground() method we open a connection to the database, create a PreparedStatement , execute a query, get a ResultSet and read the information from it. We pack the data into a Map and return it.
After the doInBackground() method finish its execution the onPostExecute() method will be called. In this method we take the result, the Map returned by the doInBackground() method, and set the values into the TextView components for display.
package org.kodejava.android; import android.annotation.SuppressLint; import android.os.AsyncTask; import android.util.Log; import android.widget.TextView; import androidx.appcompat.app.AppCompatActivity; import android.os.Bundle; import java.sql.Connection; import java.sql.DriverManager; import java.sql.PreparedStatement; import java.sql.ResultSet; import java.util.HashMap; import java.util.Map; public class MainActivity extends AppCompatActivity < private static final String URL = "jdbc:mysql://192.168.0.107:3306/kodejava"; private static final String USER = "kodejava"; private static final String PASSWORD = "kodejava"; @Override protected void onCreate(Bundle savedInstanceState) < super.onCreate(savedInstanceState); setContentView(R.layout.activity_main); new InfoAsyncTask().execute(); >@SuppressLint("StaticFieldLeak") public class InfoAsyncTask extends AsyncTask> < @Override protected MapdoInBackground(Void. voids) < Mapinfo = new HashMap<>(); try (Connection connection = DriverManager.getConnection(URL, USER, PASSWORD)) < String sql = "SELECT name, address, phone_number FROM school_info LIMIT 1"; PreparedStatement statement = connection.prepareStatement(sql); ResultSet resultSet = statement.executeQuery(); if (resultSet.next()) < info.put("name", resultSet.getString("name")); info.put("address", resultSet.getString("address")); info.put("phone_number", resultSet.getString("phone_number")); >> catch (Exception e) < Log.e("InfoAsyncTask", "Error reading school information", e); >return info; > @Override protected void onPostExecute(Map result) < if (!result.isEmpty()) < TextView textViewName = findViewById(R.id.textViewName); TextView textViewAddress = findViewById(R.id.textViewAddress); TextView textViewPhoneNumber = findViewById(R.id.textViewPhone); textViewName.setText(result.get("name")); textViewAddress.setText(result.get("address")); textViewPhoneNumber.setText(result.get("phone_number")); >> > > The complete source code can be accesses in our GitHub repository here: android-mysql-example.